Ever been mid-print, watching your intricate design slowly come to life, only to have your printer suddenly hiccup and halt? Frustrating, right? Often, the culprit isn’t a clogged nozzle or a wonky slicer setting, but the humble MOSFET, working overtime to handle the high current needed to heat your bed or hot end. When these crucial components fail or aren’t up to the task, your 3D printing journey can quickly become a bumpy ride.
Choosing the right one can feel overwhelming. Fear not, because we’re diving deep into the world of MOSFETs! This comprehensive guide will break down everything you need to know to select the best mosfet for 3d printers for your specific needs. We’ll explore different models, analyze their key features, and provide practical recommendations to ensure smooth, reliable printing for years to come.
We will review the best mosfet for 3d printers later in this article. But before that, take a look at some relevant products on Amazon:
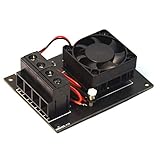

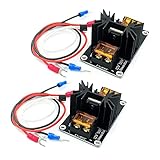


Last update on 2026-07-07 / Affiliate links / #CommissionsEarned / Images from Amazon Product Advertising API
The Unsung Hero: Why Your 3D Printer Needs a Good MOSFET
Ever noticed how your 3D printer strains when heating up the bed or hot end? It’s putting a lot of stress on its mainboard! While the mainboard tries its best, it often struggles to handle the high current demands, leading to potential overheating and even failure. Think of it like trying to power a whole stadium with a tiny generator. That’s where a MOSFET comes in – a tiny but mighty electronic switch that takes the load off your mainboard.
A MOSFET (Metal-Oxide-Semiconductor Field-Effect Transistor) acts as a power regulator. It reroutes the high current away from the sensitive circuits of your 3D printer’s control board, allowing it to manage the temperature of your heated bed and hot end more efficiently. It’s like adding a dedicated power line directly to your high-demand components. In fact, upgrading to a quality MOSFET can reduce the load on the mainboard by as much as 70% in some cases.
Choosing the best mosfet for 3d printers is crucial for safety and performance. A poorly chosen or low-quality MOSFET can itself overheat and fail, potentially causing a fire hazard. You want one that’s properly rated for the current your heated bed and hot end draw. Typically, heated beds draw significantly more current than the hot end, so it is essential to check the required current of these components for optimal MOSFET selection.
Finding the best mosfet for 3d printers might seem daunting, but it’s an investment that can save you headaches, improve print quality, and even extend the lifespan of your 3D printer. In the following sections, we’ll guide you through the key factors to consider and highlight some of the top-performing MOSFETs on the market, empowering you to make an informed decision and keep your 3D printing journey smooth and safe!
Top 5 Best Mosfet For 3D Printers
BIGTREETECH MOSFET Module
The BIGTREETECH MOSFET Module is a popular choice for a reason! It’s a workhorse, plain and simple. If you’re looking to reliably handle the high current demands of a heated bed or other power-hungry components in your 3D printer, this MOSFET has you covered. It’s generally well-regarded for its durability and ease of installation, making it a great option for both beginners and experienced users who want a simple and effective upgrade.
What sets this MOSFET apart is its affordability and widespread availability. It’s a cost-effective solution that doesn’t compromise on performance. Plus, you’ll find tons of helpful resources and tutorials online specifically for this model, making troubleshooting a breeze. If you’re tired of voltage drops and want a more stable power supply to your heated bed, this is a solid, dependable choice.
ELEGOO MOSFET Upgrade
The ELEGOO MOSFET Upgrade is designed with simplicity in mind, making it perfect for those new to electronics or anyone wanting a quick, hassle-free installation. It’s a great way to boost the power handling capabilities of your 3D printer without diving into complex wiring. Think of it as a plug-and-play solution that can significantly improve the performance and reliability of your heated bed.
This MOSFET stands out because of its compact design and clear labeling. It’s not bulky, so it fits neatly into most printer enclosures. The straightforward connections and included instructions make it easy to understand how to wire everything up, even if you’re not an electronics expert. It’s a fantastic entry-level option for upgrading your printer’s power handling.
Keenovo MOSFET Module
The Keenovo MOSFET Module focuses on robust construction and reliable performance. This isn’t just a quick fix; it’s designed to withstand the rigors of demanding 3D printing applications. Think of it as an investment in your printer’s longevity, ensuring that your heated bed and other components receive stable and sufficient power without overloading your mainboard.
What really makes the Keenovo option shine is its focus on safety and build quality. It often includes features like heatsinks and protective housings to prevent overheating and short circuits, providing extra peace of mind. The robust design translates to stable operation and a longer lifespan, making it a smart choice for serious 3D printing enthusiasts.
HLRUI MOSFET Module
The HLRUI MOSFET Module offers a balanced combination of affordability and functionality, making it a compelling option for budget-conscious users who still want a noticeable performance upgrade. It’s designed to provide a stable and reliable power supply to your heated bed, minimizing voltage drops and improving overall print quality, all without breaking the bank.
This MOSFET distinguishes itself with its ease of use and value proposition. It typically comes with clear instructions and is relatively straightforward to install, even for those with limited experience. While it may not have all the bells and whistles of some higher-end models, it provides a significant improvement over the stock setup, delivering reliable performance at an attractive price point.
HALJIA MOSFET Expansion Module
The HALJIA MOSFET Expansion Module is a versatile option that often comes with features like multiple MOSFETs, allowing you to control multiple high-current devices with a single board. This makes it ideal for more complex 3D printing setups, such as those with multiple heated beds or other power-intensive components. It’s about expanding the capabilities of your printer beyond the limitations of the stock configuration.
What makes this MOSFET unique is its expandability. If you’re planning on adding more features to your 3D printer, or if you need to control multiple high-current components simultaneously, this module provides the flexibility you need. Its ability to handle multiple devices simplifies wiring and allows you to create a more powerful and versatile 3D printing setup.
Why You Need a MOSFET for Your 3D Printer
Imagine you’re happily printing a large, complex model. Hours into the process, your printer suddenly shuts down, or worse, starts smoking. This nightmare scenario can often be avoided with a simple, affordable upgrade: a MOSFET. 3D printer heatbeds and hotends require significant power, and the original control board’s connectors and internal components may struggle to handle the load safely and reliably over time. Without a MOSFET, the current running through the board can overheat, leading to component failure, fire hazards, and ultimately, a ruined print and a potentially damaged printer.
Think of it like this: your printer’s control board is like a tiny wire trying to power a huge spotlight. It’s going to get hot and stressed. A MOSFET, on the other hand, acts as a powerful, external switch that handles the heavy lifting, taking the strain off your delicate control board. It’s like adding a dedicated circuit for that spotlight, ensuring a stable and safe power supply. This is especially critical for larger printers and those using heated beds that reach high temperatures.
Investing in a “best MOSFET for 3D printers” isn’t just about preventing disasters, it’s about optimizing your printing experience. A good MOSFET ensures a consistent and stable temperature in your heated bed, leading to better adhesion and fewer warped prints. It also protects your investment, extending the life of your control board and allowing you to confidently tackle even the most demanding printing projects. You’ll spend less time worrying and more time creating.
So, don’t risk a costly repair or worse. Adding a MOSFET is a small price to pay for peace of mind, improved print quality, and a safer, more reliable 3D printing experience. Think of it as an insurance policy for your printer, guaranteeing smooth sailing on your 3D printing journey. Choose a well-reviewed “best MOSFET for 3D printers” option to ensure you get the quality and performance you deserve!
Understanding Mosfet Ratings and Specifications
Choosing the right MOSFET isn’t just about picking one that “works,” it’s about picking one that works safely and reliably under the specific conditions of your 3D printer. MOSFETs have various ratings, including voltage, current, and resistance. Voltage (Vds) tells you the maximum voltage the MOSFET can handle without breaking down. Think of it like the maximum pressure a pipe can withstand before bursting – you want some headroom above your power supply voltage. Current (Id) is how much current the MOSFET can continuously handle before overheating. Resistance (Rds(on)) is the resistance when the MOSFET is switched on; lower resistance means less heat generation.
Imagine you’re trying to power a heated bed that draws 15 amps. If your MOSFET is only rated for 10 amps, you’re setting yourself up for a potential fire hazard. Similarly, if your 3D printer uses a 24V power supply, you should avoid using a MOSFET rated for only 12V. Make sure the voltage and current ratings of your chosen MOSFET exceed the requirements of your 3D printer components, providing a margin of safety. Always err on the side of caution.
Besides voltage and current, pay attention to the Rds(on) value. This is the “on-state resistance.” A lower Rds(on) means the MOSFET will generate less heat when it’s switched on to power your heated bed or hot end. Less heat equals better efficiency and a longer lifespan for the component. You want to minimize energy loss and prevent overheating, as excessive heat can damage the MOSFET and potentially cause a fire.
Think of it this way: using a MOSFET with a high Rds(on) to power your heated bed is like running your car with a clogged air filter. It’ll work, but it will be inefficient and put extra stress on the system. Look for MOSFETs with the lowest Rds(on) values you can find within your budget. This can significantly impact the longevity and reliability of your 3D printer.
Troubleshooting Common Mosfet Issues
MOSFETs, like any electronic component, can sometimes fail. Common issues include overheating, failure to switch on or off, and even burning out completely. Overheating is often a sign of insufficient cooling, exceeding the current rating, or a faulty MOSFET. If your MOSFET is running hot to the touch even with a heatsink, it’s a red flag that something is wrong.
Let’s say your heated bed isn’t heating up. One of the first things to check is the MOSFET. Use a multimeter to check if the gate signal is correctly activating the MOSFET. If the gate signal is present, but the output to the heated bed is zero, the MOSFET may be faulty. Likewise, if your heated bed is always on, even when the printer is idle, the MOSFET could be stuck in the “on” position.
Another common issue is a burned-out MOSFET. This usually happens when the MOSFET is overloaded or inadequately cooled. Visually inspect the MOSFET for any signs of damage, such as cracks, discoloration, or a burnt smell. If you see any of these signs, the MOSFET needs to be replaced immediately. Always disconnect the power supply before inspecting any electronic components.
When troubleshooting MOSFET issues, always prioritize safety. Disconnect the power supply before working on any electrical components. Use a multimeter to check for continuity and voltage to diagnose the problem accurately. And if you’re not comfortable working with electronics, seek help from someone who is. Remember, a faulty MOSFET can pose a fire hazard if not addressed properly.
Installing and Wiring Mosfet Modules
Installing a MOSFET module might seem daunting at first, but it’s a straightforward process if you follow a few basic steps. First, disconnect the power supply to your 3D printer. This is crucial for your safety and to prevent damage to the electronics. Then, identify the wires that control the heated bed or hot end you’re upgrading. These wires usually connect directly to the printer’s control board.
Now, connect these wires to the input side of the MOSFET module. The input side typically has screw terminals labeled “+” and “-“. Pay close attention to the polarity of the wires; connecting them incorrectly could damage the MOSFET or the printer’s control board. Next, connect the output side of the MOSFET module to the heated bed or hot end. Again, ensure the polarity is correct.
Finally, connect the signal wires from the printer’s control board to the MOSFET module’s signal input. These wires usually control the switching of the MOSFET. Double-check all your connections to ensure they are secure and properly wired. Once you’re confident that everything is connected correctly, carefully reconnect the power supply and test the MOSFET module.
Imagine you’re wiring up a new light fixture in your home. You wouldn’t just randomly connect the wires without understanding the circuit. Similarly, when installing a MOSFET module, take your time, follow the instructions carefully, and double-check your connections. A properly installed MOSFET module will improve the performance and reliability of your 3D printer, while a poorly installed one can lead to problems and even safety hazards.
Extending Lifespan and Maintaining Mosfets
Taking care of your MOSFETs goes a long way in extending their lifespan and preventing unexpected failures. A primary concern is heat management. Ensure your MOSFET has adequate cooling, which usually means a heatsink. If your MOSFET is running particularly hot, consider adding a small fan to actively cool the heatsink. Proper cooling helps prevent the MOSFET from overheating and failing prematurely.
Regularly inspect the wiring connections to your MOSFET module. Loose or corroded connections can cause increased resistance, leading to heat buildup and potential failure. Periodically check the screw terminals to ensure they are tight and secure. If you notice any signs of corrosion, clean the terminals with a contact cleaner and re-tighten the screws.
Another factor that impacts lifespan is over-voltage or over-current. Make sure you are not exceeding the rated voltage or current of your MOSFET. If you are consistently pushing the limits of the MOSFET’s ratings, consider upgrading to a more robust model or reducing the load on the circuit. This will help prevent premature failure and ensure reliable performance.
Think of your MOSFET like the tires on your car. You need to check the tire pressure regularly and ensure they are properly aligned to prevent premature wear. Similarly, you need to monitor the operating temperature of your MOSFET, inspect the wiring connections, and ensure you are not exceeding its rated capacity. With proper maintenance, your MOSFETs will last longer and provide reliable performance for your 3D printer.
Best Mosfet For 3D Printers: A Buyer’s Guide for Smooth Printing
Hey there, fellow 3D printing enthusiast! Tired of worrying about your printer’s heated bed or hot end drawing too much current? Or maybe you’re just looking to future-proof your setup for bigger, more demanding projects? Then you’ve probably heard about MOSFETs – those little electronic heroes that can take the load off your printer’s mainboard and make things run much smoother. Choosing the right MOSFET can feel a bit daunting, though. There are so many options out there! But don’t worry, I’m here to guide you through the key factors to consider so you can choose the best mosfet for 3D printers and improve your printing experience. Let’s dive in!
Current Capacity: Handling the Heat (and Everything Else)
First things first, let’s talk amps. Current capacity is arguably the most crucial factor when selecting a MOSFET. Think of it like this: your heated bed and hot end are like appliances that draw power (current) from your printer’s mainboard. Your mainboard has a limit to how much current it can safely handle. If you exceed that limit, things can get… well, fiery. A MOSFET acts as a relay, allowing the high current needed for your heated components to bypass the mainboard and be powered directly from your power supply.
So, how much current capacity do you need? It’s always better to err on the side of caution. Check the specifications of your heated bed and hot end to determine their maximum current draw. Then, choose a MOSFET with a current capacity that significantly exceeds that total. I’m talking at least double, maybe even triple, the combined amperage. This headroom ensures the MOSFET isn’t constantly operating at its limit, extending its lifespan and preventing overheating. Remember, a slightly oversized MOSFET is always a safer bet than one that’s barely adequate.
Voltage Rating: Staying Within Safe Limits
Voltage rating is the next important consideration. Voltage is like the pressure in a water pipe, and you need to make sure your MOSFET can handle the pressure in your 3D printer’s power circuit. 3D printers typically operate at 12V or 24V. So, your MOSFET’s voltage rating must be at least that high.
Again, it’s wise to give yourself some breathing room. A MOSFET rated for 30V or higher for a 24V system will provide an extra layer of protection against voltage spikes or fluctuations. Underestimating the voltage rating could lead to the MOSFET failing, potentially damaging other components in your printer. Choosing a MOSFET with a slightly higher voltage rating provides a safety margin and peace of mind. It’s a small investment that can save you a lot of headaches (and potentially costly repairs) down the road.
On-Resistance (RDS(on)): Reducing Waste and Improving Efficiency
On-resistance, often denoted as RDS(on), is a measure of how much resistance the MOSFET offers when it’s switched on and allowing current to flow. Think of it like a kink in a hose – the more resistance, the more energy is lost as heat. A lower RDS(on) means less resistance, less heat generation, and greater efficiency.
Why is this important? Well, excessive heat can shorten the lifespan of your MOSFET and potentially cause other components in your printer to overheat as well. A MOSFET with a low RDS(on) will run cooler, improving the overall reliability of your system. Look for MOSFETs with RDS(on) values in the milliohm range (mΩ). The lower the number, the better. While a lower RDS(on) often comes with a slightly higher price tag, it’s an investment that pays off in terms of efficiency, longevity, and peace of mind.
Gate Threshold Voltage (VGS(th)): Triggering the Switch
Gate threshold voltage (VGS(th)) is the voltage required to turn the MOSFET “on” and allow current to flow through it. This voltage needs to be compatible with the signal voltage coming from your 3D printer’s mainboard.
Most 3D printer mainboards output a 5V signal, so you’ll want to choose a MOSFET with a VGS(th) that is significantly lower than 5V. A VGS(th) of 2V or 3V is generally a safe bet. The goal is to ensure that the signal from your mainboard can reliably and consistently turn the MOSFET on and off. If the VGS(th) is too high, the MOSFET might not switch on completely, leading to inconsistent heating and potentially damaging your components. Check your mainboard documentation and the MOSFET datasheet carefully to ensure compatibility. The best mosfet for 3d printers will have a gate threshold voltage that matches your mainboard’s output.
Heat Sink: Keeping Things Cool Under Pressure
As we’ve discussed, MOSFETs can generate heat when they’re conducting current. While a low RDS(on) helps minimize heat generation, it’s often not enough, especially at higher currents. This is where a heat sink comes in. A heat sink is a metal component designed to dissipate heat away from the MOSFET and into the surrounding air.
A heat sink is almost always a necessity. The size and type of heat sink you need will depend on the amount of current your MOSFET will be handling. For lower-current applications, a small, clip-on heat sink might suffice. For higher-current applications, you’ll need a larger heat sink with fins to maximize surface area for heat dissipation. Some MOSFET modules even come with pre-attached heat sinks. If your MOSFET module doesn’t include a heat sink, be sure to purchase one separately. Proper heat sinking is critical for preventing overheating and ensuring the longevity of your MOSFET.
Wiring and Connections: Making the Right Links
The way you connect your MOSFET to your power supply, mainboard, and heated components is crucial for safety and performance. You need to use appropriately sized wires and secure connections. Undersized wires can overheat and create a fire hazard, while loose connections can cause intermittent problems and potentially damage your components.
Always use wires that are rated for the current you’ll be drawing. Consult a wiring gauge chart to determine the appropriate wire size for your application. Use crimp connectors or solder your connections for maximum reliability. Securely mount the MOSFET module to a stable surface and ensure that all wires are properly insulated to prevent short circuits. Double-check your wiring diagram before powering anything on. A mistake here could be catastrophic. Taking the time to make clean, secure, and properly insulated connections will ensure a safe and reliable 3D printing experience.
Build Quality and Reviews: Learning from Others
Finally, let’s talk about build quality and reviews. Not all MOSFET modules are created equal. Some are made with higher-quality components and better construction than others. Reading reviews from other users can provide valuable insights into the reliability and performance of different MOSFET modules.
Pay attention to reviews that mention things like overheating issues, connection problems, or premature failures. Look for MOSFET modules from reputable brands known for their quality and reliability. While it might be tempting to save a few dollars by opting for a cheaper, off-brand option, it’s often not worth the risk. A poorly built MOSFET module can fail unexpectedly, potentially damaging your printer and costing you more in the long run. Invest in a quality MOSFET module from a trusted brand, and read reviews to make sure you’re making an informed decision. After all, finding the best mosfet for 3d printers is more than just stats, but user experience.
Frequently Asked Questions
What exactly is a MOSFET, and why do I need one for my 3D printer?
Think of a MOSFET as a tiny electronic gatekeeper controlling the power flowing to your printer’s hotbed or hotend. Without one, the constant switching of current directly through your printer’s mainboard can overload it, leading to potential damage and even fire hazards. It’s like having a dedicated power surge protector, ensuring smooth and safe operation of your high-power components.
Essentially, a MOSFET acts as a buffer, handling the heavy lifting of switching the heating elements on and off. This takes the stress off your mainboard, extending its lifespan and preventing potentially dangerous overloads. Upgrading to a MOSFET is a worthwhile investment for any 3D printer user, especially if you plan on printing with materials that require higher temperatures.
How do I know if I actually need a MOSFET upgrade?
If you’re consistently printing with materials like ABS or nylon that require high bed temperatures (above 70°C), you’re likely pushing your mainboard’s limits. Signs that you might need a MOSFET include the mainboard getting unusually hot, the hotbed heating slowly or inconsistently, or even flickering lights when the bed is heating. These are telltale signs your board is struggling.
Another easy test is to simply check your printer’s mainboard specifications. Many budget-friendly or older printers have limitations on the maximum current they can handle. If your hotbed is drawing close to or exceeding that limit, a MOSFET is strongly recommended for safety and optimal performance. Think of it as preventative maintenance!
What specifications should I look for when choosing a MOSFET?
First and foremost, pay attention to the voltage and current ratings. Ensure the MOSFET can handle the voltage your printer operates at (typically 12V or 24V) and the current drawn by your hotbed or hotend. It’s always a good idea to choose a MOSFET with a rating that exceeds your needs by a comfortable margin – this gives you a safety buffer.
Beyond voltage and current, consider features like built-in heat sinks, which help dissipate heat and prevent overheating of the MOSFET itself. Also, look for clear and easy-to-understand wiring diagrams, especially if you’re new to electronics. A well-documented MOSFET module will make the installation process much smoother and less daunting.
Is installing a MOSFET difficult? Do I need any special skills?
While it involves a bit of wiring, installing a MOSFET isn’t rocket science! If you’re comfortable working with basic electronics and have a little patience, you should be able to handle it. Just make sure to turn off and unplug your printer before you start any work.
The key is to follow the wiring diagram provided with the MOSFET module carefully. Double-check all your connections before powering up the printer. There are also plenty of helpful tutorials and videos online that can guide you through the process step-by-step. Remember, safety first! If you’re at all unsure, don’t hesitate to ask for help from a more experienced friend or online community.
Can I use the same MOSFET for both the hotbed and the hotend?
Technically, yes, you could use the same MOSFET for both, but it’s generally not recommended. The hotbed and hotend are controlled independently, and using a single MOSFET would force them to heat simultaneously, which is not ideal for most printing scenarios.
It’s best to use a separate MOSFET for each. This gives you independent control over the temperature of both the bed and the nozzle, ensuring optimal printing conditions. Plus, using separate MOSFETs helps distribute the load and prevents overloading a single component. Think of it as assigning each job to a dedicated worker, making everything run more efficiently.
What are the signs that my MOSFET might be failing?
A failing MOSFET can exhibit a few telltale signs. You might notice the hotbed or hotend heating erratically or not reaching the set temperature. Another common symptom is the MOSFET itself getting excessively hot, even with a heat sink. This could indicate internal damage.
In more severe cases, a failing MOSFET might cause a short circuit, which can trip your breaker or even damage your printer’s power supply. If you suspect your MOSFET is failing, it’s best to replace it immediately to prevent further damage and ensure your safety. It’s always better to be safe than sorry!
Will a MOSFET improve the print quality of my 3D printer?
While a MOSFET doesn’t directly improve print quality like a better nozzle or filament would, it contributes to a more stable and reliable printing environment. By ensuring a consistent power supply to the hotbed and hotend, it helps maintain accurate temperatures throughout the printing process.
Stable temperatures are crucial for consistent layer adhesion, reduced warping, and overall improved print quality, especially when working with temperature-sensitive materials like ABS. A MOSFET is more of a background player, ensuring everything else can perform optimally. Think of it as the foundation upon which a great print is built.
Final Words
Choosing the best MOSFET for your 3D printer can feel like navigating a maze of specs and features, but hopefully, this guide has shed some light on the path. Remember, upgrading your MOSFET isn’t just about power; it’s about reliability, safety, and ultimately, unlocking the full potential of your 3D printer. Armed with this knowledge, you’re well-equipped to make an informed decision and ensure smoother, more consistent prints for years to come.
Now it’s time to take the leap and enhance your setup with what you think is the best MOSFET for 3D printers that suits your needs. Don’t be afraid to experiment and fine-tune your setup – every printer is unique, and the perfect solution is out there waiting to be discovered. Happy printing, and may your future builds be free of burnt-out boards!