Remember that time you saw a photo of yourself and thought, “Where did all that peach fuzz come from?!” I get it, I’ve been there. It’s frustrating to feel like makeup is just sitting on top of your skin instead of blending in seamlessly, and let’s not even talk about the dullness that sets in. That’s when I started exploring dermaplaning, and honestly, it’s been a game changer! Finding the right tools, however, was a journey. It seemed like every other product promised the world but delivered…well, not much.
That’s why I put together this guide to help you navigate the world of dermaplaning at home and find the best dermaplaning tools for your specific needs. Whether you’re a complete beginner or a seasoned pro looking to upgrade your setup, we’ll cover everything you need to know, from understanding different blade types to comparing the top-rated options on the market. Get ready to unveil smoother, brighter skin!
We will review the best dermaplaning tools later in this article. But before that, take a look at some relevant products on Amazon:

Last update on 2026-02-11 / Affiliate links / #CommissionsEarned / Images from Amazon Product Advertising API
Dermaplaning at Home: Unveiling Your Smoothest Skin Yet
Okay, let’s be real. We all crave that effortlessly radiant complexion, right? You know, the kind that looks like you just stepped out of a spa, even on a Tuesday morning. I used to think that achieving that glow meant endless expensive facials, but then I discovered dermaplaning. It sounded a little intimidating at first – shaving my face? – but the results quickly won me over. Think of it as a supercharged exfoliation that not only buffs away dead skin cells but also removes that pesky peach fuzz (vellus hair) that can dull your complexion and make makeup application a total drag.
So, what exactly is dermaplaning? Simply put, it’s a manual exfoliation technique that uses a sterile blade held at a 45-degree angle to gently scrape away the top layer of dead skin cells and fine hairs. Don’t worry, it’s not like shaving your legs! The blade is specially designed for facial use and, when done correctly, is incredibly safe and effective. In fact, a study published in the Journal of the American Academy of Dermatology found that dermaplaning can significantly improve skin texture and reduce the appearance of fine lines.
Now, the fun part: doing it at home! While professional dermaplaning treatments are amazing, they can be pricey and time-consuming. The good news is, you can achieve similar results in the comfort of your own bathroom with the right tools. That’s where this guide comes in. We’re going to break down everything you need to know about finding the best dermaplaning tools for your skin type and skill level.
Think of me as your friendly dermaplaning guru, here to help you navigate the world of blades, angles, and serums. We’ll explore different types of dermaplaning tools, from disposable razors to more advanced devices, and discuss how to choose the best dermaplaning tools based on your individual needs and budget. Get ready to say hello to smoother, brighter, and more radiant skin – all from the convenience of your own home!
The Best Dermaplaning Tools
Dermaflash LUXE+
The Dermaflash LUXE+ isn’t just a dermaplaning tool; it’s an experience. Think of it as a spa day for your face, all from the comfort of your own bathroom. This device uses sonic vibration to gently exfoliate dead skin cells and peach fuzz, leaving your skin feeling incredibly smooth and looking radiant. The LUXE+ also boasts two speeds, catering to both sensitive and more resilient skin types.
Beyond its exfoliating prowess, this tool promotes better absorption of your skincare products, making your serums and creams work even harder. It’s an investment, yes, but the long-term benefits for your complexion can be well worth it. Plus, the sleek design and charging dock add a touch of luxury to your skincare routine.
StackedSkincare Dermaplaning Exfoliation Tool
Ready to say goodbye to dull skin? The StackedSkincare Dermaplaning Exfoliation Tool is a solid choice for anyone wanting to delve into the world of at-home dermaplaning. Its ergonomic design makes it comfortable to hold and maneuver, allowing for precise exfoliation. It’s also relatively easy to clean, which is always a bonus when dealing with skincare tools.
What sets this tool apart is its focus on safety and efficacy. It comes with replacement blades, ensuring you’re always using a sharp, clean edge for optimal results. Users appreciate the noticeable difference in skin texture and tone after just one use. Just remember to be gentle and follow the instructions carefully for a smooth, fuzz-free finish.
Tweezerman Facial Razor
Don’t let the simple design fool you; the Tweezerman Facial Razor packs a powerful punch when it comes to removing unwanted facial hair and dead skin cells. This no-frills option is incredibly affordable and readily available, making it a great entry point for those curious about dermaplaning. Its compact size also makes it perfect for travel.
While it may not have the bells and whistles of more expensive devices, the Tweezerman Facial Razor delivers noticeable results. Users report smoother skin, improved makeup application, and a brighter complexion. Just be sure to use a light touch and hold the razor at the correct angle to avoid any irritation. This is a fantastic, budget-friendly option for maintaining a smooth, fuzz-free face.
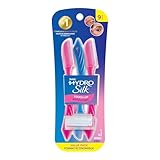
Schick Hydro Silk Touch-Up Multipurpose Exfoliating Dermaplaning Tool
Looking for a versatile tool that can tackle both facial hair and precise eyebrow shaping? The Schick Hydro Silk Touch-Up is a drugstore favorite for a reason. Its slim, portable design makes it easy to control, and the included precision cover allows for detailed work around the eyebrows and other delicate areas.
This affordable tool isn’t just for peach fuzz; it also gently exfoliates the skin, leaving it feeling softer and smoother. Users praise its ease of use and the immediate improvement in skin texture. It’s a convenient option for quick touch-ups and maintaining a polished look between professional dermaplaning treatments.
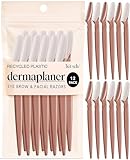
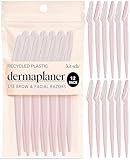
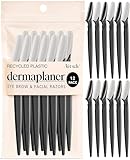
Kitsch Dermaplaner Set
The Kitsch Dermaplaner Set combines affordability with a touch of style, offering a collection of colorful and effective dermaplaning tools. These single-use razors are designed for gentle exfoliation and hair removal, leaving your skin feeling refreshed and revitalized. The fun color options add a playful element to your skincare routine.
What’s great about this set is the convenience factor. Each razor is prepped and ready to use, making it a hassle-free option for busy individuals. Users appreciate the smooth results and the noticeable difference in makeup application. This is a fantastic choice for those seeking a simple, budget-friendly, and stylish way to achieve a brighter, smoother complexion.
Why Buy Dermaplaning Tools?
Imagine waking up every morning with skin so smooth, your makeup glides on effortlessly. No more peach fuzz casting shadows or clinging to your foundation. Dermaplaning at home with the best dermaplaning tools makes this a reality. It’s a simple, yet transformative, way to gently exfoliate and remove unwanted facial hair, revealing a brighter, more radiant complexion you’ll love.
Think of dermaplaning as a supercharged exfoliation treatment. Those dull skin cells clinging to your face? Gone! By gently removing the top layer of dead skin and vellus hair (peach fuzz), you’re unclogging pores and allowing your skincare products to penetrate deeper, making them more effective. Those expensive serums and moisturizers you invested in will finally work to their full potential, giving you the results you’ve been hoping for.
Worried about the “myth” that hair grows back thicker? Don’t be! Dermaplaning only removes hair at the surface, not the root. So, your peach fuzz will simply grow back the same way it always did. The best dermaplaning tools are designed for safe and easy use at home, offering a cost-effective alternative to expensive salon treatments.
Investing in dermaplaning tools is investing in your confidence. A brighter, smoother complexion can do wonders for how you feel about yourself. From effortlessly flawless makeup application to maximizing the benefits of your skincare routine, dermaplaning is a simple step that can make a significant difference. Give your skin the glow it deserves!
Dermaplaning Tool Materials: What’s Best for Your Skin?
Choosing the right dermaplaning tool isn’t just about the blade’s sharpness, but also the material it’s made from. Think of it like picking a good knife for cooking – the steel matters! Most dermaplaning tools feature stainless steel blades, and there’s a good reason for that. It’s durable, rust-resistant, and relatively hypoallergenic. However, some blades may be coated with other materials to enhance their performance or longevity.
If you have particularly sensitive skin or are prone to allergic reactions, paying attention to blade material is crucial. Some coatings, while designed to improve sharpness, might contain nickel or other potentially irritating substances. Always check the product description carefully and, if possible, look for tools explicitly labeled as hypoallergenic or nickel-free. Think of it like choosing skincare – you want ingredients that soothe, not irritate!
Handle materials also play a role in comfort and control. Plastic handles are common, lightweight, and easy to grip, but can sometimes feel flimsy. Metal handles, often made of stainless steel or aluminum, offer a more premium feel and often better durability. Ergonomics matter too! A handle that fits comfortably in your hand will make the dermaplaning process smoother and safer, reducing the risk of slips or nicks.
In the end, the best dermaplaning tool material for you depends on your individual skin type and preferences. However, doing your research and opting for high-quality, hypoallergenic materials can significantly improve your dermaplaning experience and minimize the risk of adverse reactions. Remember, it’s all about achieving that smooth, radiant glow without irritating your delicate skin!
Prep & Aftercare: Setting Yourself Up for Success
Dermaplaning is a bit like painting a room – the prep work is just as important as the actual task! Before you even pick up your dermaplaning tool, make sure your skin is clean and dry. Think of it like prepping a canvas; you want a smooth, even surface for the best results. Gently cleanse your face with a mild cleanser to remove any makeup, dirt, or oil. Pat your skin dry thoroughly.
After dermaplaning, your skin is going to be more sensitive and vulnerable, so treat it with extra TLC. Avoid harsh exfoliants, active ingredients like retinoids or AHAs/BHAs, and anything that might irritate your freshly exfoliated skin. It’s like giving your skin a mini-vacation! Focus on hydration and protection.
Think of aftercare like protecting a newborn baby. Slather on a gentle, fragrance-free moisturizer to keep your skin hydrated and happy. Look for ingredients like hyaluronic acid, ceramides, or aloe vera, which can help soothe and replenish the skin’s moisture barrier. This is critical for preventing dryness, irritation, and potential breakouts.
Sunscreen is your best friend after dermaplaning. Your skin is more susceptible to sun damage, so apply a broad-spectrum sunscreen with an SPF of 30 or higher every morning, even on cloudy days. Think of it as building a shield against the sun’s harmful rays. This will not only protect your skin from sunburn but also prevent premature aging and hyperpigmentation.
Dermaplaning Frequency: How Often is Too Often?
Dermaplaning is a great way to achieve smooth, glowing skin, but like any exfoliating treatment, moderation is key. Overdoing it can lead to irritation, redness, and even breakouts. Think of it like over-exfoliating your face with a scrub – you risk stripping your skin of its natural oils and disrupting its delicate balance. So, how often should you dermaplane?
A good rule of thumb is to dermaplane every 2-4 weeks. This allows your skin to fully recover and regenerate between treatments. Everyone’s skin is different, so you will have to see how your skin is affected. Some people can handle weekly dermaplaning, while others need more time to recover.
Think of dermaplaning frequency as finding the perfect balance for your skin. Pay attention to how your skin feels after each treatment. If you notice any signs of irritation, like redness, dryness, or breakouts, it’s a sign that you’re dermaplaning too often. Give your skin a break and adjust your schedule accordingly.
Ultimately, the best way to determine the right dermaplaning frequency for you is to listen to your skin. If you’re unsure, consult with a dermatologist or aesthetician. They can assess your skin type and provide personalized recommendations based on your individual needs. Remember, it’s all about achieving a healthy, radiant glow without compromising the health of your skin!
Safety First: Avoiding Common Dermaplaning Mistakes
Dermaplaning can be a safe and effective way to exfoliate your skin and remove peach fuzz, but it’s crucial to do it correctly. One of the biggest mistakes people make is using a dull blade. Imagine trying to shave with a dull razor – it’s ineffective and increases the risk of nicks and irritation. Always use a fresh, sharp blade for each dermaplaning session.
Another common mistake is dermaplaning over active breakouts or irritated skin. Think of it like trying to paint over a cracked wall – it’s just going to make things worse. Avoid dermaplaning on areas with acne, eczema, or any other skin conditions. This can further irritate the skin and potentially spread bacteria.
Proper technique is essential for safe dermaplaning. Hold the blade at a 45-degree angle and use short, gentle strokes, moving in the direction of hair growth. Think of it like carefully shaving your legs – you want to avoid applying too much pressure or going against the grain. Applying too much pressure or using long, sweeping motions can increase the risk of nicks and cuts.
Finally, don’t forget about hygiene! Clean your dermaplaning tool with alcohol before and after each use. Think of it like sterilizing your makeup brushes – it helps prevent the spread of bacteria and keeps your skin healthy. Store your dermaplaning tool in a clean, dry place to further minimize the risk of contamination.
The Ultimate Guide to Choosing the Best Dermaplaning Tools
Hey there, skincare enthusiast! Thinking about trying dermaplaning at home? That’s awesome! Dermaplaning can be a fantastic way to exfoliate your skin, remove peach fuzz, and reveal a brighter, smoother complexion. But with so many dermaplaning tools on the market, it can feel overwhelming to choose the right one. Don’t worry, I’m here to help! This guide will walk you through everything you need to consider so you can find the best dermaplaning tools for your skin and your budget.
Think of this guide as advice from a friend who’s been there, done that, and learned a few things along the way. I’ll break down the essential factors you need to think about before clicking “add to cart.” Let’s dive in and get you on your way to glowing skin!
Blade Material & Sharpness: Safety First!
The blade is the heart of any dermaplaning tool, so its material and sharpness are absolutely critical. You want something that’s made of high-quality stainless steel, as this material is durable, hygienic, and less likely to cause irritation. Avoid tools with blades made from questionable materials or those that seem dull right out of the box. A sharp blade will glide smoothly over your skin, removing dead skin cells and peach fuzz without requiring excessive pressure. A dull blade, on the other hand, can tug at the skin, leading to irritation, nicks, and even cuts.
Imagine using a butter knife to try and shave your legs – not a pretty picture, right? The same principle applies here. Invest in a tool with a sharp, high-quality blade; it’s not just about effectiveness, it’s about safety. When searching for the best dermaplaning tools, read reviews carefully to see what other users have to say about the blade sharpness and how long the blade stays sharp with regular use.
Handle Design & Grip: Comfort is Key
You might not think much about the handle, but trust me, it plays a significant role in your dermaplaning experience. A comfortable and secure grip is essential for control and precision, especially when you’re maneuvering around delicate areas like your nose and around your lips. Look for a handle that’s ergonomically designed and fits comfortably in your hand. Some handles are made of silicone or have textured grips to prevent slipping, even when your hands are slightly damp.
Think about it: you’ll be holding this tool for several minutes at a time, so you want something that feels good in your hand. A flimsy or awkward handle can lead to fatigue and make it harder to maintain a steady hand, increasing the risk of nicks and cuts. The best dermaplaning tools will have a handle that allows you to confidently and comfortably glide the blade across your skin.
Disposable vs. Replaceable Blades: What’s Right for You?
Dermaplaning tools typically come in two main types: disposable and those with replaceable blades. Disposable tools are designed for one-time use and are often more affordable upfront. However, they can be less environmentally friendly and may not be the most cost-effective option in the long run if you plan to dermaplane regularly.
Tools with replaceable blades usually have a higher initial cost, but they can be more economical over time. You simply replace the blade when it becomes dull, keeping the handle. This option is also generally more sustainable, as you’re not throwing away the entire tool after each use. Consider your budget, frequency of use, and environmental concerns when deciding which type is best for you. Some people prefer the convenience of disposable, while others appreciate the long-term value of replaceable blades.
Skin Sensitivity & Irritation: Know Your Skin
If you have sensitive skin, you need to be extra cautious when choosing dermaplaning tools. Look for tools specifically designed for sensitive skin, which often have gentler blades or feature rounded safety tips to minimize the risk of irritation. It’s also a good idea to test the tool on a small, inconspicuous area of your skin before using it on your entire face.
Remember that dermaplaning is a form of exfoliation, and even the gentlest tools can cause some redness or sensitivity, especially if you’re not used to it. Always follow up with a gentle, hydrating moisturizer and avoid using harsh active ingredients like retinoids or AHAs for a few days after dermaplaning. Prioritize understanding your skin and its needs when choosing the best dermaplaning tools.
Ease of Cleaning & Hygiene: Keep it Clean!
Proper hygiene is crucial when it comes to dermaplaning. You want to choose a tool that’s easy to clean and sanitize to prevent the spread of bacteria. Tools with detachable blades are generally easier to clean, as you can thoroughly wash and disinfect both the blade and the handle separately.
Regardless of the type of tool you choose, always clean it thoroughly with soap and water after each use, and then disinfect it with rubbing alcohol. Store your dermaplaning tool in a clean, dry place to prevent bacterial growth. Remember, a clean tool is a safe tool, and using a contaminated tool can lead to skin infections. Don’t skip this step in your dermaplaning routine!
Price & Value: Balancing Quality & Budget
Dermaplaning tools range in price from very affordable to quite expensive. While it’s tempting to go for the cheapest option, remember that you often get what you pay for. Investing in a higher-quality tool with a sharp blade and comfortable handle can save you money in the long run by reducing the risk of nicks, cuts, and irritation.
That being said, you don’t necessarily need to break the bank to find the best dermaplaning tools. There are many excellent options available at reasonable prices. Read reviews carefully to compare the quality and performance of different tools within your budget. Consider the longevity of the blades and the overall durability of the tool when evaluating its value. Sometimes, spending a little more upfront can actually save you money and frustration in the long run.
Reviews & Recommendations: Learn From Others
Before making a purchase, take the time to read reviews and recommendations from other users. This is a great way to get an unbiased opinion on the performance, durability, and overall value of different dermaplaning tools. Pay attention to reviews that mention specific concerns, such as blade sharpness, ease of use, and skin sensitivity.
Look for reviews from people with similar skin types and concerns to your own. If you have sensitive skin, for example, focus on reviews from other people with sensitive skin who have tried the tool. You can also ask for recommendations from friends, family, or skincare professionals. Learning from the experiences of others can help you avoid making a costly mistake and find the best dermaplaning tools for your individual needs.
Frequently Asked Questions
What exactly *is* dermaplaning, and is it right for me?
Dermaplaning is basically a super gentle form of exfoliation that uses a surgical-grade blade to remove dead skin cells and those pesky vellus hairs (aka “peach fuzz”) from the surface of your skin. Think of it like a really close shave, but for your face! It’s a great way to reveal brighter, smoother skin underneath.
Now, is it right for you? Generally, it’s fantastic for most skin types, but if you have active acne breakouts, eczema, psoriasis, or rosacea, it’s best to hold off until those issues are under control. The blade could irritate inflamed skin. Always chat with your dermatologist if you’re unsure! They can give you personalized advice.
Will dermaplaning make my hair grow back thicker or darker?
This is probably the biggest myth surrounding dermaplaning, and the answer is a resounding NO! Dermaplaning only affects the surface of the skin and the tiny vellus hairs. It doesn’t impact the hair follicle itself, which is where hair growth actually happens.
So, don’t worry, you won’t suddenly sprout a beard! Your hair will grow back at the same rate and with the same texture as before. That initial stubble you might feel is just the blunt end of the hair that was cut, but it quickly softens as it grows out.
How often can I dermaplane?
Typically, you’ll want to dermaplane every 3-4 weeks. This allows your skin to go through its natural cycle of shedding dead skin cells and regenerating new ones. Doing it too frequently could lead to irritation and sensitivity.
Think of it like exfoliating too much – your skin needs time to recover. Pay attention to how your skin feels. If it feels sensitive or irritated, give it a little extra time before your next session. You’ll quickly learn what works best for your individual skin!
Can I do dermaplaning at home, or should I only get it done professionally?
Absolutely, you can dermaplane at home! It’s become increasingly popular, and there are many safe and effective tools designed for home use. However, it’s crucial to choose the right tool (like the ones we reviewed!) and follow instructions carefully. Start slowly and practice good hygiene.
If you’re nervous or have any specific skin concerns, seeing a professional is always a great option. They have the experience and expertise to ensure a safe and effective treatment. But for maintenance and regular exfoliation, many people find at-home dermaplaning to be a convenient and affordable alternative.
What are the risks of dermaplaning?
While dermaplaning is generally safe, there are a few potential risks to be aware of. The most common are minor cuts or nicks, especially when you’re first starting out. That’s why a steady hand and good lighting are your best friends!
Other possible side effects include temporary redness, sensitivity, or slight irritation. Rarely, you might experience a breakout if bacteria gets introduced to the skin. That’s why sterilizing your tools before and after each use is so important. If you have any concerns, always consult with a dermatologist.
What should I do before and after dermaplaning?
Before dermaplaning, make sure your skin is clean and dry. Avoid using harsh exfoliants or active ingredients like retinoids for a few days beforehand, as they can increase sensitivity. A gentle cleanser is all you need!
After dermaplaning, focus on hydration and sun protection. Apply a soothing serum or moisturizer to replenish your skin’s moisture barrier, and always wear sunscreen, even on cloudy days. Your skin will be more sensitive to the sun after exfoliation. Avoid harsh products for a day or two, and enjoy your newly glowing complexion!
How do I clean and store my dermaplaning tools?
Cleaning your dermaplaning tools is essential for preventing infection and breakouts. Immediately after each use, rinse the blade thoroughly with warm water to remove any debris. Then, disinfect it with isopropyl alcohol (70% or higher) to kill any bacteria.
Let the blade air dry completely before storing it in a clean, dry place. Some tools come with protective caps or cases – be sure to use them! If your tool has disposable blades, replace them regularly according to the manufacturer’s instructions. Proper cleaning and storage will help keep your skin healthy and your tools in good condition.
Verdict
So, there you have it! We’ve explored a fantastic range of the best dermaplaning tools, each promising to unveil a smoother, brighter version of you. Whether you’re drawn to the precision of a surgical-grade scalpel or prefer the gentle ease of an electric device, remember the key is consistency and proper technique. Don’t be afraid to experiment and find what works best for your unique skin!
Ready to embrace that radiant glow? Armed with this guide, you’re now equipped to confidently choose the perfect dermaplaning tool and embark on your journey to flawless skin. Imagine stepping out with a newfound confidence, knowing your skin is looking its absolute best. Go ahead, take the plunge and reveal the radiant complexion that’s been waiting to shine!