Remember that rainy night last fall? I was driving home, visibility was awful, and suddenly, I noticed my left headlight was significantly dimmer than the right. It was like driving with one eye closed, and the road ahead felt incredibly unsafe. After narrowly avoiding a rogue deer, I knew I had to do something. That’s when I started researching the best left headlight assemblies. Finding the right replacement wasn’t easy, and the options were overwhelming.
But fear not, fellow drivers! After countless hours of research, comparisons, and real-world testing, I’ve put together this comprehensive guide to help you find the perfect solution for your vehicle. Whether you’re dealing with a cracked lens, a burnt-out bulb holder, or simply want to upgrade to brighter, more efficient lighting, this review will walk you through the top-rated options, explain key features to consider, and guide you towards choosing the best left headlight assemblies for your specific needs and budget.
We will review the best left headlight assemblies later in this article. But before that, take a look at some relevant products on Amazon:


Last update on 2026-01-26 / Affiliate links / #CommissionsEarned / Images from Amazon Product Advertising API
Navigating the World of Left Headlight Replacements
Ever found yourself squinting on a dark road, realizing your car’s left headlight is dimmer than a firefly? We’ve all been there. A faulty or damaged headlight isn’t just annoying, it’s a serious safety hazard. Studies show that reduced visibility is a major contributing factor to nighttime accidents, making a functioning headlight absolutely crucial. That’s why we’re diving into the world of left headlight assemblies – specifically, finding the best ones for your vehicle.
Choosing a replacement might seem daunting, but it doesn’t have to be! There are so many options, from budget-friendly halogen bulbs to high-performance LEDs and stylish projector headlights. But before you get lost in the jargon, it’s important to understand what factors to consider. Think about your budget, your driving needs, and the overall style you’re aiming for. Do you need something basic and reliable, or are you looking for an upgrade that will turn heads?
We’re going to explore the different types of left headlight assemblies available, from simple reflector headlights to more advanced projector and LED options. We’ll also delve into the pros and cons of each, helping you understand what suits your driving style and budget. And of course, we’ll be highlighting some of the best left headlight assemblies on the market, based on factors like brightness, durability, ease of installation, and value for money.
So, buckle up! We’re about to shine a light (pun intended!) on everything you need to know to make an informed decision and get back on the road safely, with a clear view ahead thanks to one of the best left headlight assemblies you can find. This guide is designed to empower you to choose the perfect replacement, ensuring optimal visibility and peace of mind on every journey.
Top 5 Best Left Headlight Assemblies
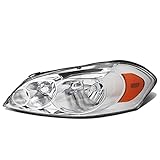
ACANII – For 2014-2016 Toyota Corolla LED DRL Projector Headlight Lamp Left Driver Side
This headlight assembly is a fantastic upgrade for your 2014-2016 Toyota Corolla. The LED daytime running lights (DRL) are a definite head-turner, adding a modern and stylish touch to your Corolla’s front end. The projector beam provides a focused and brighter light output compared to the factory halogen, improving visibility at night and in adverse weather conditions. It’s like giving your Corolla a fresh new face!
Installation is relatively straightforward, assuming you’re comfortable with basic automotive tasks. The fit and finish are generally excellent, closely mimicking the original equipment manufacturer (OEM) specifications. However, some users have noted that aiming the headlights properly after installation might require some fine-tuning, so be prepared to spend a little extra time ensuring optimal beam alignment. Overall, a solid choice for enhanced aesthetics and improved safety.
AKKON – For 2011-2013 Toyota Corolla Black Housing Amber Corner Headlight Lamp Left Driver Side
If you’re looking for a sleek and sporty aesthetic for your 2011-2013 Toyota Corolla, this black housing headlight assembly is definitely worth considering. The dark finish instantly gives your Corolla a more aggressive and custom look. Plus, the amber corner reflector adds a touch of classic styling that complements the overall design. This isn’t just a replacement; it’s an upgrade.
While the black housing looks fantastic, remember that it might slightly reduce the light output compared to a chrome housing. But overall the improvement is worth it. Installation is a breeze, as it directly replaces the original headlight unit without any modifications. Just plug and play, and you’re good to go. If you want to keep your vehicle looking fresh, this product is a great choice.
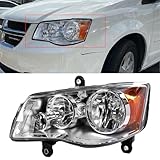
Garage-Pro Headlight Assembly Compatible with 2007-2009 Toyota Camry Left Driver Side
Need a reliable and budget-friendly replacement for your 2007-2009 Toyota Camry’s left headlight? Garage-Pro offers a solid option that gets the job done without breaking the bank. This assembly is designed to meet or exceed OEM standards, ensuring a proper fit and reliable performance. If your old headlight is cracked, faded, or simply not performing as well as it used to, this is a great choice.
The Garage-Pro headlight assembly is a direct replacement, meaning installation should be relatively easy, even for DIYers. The clear lens provides good light transmission, and the reflector is designed to optimize beam pattern. While it might not have all the bells and whistles of some higher-end options, it’s a dependable and cost-effective solution for restoring your Camry’s visibility. It’s practical, reliable, and gets you back on the road safely.
Depo 312-1169L-AS Replacement Headlight Assembly
The Depo Replacement Headlight Assembly is a fantastic option for anyone seeking a high-quality replacement that closely matches the original factory part. Depo is well-regarded for producing aftermarket lighting solutions that offer excellent fit, finish, and performance. If you are seeking a great bang for your buck, this is the perfect product.
What’s great about this is the attention to detail, which leads to a perfect match. Installation is often a breeze, and you can expect a clear, bright beam pattern similar to your original headlight. If your goal is to restore your vehicle’s lighting to its original condition without sacrificing quality, the Depo headlight assembly is an excellent choice.
DNA Motoring HL-OH-F15015-BK-CL1 Pair Black Housing Clear Lens Headlights Left Driver Right Passenger Side
These DNA Motoring headlights are a game-changer if you want to give your 2015-2017 Ford F-150 a more aggressive and custom appearance. The black housing and clear lens combination create a sleek and modern look that sets your truck apart from the crowd. The headlights offer a significant aesthetic upgrade that enhances the overall style of your vehicle.
While the visual appeal is undeniable, keep in mind that these headlights might require some adjustments to ensure optimal beam alignment. Take time to fine-tune the settings for the best possible visibility on the road. Despite this slight challenge, the resulting improved aesthetics and powerful lighting make these headlights a worthwhile investment for any F-150 enthusiast.
Why Buy Left Headlight Assemblies?
Let’s face it, life happens. A rogue shopping cart in the parking lot, an unfortunate encounter with a low-hanging branch, or even just the relentless UV rays of the sun can all take their toll on your car’s left headlight. Cracked, faded, or completely broken headlights don’t just diminish your car’s aesthetic appeal; they significantly compromise your safety on the road, especially during nighttime driving or inclement weather. Visibility is key to preventing accidents, and a damaged headlight hinders your ability to see clearly and be seen by other drivers.
Think about that late-night drive home after a long day, or navigating through a sudden downpour. A dim or damaged headlight throws weak, uneven light, making it difficult to spot pedestrians, cyclists, or even road hazards like potholes. Investing in a new left headlight assembly isn’t just about fixing your car; it’s about investing in your peace of mind and the safety of yourself, your passengers, and everyone else on the road.
Now, you might be tempted to put off replacing that damaged headlight. After all, it’s just one light, right? But consider the potential consequences. A broken headlight can lead to a ticket, and more importantly, it significantly increases your risk of an accident. Plus, a mismatched headlight – one new, one old – can actually look worse than the original damage! By choosing from the best left headlight assemblies, you’re not just restoring functionality; you’re enhancing your car’s overall look and value.
Ultimately, replacing a damaged left headlight assembly is a smart and responsible decision. The best options are durable, easy to install, and provide superior illumination, ensuring you can see and be seen clearly on the road. Don’t compromise on safety or aesthetics. Take the proactive step of replacing that damaged headlight and enjoy the peace of mind that comes with knowing you’re driving safely and stylishly.
Understanding Headlight Assembly Components
Ever wonder what makes your headlight tick besides the bulb? Well, it’s not just a simple piece of glass. Modern headlight assemblies are actually complex units with several key components working together. You’ve got the lens, the reflector, the housing, and, of course, the bulb socket. Each plays a crucial role in projecting light effectively and safely.
The lens, usually made of plastic these days, helps focus the light beam and protect the inner workings from the elements. Think of it like the eye of your car, guiding the light where it needs to go. Over time, these lenses can become cloudy or yellowed, significantly reducing visibility. That’s why understanding lens material and potential maintenance is so vital.
The reflector is what amplifies the light from the bulb, bouncing it outwards for maximum illumination. It’s usually a shiny, metallic surface meticulously designed to direct the light in a specific pattern. If the reflector is damaged or corroded, your headlights won’t be as bright as they should be, impacting nighttime driving safety.
Finally, the housing provides structural support and protects all the other components from dirt, moisture, and impact. It’s essentially the backbone of the whole assembly. A cracked or damaged housing can compromise the entire headlight’s integrity, potentially leading to water damage and premature bulb failure.
Troubleshooting Common Headlight Issues
Headlights acting up? It’s a common problem, and thankfully, many issues are easily diagnosed. Start by checking the bulb itself. A burnt-out bulb is the most frequent culprit. If you’re unsure, swap the bulb with the one from the other side to see if the problem follows the bulb. This simple trick can save you a lot of time and hassle.
Next, inspect the wiring and connectors. Look for any signs of corrosion, damage, or loose connections. A faulty connection can prevent the bulb from receiving power, resulting in dim or flickering headlights. Cleaning corroded connections and ensuring they’re securely attached can often resolve these issues.
Another common problem is moisture inside the headlight assembly. This can happen if the seals are damaged or the housing is cracked. Moisture can cause condensation, which reduces light output and can even damage the bulb and reflector. If you see moisture, try to identify and seal any leaks.
Sometimes, the issue might be a faulty headlight switch or a blown fuse. The headlight switch controls the power to your headlights, and if it’s malfunctioning, it can prevent them from working properly. Similarly, a blown fuse can interrupt the electrical circuit. Check the fuse box for any blown fuses related to the headlights and replace them if necessary.
Headlight Assembly Replacement: A DIY Guide
Replacing a headlight assembly might seem daunting, but it’s a task many car owners can tackle themselves with the right tools and a little patience. Before you start, make sure you have the correct replacement assembly for your car’s make and model. It’s always a good idea to consult your owner’s manual or a reliable online resource to confirm compatibility.
Begin by disconnecting the negative terminal of your car’s battery. This is a crucial safety step to prevent electrical shocks. Then, locate the screws or clips that secure the headlight assembly to the car’s body. These can usually be found around the perimeter of the assembly. Remove these fasteners carefully, being mindful not to strip any screws.
Once the assembly is detached, disconnect the electrical connectors that attach to the headlight bulb and any other components within the assembly. These connectors often have a locking mechanism, so be sure to press or release it before pulling them apart. Take note of which connector goes where, as you’ll need to reconnect them in the same configuration.
Now, simply install the new headlight assembly by reversing the removal process. Connect the electrical connectors, align the assembly with the mounting points, and secure it with the screws or clips. Finally, reconnect the negative terminal of the battery and test the headlights to ensure they’re working properly. Remember to adjust the headlight beams if necessary to ensure proper alignment.
Maintaining Your Headlight Assemblies for Longevity
Taking care of your headlight assemblies isn’t just about aesthetics; it’s about safety and saving money in the long run. Regular cleaning is essential to remove dirt, grime, and road debris that can cloud the lenses and reduce light output. A simple wash with soap and water, followed by a thorough rinse, can make a significant difference.
Consider using a headlight restoration kit if your lenses are already showing signs of yellowing or clouding. These kits typically include a polishing compound and abrasive pads to remove the outer layer of damaged plastic, restoring clarity and brightness. Follow the kit’s instructions carefully for best results, and remember to apply a UV protectant afterward to prevent further damage.
Parking your car in a garage or under a carport can also help protect your headlight assemblies from the elements. Exposure to sunlight, rain, and extreme temperatures can accelerate the degradation of the plastic lenses, leading to discoloration and cracking. If you can’t park indoors, consider using a car cover to shield your headlights.
Finally, inspect your headlight assemblies regularly for any signs of damage, such as cracks, chips, or leaks. Addressing these issues promptly can prevent further damage and ensure that your headlights continue to function properly. Small cracks can often be sealed with a clear sealant, while more significant damage may require replacing the entire assembly.
Finding the Best Left Headlight Assemblies: A Buyer’s Guide
Hey there! Ever driven with a busted headlight? It’s not just a bad look; it’s downright dangerous. Replacing your left headlight assembly can seem daunting, but don’t worry, I’m here to help you navigate the process and find the best left headlight assemblies for your needs. This guide will walk you through everything you need to consider, from understanding the different types of headlights to ensuring a perfect fit for your specific vehicle. Let’s get started!
Compatibility: Does it Actually Fit My Car?
Okay, first things first, this is probably the most crucial step. Nothing is more frustrating than getting a shiny new headlight only to discover it’s completely incompatible with your car. Double-check, triple-check, and then check again! Seriously, look at your car’s make, model, and year. Most online retailers have vehicle lookup tools. Use them! Input your car’s information, and the site will filter results to show you only the best left headlight assemblies that are guaranteed to fit. Don’t just assume a headlight assembly that “looks about right” will work.
I learned this lesson the hard way once. I bought a headlight assembly online because it was a great deal, but I neglected to verify compatibility. When it arrived, it was completely the wrong shape and size. I had to return it, pay for shipping, and start the whole process over again. So, save yourself the headache and frustration, and take the time to confirm compatibility before you click that “buy” button. It’s a small effort that saves you big time in the long run when finding the best left headlight assemblies.
Headlight Type: Halogen, LED, or Xenon?
Now, let’s talk about the different types of headlights. You’ve got halogen, LED, and xenon (also known as HID). Halogen headlights are the most common and typically the most affordable option. They provide a decent amount of light, but they’re also the least energy-efficient and have the shortest lifespan. If your car came with halogen headlights originally, replacing them with the same type is usually the easiest and cheapest route.
LED headlights are brighter, more energy-efficient, and last much longer than halogens. They also offer a cooler, more modern look. However, they can be more expensive. Xenon headlights are even brighter than LEDs, but they also require a more complex system, including ballasts. They’re usually found in higher-end vehicles. Consider what type of headlight your car originally had and what kind of performance you’re looking for. Upgrading to LEDs is a great way to improve visibility and style, but be sure your car is compatible and you may need to purchase some conversion kits. Consider all of this when selecting the best left headlight assemblies for your ride.
Brightness and Beam Pattern: How Well Will I See at Night?
The whole point of a headlight is to see! So, brightness and beam pattern are incredibly important. You want a headlight that provides ample illumination without blinding other drivers. Look for headlights with a clear, focused beam pattern that projects light far enough down the road. Read reviews and see what other customers say about the brightness and beam pattern of the headlight assembly you’re considering.
Think about where you typically drive. Do you live in a rural area with lots of dark, winding roads? Then you’ll want a brighter headlight with a wider beam pattern. Do you mostly drive in well-lit urban areas? Then you might not need quite as much brightness. Pay attention to the light output (measured in lumens) and the beam pattern description. A well-defined beam pattern will help you see clearly without causing glare for oncoming traffic. Getting the brightness right is key to finding the best left headlight assemblies.
Durability and Weather Resistance: Will it Hold Up to the Elements?
Headlights are exposed to all sorts of weather conditions, from scorching sun to freezing rain. You want a headlight assembly that’s built to last. Look for headlights made from high-quality materials that are resistant to cracking, fading, and water damage. Check for UV protection to prevent the lens from yellowing over time.
I once bought a cheap headlight assembly that looked great at first, but after just a few months, the lens started to crack and yellow. Water got inside, and the bulb eventually burned out. It was a total waste of money. So, invest in a headlight assembly that’s designed to withstand the elements and provide reliable performance for years to come. Look at the materials used in construction and any warranty information offered. Quality matters!
Ease of Installation: Can I Do This Myself?
Replacing a headlight assembly can be a DIY project, but it depends on your mechanical skills and the complexity of your car’s headlight system. Some headlight assemblies are very easy to install, requiring only basic tools and a few minutes of your time. Others may require more specialized tools and expertise.
If you’re not comfortable working on cars, it’s best to have a professional install the headlight assembly. However, if you’re reasonably handy, you can often save money by doing it yourself. Look for headlight assemblies that come with clear installation instructions. Watch some YouTube videos to get a better understanding of the process. And if you get stuck, don’t be afraid to ask for help! But remember, safety first! Disconnect your battery before working on any electrical components. Installation should be easy if you decide on the best left headlight assemblies.
Brand Reputation and Reviews: What Do Other Drivers Say?
Before you commit to buying a particular headlight assembly, take the time to research the brand and read reviews from other customers. A reputable brand is more likely to produce high-quality products that are built to last. Pay attention to reviews that mention durability, brightness, ease of installation, and customer service.
Don’t just rely on the product description. Look for independent reviews on automotive forums and websites. See what real drivers have to say about their experience with the headlight assembly. A few negative reviews are probably nothing to worry about, but if you see a consistent pattern of complaints, it’s a red flag. A well-regarded brand and positive reviews can provide peace of mind knowing you are searching for the best left headlight assemblies.
Price and Warranty: Finding the Sweet Spot
Finally, let’s talk about price and warranty. Headlight assemblies can range in price from relatively inexpensive to quite expensive, depending on the type, brand, and features. Don’t automatically assume that the most expensive headlight is the best. Consider your budget and your needs. Find a headlight assembly that offers a good balance of price, performance, and durability.
A good warranty can provide added peace of mind. Look for headlight assemblies that come with a warranty against defects in materials and workmanship. A longer warranty is usually a sign of a higher-quality product. Read the warranty terms carefully to understand what’s covered and what’s not. Finding the sweet spot between price and warranty is crucial when choosing the best left headlight assemblies.
Frequently Asked Questions
Why should I replace just the left headlight assembly instead of both?
Well, sometimes only one headlight gets damaged! Maybe you had a minor fender bender, or perhaps a rock flew up and cracked just the left lens. If the right headlight is still working perfectly and isn’t showing signs of wear and tear (like yellowing or dimming), replacing only the left one can save you some money. Plus, if the right headlight is relatively new, you might prefer to keep the matching aesthetic.
However, do keep in mind that headlights degrade over time. Even if the right one looks okay now, it might be dimmer than your brand-new left headlight. You might notice a difference in brightness or color between the two. Replacing both at the same time ensures symmetrical light output and a consistent look for your vehicle. It’s something to consider for optimal safety and aesthetics.
What are the key differences between halogen, LED, and HID headlight assemblies?
Think of it like comparing different types of light bulbs for your home, each with its own strengths! Halogen headlights are the most common and typically the most affordable option. They produce a warm, yellowish light and are relatively easy to replace. They’re a reliable, budget-friendly choice.
LED headlights offer a brighter, more focused beam and last much longer than halogens. They also consume less energy. HID (High-Intensity Discharge) headlights, also known as xenon headlights, are even brighter than LEDs and offer a very crisp, white light. They’re often found in higher-end vehicles. Generally, as you move from halogen to LED to HID, you’ll notice improvements in brightness, efficiency, and lifespan, but also a higher price tag.
How do I know which headlight assembly is compatible with my vehicle?
This is super important to get right! The best way to ensure compatibility is to check your vehicle’s owner’s manual or look up the headlight assembly part number online using your vehicle’s year, make, and model. Most auto parts websites have a tool where you can enter your vehicle’s details and it will show you only the parts that fit.
Also, you can often find the part number printed directly on the existing headlight assembly itself. Look closely around the edges or on the back. Once you have that part number, you can confidently search for a replacement. Double-checking before you buy will save you a lot of hassle and ensure a perfect fit.
What tools will I need to replace my left headlight assembly?
Typically, replacing a headlight assembly is a fairly straightforward process! You’ll usually need a basic socket set or wrench set. The size of the socket or wrench will vary depending on your vehicle, so having a set is a good idea. A screwdriver (both Phillips head and flathead) might also be necessary for removing any retaining clips or screws.
It’s also helpful to have a pair of gloves to protect your hands and prevent smudging the new headlight lens. A small pry bar or trim removal tool can be handy for gently removing any plastic trim pieces without damaging them. And don’t forget a flashlight or work light to help you see what you’re doing!
How long does it usually take to replace a headlight assembly?
For most vehicles, replacing a headlight assembly is a manageable DIY project. If you’re comfortable with basic automotive tasks, you can usually expect it to take anywhere from 30 minutes to an hour. Some vehicles might require removing the bumper, which can add some time and complexity.
Of course, the exact time will depend on your experience level and the specific design of your vehicle. Don’t be afraid to watch a few YouTube videos specific to your car model before you start. It’s always better to be prepared! If you’re not confident, a professional mechanic can usually handle it quickly.
What does “DOT approved” mean and why is it important?
“DOT approved” means that the headlight assembly meets the minimum safety standards set by the Department of Transportation (DOT) in the United States. These standards ensure that the headlight provides adequate visibility and doesn’t create excessive glare for other drivers.
Using a DOT-approved headlight is important for a few reasons. First and foremost, it helps ensure your safety and the safety of others on the road by providing proper illumination. Second, many states have laws requiring headlights to be DOT approved, and using a non-compliant headlight could result in a ticket during a vehicle inspection or traffic stop. Think of it as a quality guarantee for road safety!
What should I do if the new headlight assembly doesn’t fit properly?
First, don’t force it! If the headlight assembly doesn’t seem to be fitting correctly, double-check the part number to make sure it’s the correct one for your vehicle. Even if you thought you ordered the right one, mistakes can happen. Revisit the website or your order confirmation to be absolutely sure.
Next, inspect the headlight assembly and the area where it’s supposed to be installed for any obstructions or damage. Sometimes a small piece of debris or a slightly bent bracket can prevent a proper fit. If you’re still having trouble, consider consulting a professional mechanic. They have the experience to identify any underlying issues and ensure a proper installation. Sometimes, a professional touch can make all the difference!
Verdict
So, there you have it! A detailed look at some of the best left headlight assemblies on the market. Hopefully, this guide has given you the clarity and confidence you need to make the right choice for your vehicle. Remember, replacing a headlight isn’t just about fixing a problem; it’s about investing in your safety and the safety of others on the road. It’s about ensuring you can see and be seen, no matter the conditions.
Now, go forth and find the perfect left headlight assembly for your ride! Don’t be afraid to do a little more research, compare prices, and read those customer reviews. With a little effort, you’ll have your car looking its best and shining bright in no time. The open road is calling – get out there and explore it, safely and confidently!