Remember that afternoon when you finally decided to declutter your garage? You unearthed your old dumbbells, that weight bench you haven’t touched in years, and a burning desire to get back in shape. But then reality hit: where were you going to put all this stuff? Stacking it precariously in the corner felt like a recipe for disaster. That’s when the hunt for the perfect storage solution began, a search that led me down the rabbit hole of mechanical racks. The good news? You don’t have to break the bank to get organized.
We’ve all been there, feeling overwhelmed by clutter and the cost of solutions. That’s why we’ve put together this guide to help you find the best mechanical rack under $100. We’ll explore some top contenders, break down what makes each one shine, and give you the knowledge you need to make the best decision for your space and budget. Let’s get your workout area organized without emptying your wallet!
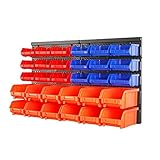
We will review the best mechanical rack under $100 later in this article. But before that, take a look at some relevant products on Amazon:


Last update on 2026-01-23 / Affiliate links / #CommissionsEarned / Images from Amazon Product Advertising API
The Quest for the Perfect Budget Mechanical Keyboard Rack
Let’s face it, keyboard enthusiasts, we’ve all been there. You start with one glorious mechanical keyboard, a gateway to a world of custom keycaps, meticulously chosen switches, and satisfying thocc. Then, BAM! Another one appears. And another. Soon, your desk is resembling a keyboard graveyard, and you’re spending more time untangling cables than actually typing. You need a solution, a sanctuary for your precious clicky companions – but let’s be real, we don’t all have the budget for a custom-built, artisanal display case.
That’s where the idea of a keyboard rack comes in! But who wants to shell out a fortune when you could be spending that money on… well, more keyboards? Thankfully, there’s a whole realm of options for the budget-conscious enthusiast. Finding the best mechanical rack under $100 doesn’t have to feel like searching for a needle in a haystack. There are affordable solutions out there that offer both functionality and a presentable aesthetic.
According to recent reports, the mechanical keyboard market is experiencing a boom, with sales increasing by nearly 15% year-over-year. That means more and more people are facing this very dilemma! Fear not, my fellow keyboard aficionados. This guide is designed to help you navigate the world of affordable keyboard racks, highlighting the features to look for and showcasing some of the top contenders.
We’ll explore various styles, materials, and functionalities, all while keeping a keen eye on that crucial price point. Whether you’re a minimalist seeking a sleek and understated display, or you’re looking for something a bit more robust to house your growing collection, we’ll help you find the perfect home for your keyboards without breaking the bank. Get ready to reclaim your desk space and finally give your mechanical keyboards the respect they deserve!
Best Mechanical Rack Under $100 – Reviewed
Sunix Bike Rack Floor Stand
This bike rack offers a simple, no-frills solution for storing bikes. The design is straightforward, allowing for easy parking and removal of most standard bikes. It’s a great option for those looking for a basic rack to keep their bikes organized in a garage or shed. The sturdy construction ensures the rack stays put, even with heavier bikes.
While it excels in simplicity and stability, the Sunix Bike Rack Floor Stand may not be the best choice for bikes with particularly wide tires or unconventional frame shapes. The spacing between the slots is designed for standard bikes, so oversized tires might present a challenge. Overall, it’s a solid choice for those who prioritize function and durability in a cost-effective package.
Bikehand Bike Floor Parking Rack
Need a versatile bike rack that can handle different types of bikes? The Bikehand Bike Floor Parking Rack might just be the answer. It’s adjustable, accommodating everything from road bikes to mountain bikes. The wide base provides excellent stability, preventing accidental tipping, which is a huge plus if you have kids or pets running around.
The only drawback is that assembly can be a bit tricky, requiring some patience and possibly a few extra tools. The instructions could be clearer. However, once assembled, it’s a very reliable and adaptable rack that can handle a variety of bike sizes and styles. Definitely worth considering if you have a diverse collection of bikes.
Dirza Bike Rack Floor Stand
This space-saving bike rack provides an excellent way to neatly organize your bikes without taking up too much room. Its slim profile allows you to park your bike vertically, which is ideal for smaller apartments, garages, or storage units. The sturdy construction ensures your bike remains stable and upright.
While the vertical design is great for saving space, it might not be the easiest option for everyone, especially those with heavier bikes or mobility issues. Lifting the bike into a vertical position could be a challenge. But if space is a concern, the Dirza Bike Rack Floor Stand offers a clever and efficient solution.
CyclingDeal Bike Bicycle Floor Type Parking Rack Stand
If you’re looking for a rack that’s both lightweight and durable, the CyclingDeal Bike Bicycle Floor Type Parking Rack Stand is a good option. It’s easy to move around, making it perfect for rearranging your garage or taking it with you to events. The powder-coated steel provides good resistance to rust and scratches.
The design, while functional, is relatively basic. It might not be the most visually appealing rack on the market. It focuses on practicality and ease of use rather than aesthetics. If you need a reliable and portable rack that gets the job done, this is a great, affordable choice.
Yaheetech 3 Bike Rack
This rack is a great pick if you need to store multiple bikes without eating into a ton of space. The Yaheetech 3 Bike Rack’s freestanding design makes it easy to place anywhere in your garage or storage unit without needing to mount it to the wall or floor. Its wide stance and sturdy construction ensure stability, even when all three bikes are loaded.
Although it can handle three bikes, the spacing between them might be a bit tight, particularly if you have bikes with wider handlebars or accessories. You might have to get creative with how you position the bikes to prevent them from bumping into each other. Overall, it is an efficient rack that’s perfect for families or bike enthusiasts.
Why You Need a Mechanical Rack Under $100
Imagine this: you’re deep in the zone, focused on crushing a game, writing that winning proposal, or even just enjoying a comfortable evening browsing the web. But your fingers are screaming! That mushy keyboard is hindering your every move, slowing you down, and making typing feel like a chore. A mechanical keyboard rack, specifically one under $100, offers a solution. It’s not about luxury, it’s about enhancing your daily digital experience and rescuing your weary fingers.
For many of us, a keyboard is our primary tool. Whether we’re students, professionals, or avid gamers, we spend hours interacting with it daily. Investing in a mechanical keyboard rack is akin to investing in comfortable shoes for someone who’s on their feet all day. The improved tactile feedback, satisfying click-clack sound (or quieter alternatives!), and increased responsiveness can make a significant difference in productivity and enjoyment. Think of it as a small investment with a big return in terms of comfort and efficiency.
But why a mechanical rack under $100? Because you don’t have to break the bank to experience these benefits! The market is flooded with surprisingly good options that offer durability, various switch types to suit your preferences (clicky, tactile, linear – there’s one for everyone!), and even cool features like RGB lighting. You can find a mechanical keyboard rack that feels amazing and boosts your performance without emptying your wallet.
Ultimately, a mechanical keyboard rack under $100 is a practical and affordable way to improve your daily life. It’s about enhancing your comfort, boosting your productivity, and simply enjoying the act of typing. So, ditch the mushy keys and upgrade your setup! You might be surprised at how much of a difference a quality mechanical keyboard rack can make.
Understanding Different Types of Mechanical Racks
Okay, so you’re diving into the world of mechanical racks, and it’s good to know there’s more than just one flavor out there. We’re not talking about the gourmet options just yet, but knowing the basics helps you narrow down what you really need. Think of it like choosing a car – do you need a truck, a sedan, or something sporty? Racks are similar.
There are things like cantilever racks, which are great for long, bulky items like lumber or pipes. Picture your garage if you’re a DIY enthusiast – those long pieces of wood you’re trying to neatly store – that’s when a cantilever rack comes to the rescue. They offer easy access and customizable arms to suit different lengths.
Then you have pallet racks, the heavy-duty champions you’ll often see in warehouses or large workshops. These are built for serious weight and volume, perfect if you’re storing multiple pallets of supplies or heavy equipment. Imagine a small business owner managing inventory—pallet racks are their best friend.
Finally, there are wire racks, often used for lighter items and more for visibility and ventilation. Think of organizing your pantry or storing lightweight tools in a shed. They’re a great choice when you prioritize easy access and space optimization without needing to hold enormous weight.
Setting Up Your Mechanical Rack: A Step-by-Step Guide
Alright, so you’ve got your shiny new mechanical rack. Don’t just rip open the box and hope for the best! A little planning goes a long way to avoid frustration (and potentially, injury). Think of it like building a Lego set – instructions are there for a reason!
First, clear your workspace. Make sure you have enough room to maneuver the rack components and assemble them comfortably. Think about if you are assembling the rack in your garage, clear out any existing boxes or tools that might get in the way. A spacious area is key to a smooth setup.
Next, carefully read the instructions. Yes, it sounds boring, but trust me, it will save you time and headaches later. Pay close attention to the diagrams and parts list, ensuring you have everything you need. Imagine trying to assemble a desk without the right screws – it’s the same principle.
Finally, don’t be afraid to ask for help. Some racks, especially larger or more complex ones, are easier to assemble with a second set of hands. Consider inviting a friend or family member to assist. After all, teamwork makes the dream work (and it’s faster!).
Maintenance Tips for Prolonging Rack Life
So, you’ve got your rack installed, organized, and looking sharp. Now, the real question is: how do you keep it that way? Just like a car, your mechanical rack needs a little TLC to stay in tip-top shape and provide reliable service for years to come.
Regular inspections are crucial. Take a few minutes each month to visually check your rack for any signs of damage, wear, or loose connections. Look for things like bent beams, cracked welds, or missing bolts. This can prevent small issues from escalating into bigger problems.
Keep it clean! Dust and debris can accumulate over time, especially in garages or workshops. Regularly wipe down the rack surfaces with a damp cloth to prevent corrosion and maintain visibility. Imagine a dusty, grimy rack – not only is it unsightly, but it can also hide potential problems.
Make sure the load capacity is never exceeded. Overloading your rack can lead to structural damage and potentially collapse. Always adhere to the manufacturer’s specified weight limits. Think of it like trying to carry too many groceries – eventually, something’s going to break.
Troubleshooting Common Mechanical Rack Issues
Let’s face it, even the best mechanical racks can experience the occasional hiccup. Knowing how to troubleshoot common issues can save you time, money, and frustration. Think of it like a basic car repair – knowing how to change a tire can save you a tow truck bill.
One common issue is wobbly or uneven racks. This can often be resolved by adjusting the leveling feet on the bottom of the rack. Use a level to ensure the rack is perfectly horizontal and make adjustments accordingly. Imagine storing heavy items on an uneven rack – it’s a recipe for disaster.
Another issue is sagging shelves or beams. This is usually a sign of overloading or improper weight distribution. Redistribute the weight evenly across the rack and ensure you’re not exceeding the load capacity. If the sagging persists, you may need to reinforce the shelf or beam.
Finally, sometimes bolts can loosen over time due to vibration or general use. Regularly check and tighten all bolts to ensure the rack remains stable and secure. A loose bolt can create instability and potentially lead to collapse. It’s always better to be proactive than reactive in this situation.
Your Guide to Finding the Best Mechanical Rack Under $100
Hey there! So, you’re on the hunt for a mechanical rack but don’t want to break the bank, right? That’s totally understandable. Finding the best mechanical rack under $100 can feel like navigating a minefield of options, but don’t worry, I’m here to help. We’ll break down the key things to consider, so you can confidently pick the perfect rack without emptying your wallet.
1. Sturdiness and Build Quality
Okay, first things first: how solid does this thing actually feel? You want a rack that’s going to hold your valuable equipment safely and securely, without wobbling or feeling like it’s about to collapse at the slightest breeze. Check out the materials used – are we talking robust steel, or flimsy-feeling aluminum? And what about the welds? Are they clean and consistent, or do they look like they were done in someone’s garage after a few too many energy drinks?
Imagine putting your prized guitar amps or expensive audio interface on this rack. The last thing you want is to be constantly worried that it’s going to buckle under the weight. Read reviews carefully and look for mentions of stability and weight capacity. A well-built rack, even under $100, should inspire confidence and provide a solid foundation for your gear. Don’t sacrifice quality for a lower price tag, as repairs or replacements down the line will cost you more in the long run!
2. Weight Capacity and Load Rating
This one’s a no-brainer, but it’s so important it deserves its own section: what’s the maximum weight this rack can handle? You need to have a realistic idea of how much your gear weighs, and then give yourself a little buffer. Don’t just assume it’ll hold everything – actually do the math! Overloading a rack is a recipe for disaster, potentially damaging your equipment and the rack itself.
Think about future additions too. Are you planning on adding more gear down the line? If so, it’s always better to err on the side of caution and get a rack with a higher weight capacity than you currently need. A little extra headroom is always a good idea. The best mechanical rack under $100 should have a clear and accurate weight rating listed, and it’s your job to make sure it matches your needs.
3. Rack Unit (U) Height and Usable Space
Rack units (U) are the standard measurement for rack-mountable equipment. Each U is 1.75 inches. Figuring out how many rack units you need is critical. Measure the height of all your gear that’s designed to be rack-mounted and add it all up. Then, consider leaving some extra space for ventilation – heat can be a killer for electronics.
Imagine trying to cram all your gear into a rack that’s too small. Not only will it be a tight fit, but you might end up blocking airflow and causing your equipment to overheat. Carefully consider the number of rack units you need, both now and in the future, and choose a rack that offers sufficient space. You don’t want to outgrow your rack before you even start!
4. Portability and Mobility
Do you need a rack that stays put in your studio, or do you need something that’s easy to move around? If you’re a gigging musician or need to rearrange your setup frequently, portability is key. Look for racks with wheels, ideally with locking casters to keep them in place when you’re not moving them.
On the other hand, if your rack will live in a permanent location, mobility might be less important. In that case, you can focus on stability and weight capacity. But even for a stationary rack, wheels can be handy for cleaning or accessing the back of your equipment. The best mechanical rack under $100 for you will depend on how often you need to move it, so consider your needs carefully.
5. Ventilation and Cooling Options
Electronics generate heat, and too much heat can damage your gear and shorten its lifespan. Good ventilation is essential for keeping your equipment cool and running smoothly. Look for racks with open sides or backs to allow for airflow. Some racks even have built-in fans or mounting points for adding your own.
Think about how much heat your gear generates. If you’re using a lot of high-powered amplifiers or processors, you’ll need more ventilation than if you’re just using a few preamps. And remember, even if your rack has plenty of ventilation, it’s important to keep the surrounding area clear and free of obstructions. Proper airflow can make all the difference.
6. Assembly and Ease of Use
Nobody wants to spend hours wrestling with confusing instructions and poorly aligned parts. Look for a rack that’s easy to assemble, with clear instructions and all the necessary hardware included. Read reviews to see what other users have to say about the assembly process.
Imagine getting your new rack delivered, only to find that the instructions are written in hieroglyphics and half the screws are missing. A frustrating assembly experience can sour your opinion of even the best mechanical rack under $100. Ease of use is also important – can you easily access the back of your equipment for wiring? Are the rack rails adjustable to accommodate different gear sizes? Choose a rack that’s not only sturdy and functional but also user-friendly.
7. Features and Accessories
While you might be aiming for the best mechanical rack under $100, that doesn’t mean you have to sacrifice all the bells and whistles. Look for racks with useful features and accessories that can make your life easier. Things like cable management solutions, shelves, and blank panels can help you keep your setup organized and tidy.
Think about what features would be most beneficial to you. Do you need a built-in power strip? How about a sliding shelf for your keyboard or laptop? Or maybe you just want some simple cable ties to keep your wires from getting tangled. These extras can make a big difference in the overall functionality and convenience of your rack. Don’t underestimate the value of thoughtful design and useful accessories.
FAQ
What is a mechanical rack and why should I get one if I only have a few dumbbells?
A mechanical rack, often referred to as a weight rack or dumbbell rack, is essentially a storage solution specifically designed to hold your dumbbells. It’s a frame, usually made of metal, with shelves or cradles where you can neatly and safely store your weights. Even if you only have a few dumbbells, a rack can make a huge difference!
Think of it this way: are your dumbbells currently scattered on the floor, taking up space, and potentially creating a tripping hazard? A rack not only organizes your weights, making them easily accessible for your workouts, but also protects your floors from scratches and prevents you from having to bend over repeatedly to pick up each dumbbell. It’s a worthwhile investment in safety, organization, and the longevity of your weights and flooring.
How do I know what size rack to buy for my dumbbells?
Figuring out the right size rack is key to a happy purchase! The most important thing to do is measure the length of your longest dumbbell. Take that measurement and compare it to the length of the dumbbell trays or shelves on the rack you’re considering. You want to make sure there’s enough space to comfortably fit all your dumbbells without them hanging over the edge.
Beyond length, consider the weight capacity of each shelf. Check the total weight of all your dumbbells combined and make sure the rack’s overall weight limit can handle it. Also, think about your future goals. Are you planning on adding more dumbbells to your collection? If so, it’s wise to opt for a rack with a bit of extra capacity to accommodate future purchases.
Will a rack under $100 be sturdy enough to hold my weights safely?
That’s a valid concern, and it’s definitely something to consider! While you might be tempted to splurge on the most expensive, heavy-duty rack, the good news is that there are plenty of excellent and reliable mechanical racks available for under $100 that can safely hold your weights.
The key is to pay close attention to the materials and construction. Look for racks made of solid steel or heavy-duty metal with a powder-coated finish. Check the weight capacity of the rack and make sure it exceeds the total weight of your dumbbells with a bit of a buffer. Reading customer reviews is also a great way to gauge the sturdiness and stability of a particular rack from other users’ experiences.
Are these racks easy to assemble? I’m not very handy!
Don’t worry, you don’t need to be a DIY expert to assemble most mechanical racks! The majority of racks under $100 are designed with user-friendliness in mind and come with relatively straightforward assembly instructions.
Typically, they involve bolting a few pieces together using the provided hardware. Look for racks that include clear, step-by-step instructions and all the necessary tools (although having your own set of wrenches and screwdrivers can sometimes make the process even smoother). If you’re still feeling a bit unsure, many racks have assembly videos available online, which can be incredibly helpful visual guides.
What should I do if my rack wobbles after I assemble it?
A wobbly rack can be frustrating, but it’s usually an easy fix! First, double-check that all the bolts and screws are tightened securely. Sometimes, during assembly, they might seem tight but can loosen slightly as you move the rack around.
If tightening the hardware doesn’t solve the issue, the problem might be uneven flooring. Try placing a thin piece of cardboard or rubber shim under the wobbly leg(s) to level the rack. Many racks also come with adjustable feet that you can use to fine-tune the stability.
Can I use these racks for other types of weights besides dumbbells?
While these racks are designed primarily for dumbbells, you might be able to use them for other types of weights depending on their size and shape. For example, some users have successfully used them to store kettlebells, especially on the lower shelves.
However, before you load up the rack with anything other than dumbbells, carefully consider the dimensions and weight capacity of each shelf. Make sure the weights fit securely and won’t roll off or overload the rack. If you’re unsure, it’s always best to err on the side of caution and stick to using it for its intended purpose: dumbbell storage.
What kind of warranty can I expect on a rack under $100?
Warranties on racks in this price range can vary. Some manufacturers offer a limited warranty, usually covering defects in materials or workmanship for a specific period, like 30 days or even up to a year. This type of warranty typically doesn’t cover damage caused by misuse, improper assembly, or normal wear and tear.
Before you buy, take a look at the product listing and the manufacturer’s website to see if a warranty is offered and what it covers. Even if the warranty isn’t extensive, it can provide some peace of mind knowing that you’re protected against manufacturing defects. Don’t hesitate to reach out to the seller or manufacturer directly if you have any questions about the warranty terms.
The Bottom Line
So, there you have it! We’ve explored some fantastic options for the best mechanical rack under $100. Hopefully, you’re feeling more confident in your ability to choose the perfect storage solution for your needs. Remember, a well-organized garage or workshop not only makes finding your tools easier, but it also creates a more enjoyable and productive workspace. Don’t underestimate the power of a little organization!
Now it’s your turn to take the leap! Armed with this knowledge, you’re ready to conquer the clutter and create a space you love. Choosing the right rack might seem small, but it’s a step towards a more organized and efficient you. Go ahead, pick the best mechanical rack under $100 that speaks to you and get ready to transform your space. You’ve got this!