Remember that beach vacation last year? I spent weeks dreaming of that golden glow, only to return home resembling a pale ghost. Sunbathing? Not worth the wrinkles! Tanning beds? Absolutely not. That’s when my quest for the perfect faux tan began. After countless streaks, orange hues, and questionable smells, I finally found my holy grail: self-tanner mousse. It’s lightweight, easy to apply, and gives me that sun-kissed radiance without the damage. If you’re like me and crave that bronzed goddess look without risking your skin’s health, you’ve come to the right place.
Finding the best self-tanner mousse can feel overwhelming with all the options on the market. But don’t worry, I’ve done the hard work for you! This guide is packed with honest reviews, helpful tips, and everything you need to know to achieve a flawless, natural-looking tan at home. Get ready to ditch the sun damage and say hello to a beautiful, bronzed you!
We will review the best self-tanner mousse later in this article. But before that, take a look at some relevant products on Amazon:


Last update on 2026-04-09 / Affiliate links / #CommissionsEarned / Images from Amazon Product Advertising API
Chasing the Sun-Kissed Dream: A Guide to Self-Tanner Mousse
Remember those endless summer days spent basking in the sun, emerging with a gorgeous, golden glow? We all crave that radiant look, but let’s face it, the sun isn’t always our friend. Years of sunbathing can lead to premature aging and, more seriously, increase the risk of skin cancer. Thankfully, there’s a safer, more convenient way to achieve that coveted tan: self-tanner, and specifically, self-tanner mousse.
For many of us, the journey to finding the perfect faux tan has been… eventful. Streaky legs, orange palms, questionable odors – we’ve been there! But fear not, dear reader, because the world of self-tanning has evolved dramatically. In fact, according to a recent report, the self-tanning product market is projected to reach over $1.5 billion by 2028, demonstrating just how popular and sophisticated these products have become. The secret to a flawless, natural-looking tan often lies in the application method and the formulation, and that’s where mousse comes in.
So, what makes mousse the “it” product? Well, the airy, lightweight texture makes it incredibly easy to apply evenly. Unlike lotions or creams, mousse absorbs quickly, minimizing the chances of streaks and blotches. Many formulas are also tinted, allowing you to see exactly where you’re applying the product, further enhancing accuracy. And with so many brands now offering natural and organic options, you can achieve a stunning tan without compromising on your skin’s health.
Think of this guide as your trusty companion on the quest for the best self-tanner mousse. We’ll dive into what to look for, how to apply it like a pro, and, of course, our top picks for achieving that sun-kissed perfection, all year round. Get ready to say goodbye to pale skin and hello to a confident, glowing you!
5 Best Self-Tanner Mousse
St. Tropez Self Tan Classic Bronzing Mousse
This mousse is a cult classic for a reason! It delivers a natural-looking, golden tan that’s believable and not at all orange. Application is a breeze thanks to its lightweight texture, and the guide color ensures you don’t miss any spots. It dries relatively quickly, so you won’t be stuck waiting forever to get dressed.
The tan develops beautifully over several hours, leaving you with a streak-free, sun-kissed glow. It’s also relatively forgiving, so even beginners can achieve great results. The scent is pleasant, unlike some other self-tanners that can have a chemical odor. Expect the tan to last for about a week with proper moisturizing.
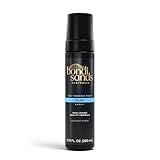
Bondi Sands Self Tanning Foam – Dark
Craving a deep, bronzed look? This self-tanning foam is a top contender. It’s specifically formulated for those who want a noticeably darker tan, mimicking the results of spending days in the sun (without the sun damage, of course!). The coconut scent is heavenly, making the application process a more enjoyable experience.
While this mousse is designed for a darker tan, it still manages to look natural and even. The color develops evenly, leaving you with a beautiful, rich bronze. Be sure to exfoliate well beforehand to ensure a smooth and even application. It may require a bit more effort to blend properly compared to lighter formulas, but the results are definitely worth it for those seeking a deeper tan.
Loving Tan Deluxe Bronzing Mousse – Dark
For a luxurious tanning experience and a deep, rich color, look no further. This mousse is known for its intense color payoff and its ability to deliver a long-lasting tan. The guide color is dark, allowing you to see exactly where you’ve applied the product, minimizing the risk of streaks or missed spots.
Although pricier than some other options, many users believe it’s worth the investment. The formula is enriched with moisturizing ingredients, leaving the skin feeling hydrated and soft. The tan fades evenly over time, without the dreaded patchy appearance. The result is a flawless, sun-kissed glow that will have everyone asking where you’ve been vacationing.
Coco & Eve Sunny Honey Bali Bronzing Foam
This tanning foam smells absolutely divine! The tropical fragrance will transport you to a sunny beach, making the tanning process feel like a mini-vacation. But it’s not just about the scent; the formula is infused with nourishing ingredients like coconut oil and mango extract, leaving your skin feeling hydrated and healthy.
The mousse delivers a natural-looking, bronzed glow that develops gradually. It’s easy to apply and dries quickly, making it a convenient option for those who are short on time. The color is buildable, so you can customize the intensity of your tan to your liking. Plus, it’s vegan and cruelty-free, making it a guilt-free choice.
Isle of Paradise Self-Tanning Mousse – Dark
If color correcting is your thing, you’ll love this mousse. It contains color-correcting actives that are designed to neutralize any unwanted tones in your skin, leaving you with a perfectly balanced tan. The green shade counteracts redness, the peach shade brightens dullness, and the violet shade neutralizes yellow undertones.
The mousse is lightweight and easy to apply, and the guide color ensures you don’t miss any spots. The scent is pleasant and subtle, and the tan develops evenly over several hours. It’s a good option for those with sensitive skin, and it leaves a gorgeous, believable dark tan.
Why Do People Need to Buy Self-Tanner Mousse?
Let’s face it, everyone loves that sun-kissed glow. It makes us look healthier, more vibrant, and just plain good! But let’s also be real – baking in the sun or frequenting tanning beds isn’t the safest or most practical way to achieve it. Sun damage is a serious concern, and who has the time (or money!) for constant salon visits? That’s where the magic of self-tanner mousse comes in. It’s a safe, affordable, and convenient way to get that gorgeous tan without the risks.
Imagine this: You have a big event coming up, maybe a wedding, a vacation, or even just a night out with friends. You want to feel confident and look your best. With the “best self-tanner mousse,” you can achieve a flawless tan in the comfort of your own home. No streaky orange skin, just a natural-looking bronze that will have everyone asking where you’ve been vacationing. It’s your secret weapon for a boost of confidence anytime you need it.
Think about the possibilities! You can finally wear that little black dress without feeling self-conscious about your pale legs. You can rock a swimsuit without feeling like you’re blinding everyone with your winter skin. And the best part? You’re doing it all safely and responsibly, protecting your skin from harmful UV rays. Self-tanner mousse empowers you to control your look and feel amazing without compromising your health.
Investing in the “best self-tanner mousse” is investing in yourself. It’s about feeling confident, looking radiant, and taking care of your skin. It’s a game-changer for anyone who wants to achieve a beautiful, natural-looking tan without the risks of traditional sun exposure. So go ahead, treat yourself! You deserve to glow.
How to Prep Your Skin for the Perfect Tan
Okay, so you’ve got your self-tanner mousse picked out – excellent choice! But hold on a second. Think of your skin as a canvas. You wouldn’t paint a masterpiece on a dirty, uneven surface, right? Same goes for self-tanner. Proper skin prep is the difference between a flawless, natural-looking glow and a patchy, orange mess. Trust me, spending a little time prepping beforehand will save you tons of frustration (and potential scrubbing!) later.
First things first: exfoliation is key. This is where you gently buff away dead skin cells, creating a smooth, even surface for the mousse to adhere to. Think of it like sanding down wood before staining it. Exfoliating not only helps your tan look more even but also helps it last longer since you’re not tanning dead skin that’s about to flake off anyway. Use a gentle scrub, an exfoliating mitt, or even a dry brush – just be sure not to overdo it!
Next up, shaving or waxing. If you plan to remove any unwanted hair, do it at least 24 hours before applying your self-tanner. This gives your pores time to close and prevents those pesky dark dots from appearing. Shaving right before tanning can lead to irritation and uneven color absorption, especially around sensitive areas like your underarms and bikini line. Planning ahead is your best bet here.
Finally, moisturizer is your friend, but only in moderation. Avoid applying heavy lotions or oils right before tanning, as they can create a barrier that prevents the mousse from properly developing. However, lightly moisturizing dry areas like your elbows, knees, and ankles can help prevent the tan from clinging too much to these spots and looking unnaturally dark. A light, water-based lotion is perfect for this step!
Application Techniques for a Streak-Free Finish
Alright, you’ve got your prepped skin, your chosen mousse, and your mitt – let’s get tanning! Application is arguably the most crucial step, and a little practice can make a world of difference. Remember that time you tried to bake a cake without reading the instructions? Learning proper techniques will help you avoid the dreaded orange palms and streaky legs.
Start with small, even sections. Don’t try to cover your entire arm or leg in one go. Instead, work in sections, like your lower leg, upper leg, forearm, upper arm. This allows you to control the amount of mousse you’re applying and ensures even coverage. Use long, sweeping motions with your tanning mitt to blend the mousse seamlessly into your skin. Think of it like painting a wall – you want a smooth, consistent finish.
Don’t forget the tricky areas. Ankles, knees, elbows, and hands are notorious for absorbing too much product and ending up looking much darker than the rest of your body. To avoid this, use the leftover mousse on your mitt to lightly blend these areas. Avoid applying a full pump of mousse directly to these spots. Less is definitely more when it comes to these areas.
And what about the back? This can be a real challenge, especially if you’re tanning solo. Investing in a back applicator is a game-changer, as it allows you to reach those hard-to-reach spots without contorting yourself into uncomfortable positions. Alternatively, you can enlist the help of a friend or family member to ensure even coverage. Just make sure they know what they’re doing!
Finally, don’t rush the drying process. Give your tan at least 10-15 minutes to dry completely before getting dressed. Wear loose, dark clothing to avoid transferring the mousse onto your clothes. And for extra precaution, avoid activities that will cause you to sweat, like working out, until after you’ve showered off the guide color. Patience is key to a perfect tan.
Maintaining Your Glow: Tips for Longevity
You’ve achieved that beautiful, sun-kissed glow – congratulations! Now, the real challenge begins: keeping it looking fresh for as long as possible. Think of your self-tan as a delicate flower – it needs to be nurtured and cared for to thrive. Neglecting your tan can lead to premature fading, patchiness, and a generally lackluster appearance. But with the right maintenance routine, you can extend the life of your tan and keep that radiant glow going strong.
Moisturize, moisturize, moisturize! Dry skin is the enemy of a self-tan. When your skin is dry, it tends to flake off more quickly, taking your tan with it. Applying a generous layer of moisturizer, preferably an oil-free formula, twice a day will keep your skin hydrated and help your tan last longer. Pay special attention to those areas that are prone to dryness, like your elbows, knees, and ankles.
Avoid harsh exfoliants. While exfoliating is important for prepping your skin before tanning, it’s a no-no after you’ve applied your self-tanner. Harsh scrubs and abrasive cleansers will strip away the top layer of your skin, taking your tan with it. Opt for gentle, hydrating cleansers and avoid using washcloths or loofahs that can be too rough on your skin.
Be mindful of your activities. Certain activities can accelerate the fading of your self-tan. Long, hot showers or baths, swimming in chlorinated pools or saltwater, and excessive sweating can all contribute to a shorter-lived tan. If you’re going swimming, try applying a waterproof sunscreen or barrier cream to protect your tan. And after showering or swimming, always pat your skin dry instead of rubbing it.
Consider a tan extender. These products are specifically designed to prolong the life of your self-tan. They typically contain a small amount of tanning agent that gradually builds up your color, helping to keep your tan looking fresh and vibrant for longer. Apply a tan extender every few days to maintain your desired level of color.
Troubleshooting Common Self-Tanning Problems
Even with the best preparation and application techniques, self-tanning mishaps can happen. It’s like when you’re driving and a tire blows out. The good news is that most self-tanning problems are easily fixable. From streaks to dark spots, here’s how to handle some common self-tanning situations.
Streaks are a common frustration. If you notice streaks after applying your self-tanner, don’t panic! The first step is to gently exfoliate the affected area. Use a gentle scrub or a washcloth to buff away the excess product. If the streaks are particularly stubborn, try applying a mixture of baking soda and lemon juice to the area. Let it sit for a few minutes, then rinse with warm water.
What about dark spots or uneven color? These often occur on dry areas like elbows, knees, and ankles. To lighten these areas, try applying a small amount of lemon juice or hydrogen peroxide. Let it sit for a few minutes, then rinse with warm water. Be careful not to overdo it, as these ingredients can be drying. You can also try using a tanning eraser product that helps to specifically remove unwanted color.
Orange palms are a classic self-tanning blunder. If you’ve accidentally stained your palms, don’t worry, it happens to the best of us! The best way to remove self-tanner from your hands is to wash them thoroughly with soap and water, using a scrub brush or exfoliating glove. You can also try using a mixture of baking soda and lemon juice, or a dedicated tanning remover.
And finally, what if you just want to remove the tan completely? Sometimes, you might just decide that you want to get rid of your self-tan altogether. In this case, exfoliation is your best friend. Take a long, hot bath or shower and use a loofah or exfoliating scrub to gently buff away the tan. You can also try using a tanning remover product, which is specifically designed to dissolve self-tanner. Repeat this process daily until the tan has completely faded.
The Ultimate Guide to Finding Your Best Self-Tanner Mousse
Hey there, sun-kissed seeker! Ready to ditch the harmful rays but still rock that radiant glow? Then you’re in the right place. We’re diving deep into the world of self-tanner mousse, and trust me, it can be a jungle out there. With so many options promising bronzed perfection, how do you choose the best self-tanner mousse for you? Don’t worry, consider me your friendly guide, here to help you navigate the shelves (virtual or real!) and find the perfect formula to achieve your dream tan. Let’s get started, so you can look like you’ve spent a week in the Bahamas, without ever leaving your bathroom!
Skin Tone and Desired Shade: Match Made in Tanning Heaven
Think of your skin tone like the blank canvas for your tanning masterpiece. A very fair complexion will react differently to a mousse than a medium or olive skin tone. Going too dark too fast can result in an unnatural orange hue – nobody wants to look like a walking Cheeto! Most mousses come in light, medium, and dark shades. If you’re fair, start with a light or medium shade and build gradually. It’s always easier to add more color than to take it away.
Consider what kind of tan you are dreaming of. Are you aiming for a subtle, sun-kissed glow, or a deep, bronzed goddess vibe? A lighter shade applied liberally can achieve a sun-kissed look, whereas dark shades are designed for that deep bronze. If you’re unsure, err on the side of caution and choose a lighter shade. You can always layer the product for a deeper tan on subsequent applications. Finding the best self-tanner mousse also depends on finding the best shade for your skin.
Ingredient List: What’s In That Bottle?
Just like with skincare, the ingredients in your self-tanner mousse matter. Pay close attention to the active tanning ingredient, typically Dihydroxyacetone (DHA). DHA reacts with the amino acids in the outermost layer of your skin to create that tanned appearance. The concentration of DHA will influence the depth of the tan, so look for a lower percentage for a lighter tan and a higher percentage for a darker tan. Also, keep an eye out for hydrating ingredients like hyaluronic acid, glycerin, and aloe vera. These will help prevent your skin from drying out, which can lead to a patchy tan.
On the flip side, be wary of ingredients like parabens, sulfates, and artificial fragrances, especially if you have sensitive skin. These can cause irritation or allergic reactions. Many brands now offer organic or natural self-tanner mousses that are free of harsh chemicals. Reading the ingredient list is crucial for finding a product that’s not only effective but also safe and gentle on your skin. After all, the best self-tanner mousse is one that you feel good about putting on your body.
Formula and Texture: Mousse vs. Lotion vs. Spray – Why Mousse Wins!
Self-tanners come in various forms, but mousse is a popular choice for a reason. Its light and airy texture makes it easy to apply evenly, reducing the risk of streaks. The airy foam allows for quick absorption and dries down relatively fast. Compared to lotions, mousses are generally less sticky and greasy, which is a huge plus, especially during warmer months. Sprays can be messy and often require assistance to reach those tricky areas like your back.
The best self-tanner mousse will have a smooth, velvety texture that glides effortlessly over the skin. It shouldn’t be too watery or too thick. Look for a mousse that has a slight tint or guide color. This helps you see where you’ve already applied the product, ensuring even coverage and preventing missed spots. The tint washes off when you shower, leaving behind your gorgeous tan.
Scent: Bye-Bye Biscuit Smell!
Let’s be honest, the dreaded “self-tanner smell” is a major concern for many. That distinctive, slightly musty odor comes from the DHA interacting with your skin. Thankfully, brands have come a long way in masking this scent with pleasant fragrances.
Look for self-tanner mousses that are infused with natural fragrances like coconut, vanilla, or citrus. These scents can help to neutralize the DHA smell and leave you smelling fresh and clean. Read reviews to see what other users have to say about the scent of a particular mousse. Finding a self-tanner mousse that smells good is half the battle! Nobody wants to walk around smelling like old biscuits all day!
Application Method: Gloves Are Your Friends!
Even the best self-tanner mousse can turn into a disaster if applied incorrectly. Always, always, always use a tanning mitt! This will protect your hands from staining and ensure a streak-free application. Apply the mousse in circular motions, working in small sections. Start with your legs, then move up to your torso and arms. Don’t forget to blend the product well around your ankles, knees, elbows, and wrists – these areas tend to absorb more product and can end up looking darker if you’re not careful.
For your face, use a small amount of mousse or opt for a specific self-tanning product formulated for the face. Blend well around your hairline and ears. Allow the mousse to dry completely before getting dressed, and avoid sweating or showering for the recommended time (usually 6-8 hours, or overnight). Remember, patience is key to achieving a flawless, even tan. The best self-tanner mousse, applied with the right technique, can give you a professional-looking tan at home.
Longevity and Fade: How Long Will Your Glow Last?
The longevity of your tan will depend on several factors, including the DHA concentration of the mousse, your skin type, and your skincare routine. Generally, a good self-tanner mousse should last for 5-7 days with proper care. Exfoliating regularly before applying the mousse will create a smooth canvas and help the tan last longer.
Moisturizing daily after applying the mousse is crucial for maintaining your tan. Hydrated skin holds onto the color better, preventing it from fading unevenly. Avoid harsh soaps, exfoliants, and prolonged exposure to water, as these can strip away your tan. When your tan starts to fade, exfoliate gently to remove any dead skin cells and prepare for your next application. The best self-tanner mousse will fade gradually and evenly, without leaving you with patchy or streaky skin.
Price and Value: Getting the Most Bronzed Bang for Your Buck
Self-tanner mousses range in price from budget-friendly to high-end. While it’s tempting to go for the cheapest option, remember that you often get what you pay for. A more expensive mousse might contain higher-quality ingredients, have a better scent, and last longer, making it a better value in the long run.
Consider the size of the bottle and how often you’ll be using the mousse. If you’re a frequent tanner, a larger bottle might be more economical. Read reviews to see what other users have to say about the value of a particular mousse. Does it deliver on its promises? Does it last a long time? Is it easy to apply? Ultimately, the best self-tanner mousse is one that fits your budget and meets your needs. It’s about finding that sweet spot between price and performance, ensuring you get a beautiful, natural-looking tan without breaking the bank.
FAQs
What exactly is self-tanner mousse, and why should I choose it over other types?
Self-tanner mousse is basically a lightweight, foamy formula designed to give you a sun-kissed glow without the sun damage. It’s popular because it’s generally easy to apply, dries quickly, and often gives you a really natural-looking tan. The airy texture helps it spread evenly, which can reduce the risk of streaks if you’re diligent with your application!
Compared to lotions or sprays, mousse often feels lighter on the skin and can be less sticky. Plus, many mousses come with a guide color (a temporary tint), so you can see exactly where you’ve applied the product. This helps ensure even coverage and avoid those dreaded patchy spots. It’s a great option, particularly for beginners, to achieve that perfect bronzed look!
I’m worried about ending up orange! How can I avoid that tell-tale self-tan look?
I totally get your concern! Nobody wants to look like an Oompa Loompa. The key to avoiding that orange tint is all about preparation, application, and choosing the right product for your skin tone. Exfoliate thoroughly before applying to remove dead skin cells, and moisturize dry areas like elbows, knees, and ankles, as these tend to absorb more color.
Make sure you’re selecting a mousse formulated for your skin tone – fair, medium, or dark. Applying too much product, or a shade that’s too dark for you, is a recipe for orange-ness! Use a tanning mitt for even application and blend well, paying special attention to those problem areas. Also, rinse off at the recommended time – leaving it on longer doesn’t necessarily mean a darker tan, it might just mean an orange one!
How do I apply self-tanner mousse for the best results?
Alright, let’s get into the application process. First things first, make sure you’ve exfoliated and moisturized those dry areas I mentioned before. Pump a small amount of mousse onto your tanning mitt – don’t go overboard, you can always add more! Then, use long, sweeping motions to apply the mousse to your body, working in sections.
It’s super important to blend, blend, blend! Pay extra attention to areas like your wrists, ankles, and knees, where the tan tends to build up. Once you’ve covered your entire body, double-check for any missed spots and blend those in too. Let the mousse dry completely before getting dressed, and avoid showering for the recommended time (usually 6-8 hours).
What ingredients should I look for (or avoid) in a self-tanner mousse?
When choosing a self-tanner mousse, it’s a good idea to keep an eye out for ingredients that are beneficial for your skin. Look for moisturizing ingredients like aloe vera, hyaluronic acid, or vitamin E to help keep your skin hydrated and prevent it from drying out. Some mousses also contain antioxidants, which can protect your skin from free radical damage.
On the other hand, you might want to avoid products that contain harsh chemicals like parabens, sulfates, or artificial fragrances, especially if you have sensitive skin. These ingredients can sometimes cause irritation or allergic reactions. If you’re unsure, it’s always a good idea to do a patch test on a small area of your skin before applying the mousse all over your body.
How long will my self-tan last, and how can I make it last longer?
The longevity of your self-tan depends on several factors, including the product you use, your skin type, and how well you care for your tan. Generally, a self-tan from a mousse will last anywhere from 5 to 10 days. To prolong your tan, avoid harsh soaps, exfoliating scrubs, and anything that will cause your skin to shed quickly.
Keeping your skin moisturized is absolutely key to making your tan last. Apply a hydrating lotion or body oil every day to prevent your skin from drying out and flaking. Also, be gentle when drying off after showering – pat your skin dry instead of rubbing it vigorously. And, of course, reapply your self-tanner every few days to maintain that golden glow!
What if I mess up my self-tan? How can I fix streaks or uneven patches?
Don’t panic! We’ve all been there. If you end up with streaks or uneven patches, there are a few things you can try. One option is to use an exfoliating scrub to gently buff away the excess tan in the affected areas. You can also try using a lemon juice and baking soda paste as a natural exfoliator.
If the streaks are particularly stubborn, you might need to use a self-tan remover. These products are specifically designed to break down the DHA in self-tanners and help you get rid of unwanted color. Another tip is to take a warm bath with Epsom salts, which can help to fade the tan more quickly. Remember, patience is key!
Can I use self-tanner mousse on my face?
While some self-tanner mousses can be used on the face, it’s generally a good idea to use a product specifically formulated for facial application. Facial skin is more delicate and sensitive than the skin on your body, so you’ll want to choose a self-tanner that is gentle, non-comedogenic (won’t clog pores), and fragrance-free.
If you do decide to use a body mousse on your face, apply it sparingly and blend it carefully. Be sure to avoid your eyes and mouth. You can also mix a small amount of the mousse with your regular moisturizer to dilute the color and make it more subtle. Just remember, less is more when it comes to self-tanning your face!
Final Words
So, there you have it! Your ultimate guide to finding the best self-tanner mousse for your skin. Remember, achieving that sun-kissed glow shouldn’t feel like a chore. With the right mousse and a little practice, you’re well on your way to radiating confidence and feeling fabulous in your own skin, all year round. Don’t be afraid to experiment and find what works best for you – the perfect tan is waiting to be discovered!
Now it’s time to take the plunge and treat yourself! Armed with the knowledge from this guide, you’re ready to confidently choose a mousse that suits your needs and budget. Go ahead, order that mousse you’ve been eyeing, and get ready to embrace a gorgeous, healthy-looking tan. Your journey to bronzed perfection starts now, and we’re cheering you on every step of the way!