It’s Monday morning, and Mrs. Davis is knee-deep in a mountain of papers. Student folders are overflowing, supply bins are a chaotic jumble, and the looming field trip forms are threatening to take over her entire desk. Sound familiar? Every teacher knows the struggle of keeping an organized classroom, and sometimes, a simple label can be the superhero you didn’t know you needed. That’s where the best label makers for teachers come in.
This article is designed to be your ultimate guide to navigating the world of label makers. We’ve researched and reviewed the top options available, highlighting the features that truly matter for educators. From durable labels that can withstand sticky fingers to user-friendly interfaces perfect for busy teachers, we’re here to help you find the perfect label maker to conquer the classroom chaos and bring some much-needed order to your teaching life.
We will review the best label makers for teachers later in this article. But before that, take a look at some relevant products on Amazon:


Last update on 2026-04-26 / Affiliate links / #CommissionsEarned / Images from Amazon Product Advertising API
Tired of the Teacher Chaos? Let’s Get Organized!
Ever feel like you’re drowning in a sea of student papers, supplies, and… well, just stuff? You’re not alone! Teachers are masters of multitasking, but even the most seasoned educator can benefit from a little organizational magic. According to a recent study by the National Education Association, teachers spend an average of 7 hours per week on non-teaching tasks, and much of that time is spent searching for lost items or trying to decipher unlabeled containers.
That’s where the best label makers for teachers come in! Forget sticky notes that curl and fade, or messy handwriting that no one can decipher (including yourself!). Think crisp, clear labels that instantly transform chaos into calm. Imagine finally having a system where everything has its place, and students (and even you!) can find what they need with ease. This not only saves you valuable time but also creates a more efficient and engaging learning environment.
Choosing the right label maker can feel overwhelming, with so many options available. Do you need something portable for labeling on the go? Or maybe a heavy-duty model for tackling everything from classroom library books to supply bins? Are you looking for a machine that can print fun, colorful labels to grab your students’ attention? Don’t worry; we’re here to help you navigate the world of labeling and find the perfect match for your classroom needs.
In this guide, we’ll explore some of the best label makers for teachers on the market, considering factors like ease of use, durability, font options, and of course, price. We’ll dive into features that will help you tackle all of those back-to-school organizational projects, streamline your daily routines, and create a classroom that is both functional and fun. Get ready to say goodbye to the clutter and hello to an organized and stress-free teaching experience!
5 Best Label Makers For Teachers
Brother P-Touch PTD210 Label Maker
Looking for a reliable and versatile label maker for your classroom? The Brother P-Touch PTD210 is a fantastic choice. This user-friendly label maker allows teachers to easily create labels for organizing everything from student folders and supply bins to classroom library books. It offers a variety of fonts, symbols, and templates, so you can customize your labels to perfectly match your classroom aesthetic and organizational needs. The one-touch keys make it a breeze to quickly format labels, and the graphical display shows you exactly what your label will look like before you print.
The P-Touch PTD210 is also compact and lightweight, making it easy to store in a drawer or take on the go. It’s powered by batteries or an AC adapter (sold separately), giving you flexibility in how you use it. While it doesn’t connect to a computer, the built-in features provide plenty of creative options for labeling practically everything in your learning space. It’s a solid, dependable option for any teacher looking to enhance classroom organization.
DYMO LabelManager 280 Rechargeable Handheld Label Maker
The DYMO LabelManager 280 is a sleek and modern label maker perfect for the tech-savvy teacher. What sets this one apart is its rechargeable battery, meaning you won’t be constantly hunting for AA batteries when you need to print a quick label. Plus, connecting it to your computer via USB allows you to use DYMO’s label software to customize your labels with even more fonts, graphics, and layouts. Imagine designing labels with your school logo or adding custom icons to differentiate student belongings!
Beyond its connectivity, the LabelManager 280 boasts a user-friendly interface with a large graphical display and quick-access buttons. It prints crisp, clear labels on durable D1 tape, which comes in a variety of colors and widths. It’s a great choice for creating professional-looking labels for everything from classroom technology to storage containers, and the rechargeable battery makes it an eco-friendly and cost-effective solution in the long run.
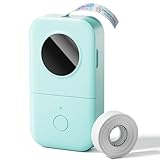
NIIMBOT D11 Label Maker
If you are searching for a portable and budget-friendly label maker, the NIIMBOT D11 is an excellent option. This mini label maker connects wirelessly to your smartphone or tablet via Bluetooth, allowing you to design and print labels directly from the NIIMBOT app. This is incredibly convenient for teachers who are always on the go and need to create labels on the fly. The app offers a wide range of fonts, symbols, and templates, and you can even import your own images and graphics.
The NIIMBOT D11 uses thermal printing technology, so there’s no need for ink or toner. This makes it a low-maintenance and cost-effective choice for teachers. The labels are water-resistant and durable, making them suitable for a variety of classroom applications. Despite its small size, the NIIMBOT D11 is a powerful little label maker that can help teachers stay organized and efficient.
Phomemo D30 Label Maker
The Phomemo D30 label maker is a compact and user-friendly device that’s perfect for teachers who value simplicity and affordability. Like the NIIMBOT, this label maker connects to your smartphone via Bluetooth and allows you to design labels using a dedicated app. The Phomemo app is incredibly intuitive and offers a wide variety of pre-designed templates, fonts, and graphics to choose from, making it easy to create custom labels in minutes.
The Phomemo D30 utilizes thermal printing technology, eliminating the need for ink or toner and saving you money on supplies. The labels are also water-resistant, oil-proof, and scratch-resistant, ensuring they can withstand the rigors of a busy classroom environment. Its small size makes it easy to store in a desk drawer or carry in a bag, making it a convenient tool for labeling everything from student supplies to classroom resources.
Brother P-Touch Cube Plus PT-P710BT Label Maker
For teachers who want a label maker with advanced features and seamless connectivity, the Brother P-Touch Cube Plus PT-P710BT is a top contender. This sleek and stylish label maker connects to your smartphone, tablet, or computer via Bluetooth, allowing you to design and print labels from a variety of devices. The Brother iPrint&Label app offers a wide range of design options, including pre-designed templates, fonts, symbols, and the ability to import your own images.
What truly sets the P-Touch Cube Plus apart is its ability to print labels up to 24mm wide, allowing for larger and more eye-catching designs. It also supports a variety of label tapes, including laminated tapes that are water-resistant, fade-resistant, and chemical-resistant. This makes it perfect for creating durable labels that can withstand even the toughest classroom conditions. The automatic cutter also adds a touch of professionalism to your labeling projects.
Why Teachers Need Label Makers: The Unsung Hero of the Classroom
Imagine a classroom where everything has its place, neatly organized and easily accessible. No more frantic searches for the right crayons or struggling to find the math worksheets amidst a pile of papers. This isn’t just a dream; it’s the reality a label maker can bring to a teacher’s life. Think about those end-of-day rushes when students are packing up – a quick scan of a labeled cubby ensures everyone takes home the right belongings. Less lost property, fewer headaches, and more time for what truly matters: teaching!
The “best label makers for teachers” aren’t just about aesthetics, they’re about efficiency. They allow educators to create custom labels for everything from supply bins and student folders to technology chargers and library books. With a simple click, teachers can create clear, durable labels that will stand the test of time. Gone are the days of messy handwritten labels that fade or peel. These tools empower teachers to establish a system that saves precious time and keeps the classroom running smoothly, reducing stress and maximizing instructional time.
Think of all the hours teachers dedicate to organizing their classroom, only to find it undone in a matter of days. Label makers help create a visual system that students can easily understand and follow. This reduces the need for constant reminders and keeps the classroom tidy, even during the busiest school days. Plus, with various fonts, sizes, and even symbols, teachers can create visually appealing labels that add a touch of personality to their learning environment, making it a welcoming and engaging space for students.
Investing in a label maker, especially one of the best label makers for teachers, is an investment in a teacher’s sanity and a student’s learning environment. It’s a practical, affordable way to improve organization, save time, and create a more efficient and engaging classroom. Ultimately, a well-organized classroom allows teachers to focus on what they do best: inspiring and educating the next generation. It’s a win-win for everyone!
Creative Labeling Ideas to Enhance Classroom Organization
Okay, so you’ve got your label maker, ready to unleash organizational bliss. But sometimes, the hardest part is figuring out what to label! Think beyond the obvious. Instead of just “Pencils,” consider “Sharpened Pencils Ready to Go” or “Needs Sharpening – Please Help!” Make it engaging and clear for your students.
Another great idea? Learning center labels that actually instruct. Imagine labeling your math station with “Math Games – Solve at Least 3 Before Moving On.” This gives kids clear expectations and minimizes the “What are we supposed to do?” questions. Plus, it frees you up to focus on helping those who really need it.
Don’t forget about personalizing student belongings! Labeling cubbies with each student’s name is classic, but how about adding a small picture of their favorite animal or a symbol representing a special interest? This helps younger students who are still learning to read and adds a personal touch that makes them feel valued.
Finally, think about creating visual schedules for the classroom. A series of labeled pictures showing the daily routine – “Arrival,” “Reading Time,” “Snack,” “Recess” – can be incredibly helpful, especially for students who benefit from visual cues or have special needs. Laminated and attached to a wall, these labels become a valuable classroom management tool.
Maximizing Your Label Maker’s Features: Tips and Tricks
So you’ve got your label maker, and you’re excited to get started! But did you know there are tricks to truly maximize its potential? One of the best tips is to explore different fonts and sizes. Don’t just stick with the default settings. Experiment to find what’s most legible and aesthetically pleasing for different labeling needs. A bold font for shelf labels, a smaller, more elegant font for student awards – the possibilities are endless!
Another key tip is to use different label colors. Color-coding can be a powerful organizational tool. For example, you could use blue labels for reading materials, green for science supplies, and yellow for math games. This makes it easy for both you and your students to quickly locate what you need.
Don’t be afraid to use the special characters and symbols your label maker offers. Adding a little star to a student’s work box or a book image to the reading corner labels can make them more visually appealing and engaging for students, especially the younger ones.
Finally, conserve label tape by planning your labeling spree. Before you print a single label, write down everything you need to label and then organize it logically. This way, you can minimize wasted tape and avoid having to re-do labels because you ran out of space or made a mistake. Think of it as a label-making game plan!
Troubleshooting Common Label Maker Issues
Let’s face it, even the best label makers can occasionally throw a curveball. One common issue is label jamming. This often happens when the label cartridge isn’t properly inserted or when there’s debris stuck inside the machine. Always turn off the label maker and carefully check the cartridge and the label path for any obstructions. A small, soft brush can be helpful for removing dust.
Another frequent problem is faded or incomplete printing. This usually indicates a low battery or a depleted label tape. Make sure your label maker is fully charged or has fresh batteries. Also, check the label tape cartridge to ensure it’s not running low. Sometimes, a quick cleaning of the print head can also resolve this issue.
If you’re having trouble connecting your label maker to your computer or mobile device, double-check the Bluetooth or Wi-Fi settings. Ensure that both devices are paired correctly and that you have the latest version of the label maker’s software installed. A simple restart of both devices can often solve connection problems.
Finally, don’t overlook the user manual! It might seem like a daunting read, but it often contains specific troubleshooting steps for common issues related to your particular label maker model. Before resorting to online forums or customer support, take a few minutes to consult the manual. You might be surprised at how quickly you can find a solution.
Budget-Friendly Alternatives and DIY Labeling Solutions
A fancy label maker isn’t the only path to an organized classroom! If your budget is tight, don’t despair. There are plenty of cost-effective alternatives and DIY labeling solutions that can help you achieve organizational bliss without breaking the bank.
Consider using printable label templates that you can download for free online. These templates allow you to design and print labels using your regular printer and adhesive label paper. You can even customize them with different fonts, colors, and graphics to match your classroom theme. This is a great option for creating unique and personalized labels without the investment in a dedicated label maker.
Another budget-friendly option is to repurpose existing materials. For example, you can cut up old file folders or cardstock to create homemade labels. Write on them with permanent markers or colored pens, and then attach them to your classroom supplies using tape or glue. This is a sustainable and creative way to label your classroom while reducing waste.
Don’t underestimate the power of simple masking tape and a permanent marker. While it might not be the most visually appealing option, it’s definitely one of the most affordable and readily available. Masking tape is easy to write on and can be easily removed and replaced when needed. This makes it a practical choice for labeling items that you frequently reorganize or update.
Finally, get your students involved! Enlist their help in creating and decorating labels for classroom supplies. This is a fun and engaging activity that not only promotes organization but also encourages creativity and teamwork. You can provide them with art supplies and let them design their own labels, turning a chore into a learning experience.
Best Label Makers For Teachers: A Comprehensive Buying Guide
Hey there, fellow educator! Feeling overwhelmed by the chaotic classroom supplies, student projects, and endless piles of paperwork? You’re not alone! As teachers, we’re constantly battling disorganization, and one of the best weapons in our arsenal is a good label maker. Seriously, a quality label maker can be a game-changer, transforming a cluttered classroom into an organized oasis.
But with so many options out there, how do you choose the right one? Don’t worry, I’m here to help! This guide will walk you through everything you need to consider before investing in a label maker, ensuring you find the perfect fit for your classroom needs. Let’s dive in and find the best label makers for teachers!
Durability and Build Quality: Will it Survive the School Year?
Okay, let’s be real. We’re teachers. We’re constantly surrounded by energetic kids, sticky fingers, and the occasional accidental drop. That’s why durability is super important. You don’t want a label maker that’s going to fall apart after a few months of use. Look for models that feel sturdy and well-constructed. Read reviews and see what other teachers are saying about the long-term reliability of the label maker. Plastic casing can vary greatly in quality. A cheap, brittle plastic might crack easily, while a more robust, impact-resistant plastic will be much more likely to withstand the rigors of a classroom environment.
Think about where you’ll be storing your label maker. Will it be tossed into a supply closet, or kept in a drawer? Also, consider how frequently it will be used. If you plan on using it daily, you’ll need a tougher model than if you only need it occasionally. Don’t underestimate the importance of a well-built label maker that can survive the bumps and bruises of everyday classroom life. Investing in a slightly more expensive, durable model can save you money in the long run by avoiding frequent replacements. Choosing a durable label maker is a key consideration when selecting the best label makers for teachers.
Label Options and Versatility: How Many Different Labels Can You Create?
Think beyond just labeling student names. How about organizing your supply bins? Creating labels for learning centers? Marking student folders? The more label options your label maker offers, the more versatile it will be. Look for models that can print in various fonts, sizes, and styles. Consider the different colors of labels available. Color-coding can be a fantastic way to organize different subjects or grade levels. You might also want to consider label makers that can print symbols or images, allowing you to create visually appealing labels for younger students.
Some label makers offer the ability to create labels with barcodes or QR codes. This can be especially useful for tracking classroom inventory or creating interactive learning activities. Also, think about the type of adhesive. Standard adhesive labels are great for general use, but you might also want to consider stronger adhesives for items that will be handled frequently or exposed to moisture. The best label makers for teachers are the ones that offer a wide range of label options to meet all your organizational needs.
Connectivity and Software: How Easy Is It to Use With Your Computer?
In today’s tech-savvy world, you probably want a label maker that can connect to your computer. This allows you to create more complex labels, import images, and even use different fonts than the built-in options. Look for models that offer USB connectivity or even Bluetooth connectivity. Bluetooth connectivity allows you to print labels directly from your smartphone or tablet, which can be incredibly convenient.
Many label makers come with their own proprietary software. Before you commit, download the software and play around with it. Is it intuitive and easy to use? Does it offer the features you need? Is it compatible with your computer’s operating system? Some label makers are also compatible with third-party label design software, giving you even more flexibility. A user-friendly interface is key to making the most of your label maker. The best label makers for teachers integrate seamlessly with existing technology, saving you time and frustration.
Portability and Power Source: Where Will You Use It Most Often?
Will you be using your label maker primarily at your desk, or do you need something more portable that you can take with you to different classrooms or events? If you need a portable option, look for a lightweight model that’s battery-powered. Consider the battery life of the label maker. Some models use rechargeable batteries, while others use standard AA or AAA batteries. Rechargeable batteries are more environmentally friendly and can save you money in the long run, but you’ll need to remember to keep them charged.
If you plan on using your label maker primarily at your desk, a corded model might be a better option. Corded models don’t require batteries, so you don’t have to worry about running out of power. They also tend to be more powerful than battery-powered models. It all comes down to your individual needs and preferences. Think about where you’ll be using your label maker the most and choose a model that’s convenient and easy to use in that location. Portability and a reliable power source are crucial considerations when selecting the best label makers for teachers who need to be flexible in their workspace.
Printing Speed and Quality: How Quickly Can You Create Labels?
Let’s face it, teachers are busy. We don’t have time to wait around for a label maker to slowly churn out labels. Look for a model that offers a fast printing speed. The faster the printing speed, the more labels you can create in a shorter amount of time. This can be especially important if you need to label a large number of items quickly.
However, don’t sacrifice quality for speed. You also want a label maker that produces clear, crisp labels that are easy to read. Look for models with a high print resolution. A higher print resolution will result in sharper, more detailed labels. Also, consider the print technology. Some label makers use thermal printing, which is fast and efficient, but the labels can fade over time. Others use inkjet or laser printing, which produces more durable labels but can be slower and more expensive. When searching for the best label makers for teachers, balancing speed and quality is paramount.
Price and Value: Are You Getting the Most Bang For Your Buck?
Of course, price is always a factor. You don’t want to spend a fortune on a label maker, but you also don’t want to buy the cheapest model only to have it break down after a few months. Consider your budget and look for a label maker that offers the best value for your money.
Don’t just focus on the initial purchase price. Consider the cost of replacement labels. Some label makers use proprietary label cartridges, which can be expensive to replace. Others use more generic labels, which are more affordable. Also, consider the long-term cost of ownership. A more durable label maker might cost more upfront, but it could save you money in the long run by avoiding frequent replacements. The best label makers for teachers provide a good balance between cost and features, ensuring a worthwhile investment.
Ease of Use: Is It Teacher-Friendly?
Finally, and perhaps most importantly, consider ease of use. You want a label maker that’s intuitive and easy to operate, even if you’re not a tech expert. Look for models with a clear display screen and easy-to-understand controls. Read reviews and see what other teachers are saying about the user-friendliness of the label maker.
Avoid models that are overly complicated or require a lot of technical knowledge to operate. You want something that you can pick up and use right away, without having to spend hours reading the manual. A simple, straightforward design is key to maximizing productivity. The best label makers for teachers are the ones that are easy to use, allowing you to focus on what’s important: teaching!
FAQs
What kind of labels can these label makers actually print? I’m picturing just plain, boring labels.
Don’t worry, label makers have come a long way! The models we’ve highlighted can print a surprisingly wide variety of labels. You’re not stuck with just plain black text on a white background anymore. Many allow you to choose different fonts, sizes, and even add fun symbols or borders to really personalize your labels. Think everything from simple name tags to beautifully organized binder labels.
Plus, some of the more advanced label makers can even print in multiple colors! This opens up even more creative possibilities for classroom organization and labeling projects. Just imagine color-coding your subject folders or creating eye-catching signs for learning centers. You’ll be surprised at how versatile these devices are!
I’m worried about how easy these label makers are to use. I’m not the most tech-savvy person!
We totally understand that concern! Nobody wants to spend hours wrestling with a complicated device, especially when you have a classroom to manage. That’s why we focused on label makers that are known for their user-friendliness. Many feature simple, intuitive interfaces and straightforward button layouts. You’ll be creating labels in minutes, even if you’re not a tech whiz.
And if you ever do get stuck, most of these label makers come with clear and concise instructions. Plus, there are usually plenty of helpful online tutorials and videos available to walk you through the process. You can even check out reviews from other teachers, who often share their own tips and tricks. You got this!
How durable are these labels? I need something that can withstand being handled by kids.
Durability is key when you’re dealing with labels in a classroom environment! Fortunately, the labels produced by the recommended label makers are designed to be pretty tough. They’re typically resistant to smudging, fading, and even water, so they can handle everyday wear and tear.
That being said, the durability can vary slightly depending on the type of label tape you use. For example, laminated labels are extra resistant to scratches and moisture, making them a great choice for items that get a lot of handling. It’s always a good idea to check the specifications of the label tape you’re using to ensure it meets your needs.
Are the replacement label tapes expensive? I’m on a teacher’s budget!
We get it – budget is a big concern! Replacing label tapes can add up over time, so we definitely considered that when recommending label makers. The cost of replacement tapes can vary depending on the brand, type, and quantity.
A good tip is to look for compatible generic or off-brand label tapes. These can often be significantly cheaper than the name-brand options without sacrificing too much in terms of quality. Also, buying in bulk can often save you money in the long run. Just be sure to check reviews to ensure the generic tapes work well with your specific label maker model.
Can these label makers connect to my computer or phone for more design options?
Yes, many of the label makers we recommend offer connectivity options for even more design possibilities! Some models can connect to your computer via USB, allowing you to design labels using software that offers a wider range of fonts, images, and layouts. This gives you much greater control over the final look of your labels.
Even better, many modern label makers can connect to your smartphone or tablet via Bluetooth! This allows you to design and print labels on the go using dedicated mobile apps. These apps often come with pre-designed templates and other helpful features, making it even easier to create professional-looking labels.
Do these label makers require batteries, or can they be plugged in?
The power source depends on the specific label maker model. Some are battery-powered, which makes them very portable and convenient for labeling in different parts of the classroom. This can be a great option if you need to move around a lot or don’t have easy access to an outlet.
Other label makers come with an AC adapter and can be plugged directly into a wall outlet. This eliminates the need to worry about replacing batteries, which can be a plus if you plan to use the label maker frequently. Some models even offer both options – they can be powered by batteries or plugged in, giving you the ultimate flexibility!
What happens if my label maker jams? Is it easy to fix?
Jams can happen with any mechanical device, but don’t panic! Many label makers are designed to be relatively easy to clear if a jam occurs. The first step is always to consult your user manual, as it will likely have specific instructions for your model.
Generally, the process involves opening the label tape compartment, carefully removing any stuck tape, and then re-threading the tape correctly. Make sure to avoid forcing anything, and double-check that the tape is aligned properly before closing the compartment. With a little patience, you should be able to get your label maker working again in no time. If you’re still having trouble, try searching online for troubleshooting videos or contacting the manufacturer’s customer support.
Final Verdict
Choosing the perfect label maker is really about choosing the right tool to unlock your classroom’s organizational potential. Think of it: from perfectly alphabetized book bins to clearly labeled supply drawers, the best label makers for teachers can transform chaos into calm. It’s about crafting a space that sparks creativity and focuses learning, not frustrating searches. It’s an investment in you and your students’ success, saving precious lesson planning time and creating a more inviting and efficient learning environment.
Ready to take the plunge? Don’t overthink it! You’ve absorbed the knowledge, explored the options, and now it’s time to choose the label maker that aligns with your unique classroom needs. Imagine the satisfaction of finally tackling that overflowing storage closet or designing personalized name tags for your new class. Trust your instincts, embrace the possibilities, and get ready to create a classroom that’s as organized and inspiring as you are!