Ever wondered what’s causing that drafty chill in your home, even with the windows closed? Or maybe you’re a contractor trying to quickly identify insulation problems in a client’s building without tearing down walls. It’s frustrating to feel like you’re playing detective with limited clues, right? Thankfully, technology has given us a powerful tool to see what our eyes can’t: thermal imaging.
That’s where the best thermal imagers come in. They’re not just cool gadgets; they’re invaluable for homeowners, inspectors, electricians, and more. Picking the right one can feel overwhelming, with all the options available. So, we’ve put together this comprehensive review and buying guide to help you navigate the world of thermal imaging and find the perfect device for your needs, ensuring you’re equipped to tackle any thermal mystery that comes your way.
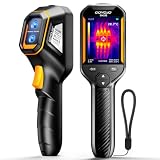
We will review the best thermal imagers later in this article. But before that, take a look at some relevant products on Amazon:


Last update on 2026-05-01 / Affiliate links / #CommissionsEarned / Images from Amazon Product Advertising API
Seeing the Unseen: A Quick Dip into the World of Thermal Imaging
Ever felt a draft and couldn’t pinpoint its source? Or worried about energy loss in your home? Maybe you’re a hunter tracking game, or an electrician troubleshooting faulty wiring. That’s where the magic of thermal imaging comes in! Imagine being able to “see” heat, revealing hidden problems or opportunities that are invisible to the naked eye. Thermal imagers do just that, turning temperature differences into a visual representation you can understand instantly. It’s like having X-ray vision, but for heat!
Think about it: traditionally, finding insulation gaps meant invasive inspections, poking around with your hands, and a whole lot of guesswork. Now, with a thermal imager, you can simply scan a wall and instantly see exactly where heat is escaping, saving you time and money. Did you know that, according to the U.S. Department of Energy, improper insulation can account for up to 20% of a home’s energy loss? Finding these issues proactively can make a huge difference. But how do you know which one is right for you?
With so many options available, finding the best thermal imagers can feel overwhelming. From entry-level models perfect for homeowners to professional-grade units used in industrial settings, the range of features and price points is vast. We’re going to break down what to look for, considering things like image resolution, temperature range, and ease of use.
So, whether you’re a DIY enthusiast tackling home improvements, a professional looking for reliable diagnostic tools, or simply curious about the possibilities, this guide will help you navigate the world of thermal imaging and find the perfect fit for your needs. We’ll explore some top contenders and highlight their strengths, so you can make an informed decision and start seeing the unseen!
Best Thermal Imagers – Reviews
FLIR E8 Pro
The FLIR E8 Pro is a fantastic entry-level thermal camera packed with features that punch above its weight class. It boasts a crisp 320 x 240 thermal resolution, which means you get clear, detailed images that make finding temperature differences a breeze. The MSX (Multi-Spectral Dynamic Imaging) technology is a real game-changer, overlaying visual details onto the thermal image for better context and easier identification of problem areas. It’s user-friendly, durable, and perfect for home inspectors, electricians, and anyone needing reliable thermal imaging without breaking the bank.
Beyond its impressive image quality, the E8 Pro also offers a wide temperature range and accurate readings. It’s simple to operate, with an intuitive interface that lets you quickly adjust settings and capture images or videos. The included FLIR Tools software allows for easy analysis and reporting. Whether you’re detecting heat loss, troubleshooting electrical issues, or simply exploring the world of thermal imaging, the FLIR E8 Pro is an excellent choice.
FLIR C5 Compact Thermal Camera
Need a thermal camera that fits in your pocket? The FLIR C5 is the answer. This compact device is incredibly portable, making it perfect for on-the-go inspections and quick checks. Don’t let its size fool you; it still delivers impressive thermal imaging capabilities, allowing you to detect hidden heat patterns and potential problems with ease. The C5’s intuitive touchscreen interface makes it incredibly easy to use, even for beginners.
The C5 doesn’t compromise on functionality despite its size. It features FLIR’s MSX technology for enhanced image clarity, a wide field of view, and automatically saves images to the cloud for easy sharing and backup. The built-in LED flashlight is a handy addition for working in dimly lit areas. For electricians, plumbers, and anyone who needs a portable and reliable thermal imaging solution, the FLIR C5 is a top contender.
Seek Thermal Reveal PRO
The Seek Thermal Reveal PRO is a rugged and powerful thermal camera designed for demanding environments. Its high-resolution 320 x 240 thermal sensor provides excellent image clarity, allowing you to detect even subtle temperature differences. The Reveal PRO is built to withstand tough conditions, with a durable housing that can handle drops and bumps. It’s a great tool for hunters, law enforcement, and outdoor enthusiasts who need a reliable thermal imaging solution in challenging situations.
What sets the Reveal PRO apart is its focus on durability and ease of use. The simple button interface makes it easy to operate, even with gloves on. The built-in 300-lumen LED flashlight is incredibly useful for navigating dark environments, and the wide field of view helps you scan large areas quickly. The Reveal PRO is a solid choice for those who need a rugged and reliable thermal camera that can withstand the rigors of outdoor use.
Testo 872 Thermal Imager
The Testo 872 is a high-performance thermal imager designed for professional use. It boasts a large, high-resolution display and a sensitive thermal detector that delivers incredibly detailed images. With its wide temperature range and advanced measurement features, the Testo 872 is ideal for building diagnostics, electrical inspections, and mechanical maintenance. The integrated digital camera captures real images, making it easy to document and analyze your findings.
Beyond its impressive image quality, the Testo 872 offers a range of features designed to streamline your workflow. It automatically detects hot and cold spots, calculates temperature differences, and allows you to create professional reports quickly and easily. The Testo Thermography App enables you to remotely control the camera, transfer images, and share your results with colleagues. The Testo 872 is a top-of-the-line thermal imager that provides the performance and features professionals demand.
Infiray P2 Pro Thermal Camera
The Infiray P2 Pro is a unique and innovative thermal camera that plugs directly into your smartphone. This compact and affordable device transforms your phone into a powerful thermal imaging tool. With its high-resolution sensor and user-friendly app, the P2 Pro is perfect for home inspections, DIY projects, and anyone who wants to explore the world of thermal imaging without investing in a dedicated camera.
The P2 Pro is surprisingly capable for its size and price. The app offers a range of features, including adjustable emissivity, multiple color palettes, and the ability to capture images and videos. It’s incredibly easy to use – simply plug it into your phone, launch the app, and start exploring. The Infiray P2 Pro is a fantastic option for those looking for a portable, affordable, and surprisingly powerful thermal imaging solution.
Why Do People Need to Buy Thermal Imagers?
Imagine discovering a hidden water leak behind your bathroom wall before it turns into a costly mold infestation, or pinpointing a drafty window during a chilly winter evening, instantly saving on your energy bill. Thermal imagers make the invisible visible, detecting temperature differences that our naked eyes can’t see. They’re not just gadgets for professionals; they’re powerful tools that empower homeowners, DIY enthusiasts, and anyone seeking to understand and improve their environment. By providing a clear visual representation of heat signatures, thermal imagers let you identify potential problems early, before they escalate into significant issues.
Think about a flickering light in your kitchen. Instead of blindly replacing bulbs, a thermal imager could reveal an overheating electrical connection within the wiring, potentially preventing a fire hazard. Or, perhaps you’re concerned about energy efficiency. With a thermal imager, you can quickly identify insulation gaps in your attic, ensuring your home stays warm in the winter and cool in the summer, saving you money on heating and cooling costs year-round. The best thermal imagers offer user-friendly interfaces and impressive image clarity, making them accessible and invaluable for anyone.
For professionals, the applications are even more profound. Electricians can troubleshoot circuits faster and safer, plumbers can locate hidden pipe leaks without tearing down walls, and HVAC technicians can diagnose system inefficiencies with pinpoint accuracy. Even beyond construction and maintenance, thermal imagers are used in fields like search and rescue, law enforcement, and even wildlife observation, showcasing their versatility and importance in various sectors.
Investing in a thermal imager is investing in peace of mind, safety, and efficiency. By providing a clear understanding of the thermal landscape around you, these devices empower you to identify problems, save money, and ensure the well-being of your home and loved ones. Consider the long-term benefits and the potential savings – a thermal imager is more than just a tool; it’s a valuable asset.
Understanding Thermal Imager Specifications
So, you’re diving into the world of thermal imagers. That’s fantastic! But before you start comparing models, it’s crucial to grasp what all those technical specifications actually mean. Think of it like buying a car. You wouldn’t just look at the color, right? You’d want to know about horsepower, fuel efficiency, and safety features. Thermal imagers are the same. Knowing the specs helps you pick the right tool for the job.
One of the first things you’ll see is the detector resolution, often expressed in pixels like 320×240 or 640×480. This directly impacts image clarity. Imagine taking a photo with a low-resolution phone camera versus a high-end DSLR. The higher the resolution, the more detail you’ll see in your thermal image. This is especially important when you’re trying to identify small components on a circuit board or pinpoint a subtle temperature difference in a wall.
Another important spec is thermal sensitivity, often referred to as NETD (Noise Equivalent Temperature Difference). This tells you how small a temperature difference the imager can detect. A lower NETD value is better, meaning the imager is more sensitive. Think of it like trying to hear a whisper in a noisy room – a more sensitive “ear” (the imager) can pick up the faintest temperature variations. This is crucial for diagnosing overheating components or finding hidden leaks.
Finally, consider the field of view (FOV). This determines how much area the imager can “see” at a given distance. A wider FOV is great for scanning large areas quickly, like inspecting a whole building for insulation issues. A narrower FOV is better for focusing on specific details, such as inspecting a small section of a pipe for corrosion. Choosing the right FOV can save you time and improve accuracy in your inspections.
Applications Across Industries
Thermal imagers aren’t just for ghost hunters! They’re incredibly versatile tools with applications in a wide range of industries. Think about electricians: they use thermal imagers to quickly identify overloaded circuits or faulty wiring before they cause a fire. It’s a non-invasive way to ensure safety and prevent costly downtime. Imagine the peace of mind knowing you’re catching a potential hazard before it becomes a real problem.
Building inspectors rely heavily on thermal imagers to detect insulation gaps, moisture intrusion, and air leaks in buildings. Finding these issues early can save homeowners a ton of money on energy bills and prevent structural damage. Picture a homeowner noticing a cold spot on their wall during winter. A thermal imager can pinpoint exactly where the insulation is missing, allowing for targeted repairs and a warmer, more comfortable home.
Veterinarians are even using thermal imaging to diagnose injuries in animals. Since animals can’t tell us where they hurt, a thermal imager can reveal areas of inflammation or increased blood flow, indicating potential problems like muscle strains or arthritis. It’s a non-invasive way to help diagnose and treat our furry friends, ensuring they get the care they need. Think about how much easier it would be to diagnose a limp if you could “see” the inflammation causing it!
Law enforcement and security professionals use thermal imagers for surveillance and search and rescue operations. They can detect heat signatures in dark or smoky environments, helping them locate suspects or missing persons. Imagine searching for a lost hiker in the woods at night – a thermal imager can be a lifesaver, providing clear visibility even in complete darkness.
Maintaining and Calibrating Your Thermal Imager
Okay, you’ve invested in a great thermal imager. Now it’s important to keep it in top condition so it continues to provide accurate and reliable results. Think of it like owning a high-end camera – you wouldn’t just toss it in a drawer and expect it to work perfectly years later, right? Regular maintenance and calibration are key.
One of the simplest things you can do is keep the lens clean. Use a soft, lint-free cloth to gently wipe away any dust, fingerprints, or smudges. Avoid using harsh chemicals or abrasive materials, as these can damage the lens coating. A clean lens ensures the clearest and most accurate thermal images. Imagine trying to take a picture with a dirty camera lens – the results would be blurry and distorted. The same applies to your thermal imager.
Proper storage is also crucial. Avoid exposing your thermal imager to extreme temperatures, humidity, or direct sunlight. These conditions can damage the internal components and affect its accuracy. Store it in a cool, dry place, preferably in a protective case. Think about how you would store sensitive electronic equipment – your thermal imager deserves the same care.
Finally, consider regular calibration. Calibration ensures that your thermal imager is measuring temperatures accurately. Most manufacturers recommend calibrating your imager every year or two. Check your user manual for specific recommendations. Think of it like tuning a musical instrument – regular calibration ensures that your thermal imager is hitting the right notes.
Troubleshooting Common Issues
Even with the best care, you might occasionally encounter issues with your thermal imager. Don’t panic! Many common problems can be easily resolved with a little troubleshooting. Think of it like your car – sometimes the problem is just a loose gas cap, not a major engine malfunction.
One common issue is blurry or distorted images. This could be due to a dirty lens, as mentioned earlier. Clean the lens and try again. If the problem persists, it could be a focus issue. Make sure the imager is properly focused on the object you’re viewing. Just like a camera, a thermal imager needs to be in focus to provide clear images.
Another issue is inaccurate temperature readings. This could be due to improper emissivity settings. Emissivity is a measure of how well an object radiates heat. Different materials have different emissivity values. Make sure you’ve selected the correct emissivity setting for the material you’re measuring. Think of it like using the wrong measuring units – using Fahrenheit instead of Celsius would give you incorrect results.
Finally, if your thermal imager is not turning on or is experiencing other technical issues, check the battery. Make sure it’s fully charged or replace it with a fresh one. If that doesn’t solve the problem, consult your user manual or contact the manufacturer for support. Sometimes the solution is as simple as a dead battery!
The Ultimate Guide to Finding the Best Thermal Imagers
Hey there! Thinking about picking up a thermal imager? That’s fantastic! They’re incredibly versatile tools, opening up a whole new world of invisible details. But with so many options out there, navigating the thermal landscape can feel a little overwhelming. Don’t worry, I’m here to walk you through it. Consider this your friendly guide to finding the best thermal imagers for your specific needs, ensuring you choose a device that will actually deliver the results you’re hoping for. So grab a cup of coffee, settle in, and let’s get started!
Understanding Resolution: Seeing the Details That Matter
First things first, let’s talk resolution. Think of it like the number of pixels in a digital camera – the more pixels, the clearer and more detailed the image. In the thermal world, resolution determines how accurately you can see temperature differences. A higher resolution imager allows you to pinpoint smaller temperature variations and identify problems with greater precision. Imagine trying to find a leak in a pipe; a low-resolution image might just show a general warm spot, while a high-resolution image could pinpoint the exact source of the leak, saving you time and frustration.
It’s tempting to jump straight for the highest resolution available, but it’s also important to consider your budget. Higher resolution often comes with a higher price tag. Think about what you’ll primarily be using the imager for. If you’re mostly doing general home inspections, a lower resolution might be sufficient. But if you’re working in a professional setting where accurate temperature measurements and detailed analysis are crucial, investing in a higher resolution will be worth it in the long run. This is a critical factor for choosing the best thermal imagers for your needs.
Temperature Range: Knowing Your Operational Limits
Next up, let’s discuss temperature range. This refers to the span of temperatures that the thermal imager can accurately measure. It’s crucial to choose an imager with a range that covers the temperatures you’re likely to encounter in your work or projects. Imagine using a thermal imager to inspect a furnace, only to discover it can’t read temperatures above a certain threshold. That would be pretty useless, right?
Consider the hottest and coldest objects you’ll be scanning. Are you inspecting electrical panels that might get very hot? Or perhaps you’re looking for cold drafts around windows in winter? Make sure the imager’s specified temperature range comfortably covers these extremes. Don’t forget to factor in potential spikes or fluctuations. A little extra headroom in the temperature range can save you from inaccurate readings or even damaging the imager. The best thermal imagers will have temperature ranges that are appropriate for your use case.
Thermal Sensitivity (NETD): Catching Subtle Differences
Thermal sensitivity, often referred to as NETD (Noise Equivalent Temperature Difference), is a critical factor that often gets overlooked. Think of it as the imager’s ability to detect very small temperature differences. The lower the NETD value (usually expressed in milliKelvins, mK), the more sensitive the imager is. A highly sensitive imager can detect even the slightest variations in temperature, which is essential for spotting subtle problems like moisture intrusion or minor insulation gaps.
Imagine trying to find a water leak behind a wall. The temperature difference might be very small, perhaps only a degree or two. A less sensitive imager might not be able to pick up on this subtle difference, leading you to miss the problem entirely. The best thermal imagers boast low NETD values, allowing them to reveal hidden issues that would otherwise go unnoticed. So, if you’re looking for the ability to detect fine details and subtle temperature variations, pay close attention to the NETD specification.
Emissivity Adjustment: Getting Accurate Readings on Different Surfaces
Emissivity is a material’s ability to emit thermal radiation. Different materials emit thermal energy at different rates, even if they’re at the same temperature. A shiny metal surface, for example, emits less thermal radiation than a matte black surface. Therefore, if you don’t account for emissivity, you can end up with inaccurate temperature readings.
Many of the best thermal imagers allow you to adjust the emissivity setting to match the material you’re inspecting. This is crucial for getting accurate temperature measurements, especially when dealing with a variety of surfaces. Without emissivity adjustment, you might misinterpret the temperature of an object, leading to incorrect diagnoses and potentially costly mistakes. Take the time to understand emissivity and learn how to adjust the setting on your imager for the most accurate results.
Ease of Use and Features: Making Your Life Easier
Let’s be honest, no one wants to struggle with a complicated and confusing thermal imager. Ease of use is a huge factor, especially if you’re new to thermal imaging. Look for imagers with intuitive interfaces, clear displays, and easy-to-access controls. A well-designed user interface can significantly speed up your workflow and reduce frustration.
Beyond the basics, consider the features that are important to you. Does the imager have built-in Wi-Fi for easy image transfer? Does it offer image blending, which overlays a visual image with the thermal image for better context? Does it have a laser pointer to help you pinpoint the exact location of a problem? Think about the features that will make your work easier and more efficient. The best thermal imagers will strike a balance between functionality and user-friendliness.
Durability and Build Quality: Surviving the Real World
Thermal imagers are often used in demanding environments, whether it’s a dusty construction site or a damp basement. That’s why durability and build quality are crucial. Look for imagers that are built to withstand the rigors of everyday use. Consider features like drop resistance, water resistance, and dust protection.
A ruggedized imager will not only last longer but will also provide more reliable performance in challenging conditions. Think about where you’ll be using the imager most often and choose a model that’s up to the task. A flimsy plastic casing might not hold up well to repeated drops or exposure to the elements. Investing in a well-built imager will save you money in the long run by reducing the need for repairs or replacements. The best thermal imagers are built to last.
Budget and Value: Finding the Sweet Spot
Finally, let’s talk about budget. Thermal imagers range in price from a few hundred dollars to tens of thousands, so it’s important to set a realistic budget before you start shopping. While it’s tempting to go for the cheapest option, keep in mind that you often get what you pay for. A bargain-basement imager might lack the features, resolution, or durability you need to get the job done right.
Focus on finding the best value for your money. Consider your needs, your budget, and the features that are most important to you. Read reviews, compare specifications, and don’t be afraid to ask for advice from experienced users. Remember, the best thermal imagers aren’t necessarily the most expensive ones; they’re the ones that provide the best performance and features for your specific application within your budget. Ultimately, finding the best thermal imagers involves balancing your needs with your financial constraints.
FAQs
What exactly *is* a thermal imager and what does it do?
Think of a thermal imager as a special camera that “sees” heat instead of visible light! Everything around us, even ice cubes, emits some amount of infrared radiation (heat). A thermal imager detects these tiny variations in heat and translates them into an image we can understand, typically displayed with different colors representing different temperatures. Hotter objects usually appear brighter, while cooler objects are darker.
Basically, it’s like having heat-vision! This ability allows you to see things that are invisible to the naked eye, like heat escaping from poorly insulated areas in your home, overheating electrical components, or even animals hiding in the dark. It opens up a whole new world of possibilities for troubleshooting, detecting problems, and enhancing safety.
What are the main uses for a thermal imager?
Thermal imagers are incredibly versatile tools with a wide range of applications! In homes, they’re used to identify energy leaks, find hidden water damage, and even check for pests behind walls. Electricians use them to spot overheating circuits, while mechanics can diagnose engine problems quickly.
Beyond that, thermal imagers are employed by firefighters to see through smoke, by search and rescue teams to locate missing persons, and even by veterinarians to diagnose animal ailments. They’re also used in industrial settings for preventative maintenance, security surveillance, and quality control. From home improvement to professional applications, the possibilities are truly vast!
What should I look for when choosing a thermal imager?
When choosing a thermal imager, it’s a good idea to consider a few key factors. Image resolution is crucial – the higher the resolution, the clearer and more detailed the thermal image will be. Think of it like megapixels on a regular camera. Also, pay attention to the temperature range the imager can detect. Make sure it covers the temperatures you’re likely to encounter in your intended applications.
Next, consider the thermal sensitivity, also known as NETD. This measures how well the imager can detect subtle temperature differences. A lower NETD means the imager is more sensitive and can pick up on smaller temperature variations, which is especially helpful for finding hidden issues. Don’t forget to think about features like built-in cameras for visual reference, Wi-Fi connectivity for easy reporting, and overall ease of use.
How much does a thermal imager typically cost?
Thermal imagers can range quite a bit in price, depending on their features and performance. Entry-level models, suitable for basic home use like finding drafts or checking insulation, can often be found for a few hundred dollars. These are a great starting point for homeowners who want to explore the benefits of thermal imaging without breaking the bank.
However, professional-grade imagers with higher resolution, wider temperature ranges, and more advanced features can easily cost thousands of dollars. These are designed for more demanding applications like building inspections, electrical troubleshooting, and industrial maintenance. Ultimately, the price you pay will depend on the level of accuracy and functionality you need.
Are thermal imagers difficult to use?
Not at all! While they might seem complex at first, most thermal imagers are actually quite user-friendly. Many models have intuitive interfaces and simple controls, making them easy to pick up and start using right away. The included manuals are usually pretty helpful as well, explaining the various features and how to interpret the thermal images.
In fact, many modern thermal imagers even offer features like automatic temperature scaling and on-screen guides to help you get the best results. Once you get a feel for how the different colors correspond to different temperatures, you’ll be surprised how quickly you can become proficient at using a thermal imager!
Is a higher resolution always better in a thermal imager?
While higher resolution definitely contributes to a clearer and more detailed thermal image, it’s not always the be-all and end-all. Think of it like this: a high-resolution image can show you more detail, allowing you to identify smaller temperature differences and pinpoint the exact location of a problem. This can be particularly useful for professional applications or when working with intricate systems.
However, for simpler tasks like checking insulation in your home or looking for drafts, a lower-resolution imager might be perfectly adequate. The key is to balance resolution with your budget and the specific needs of your intended applications. A good starting point is to consider your budget and needs, and try to find an imager that meets your demands.
Can thermal imagers see through walls?
Okay, this is a common question, and the answer is a bit nuanced. Thermal imagers can’t technically see through walls in the way you might imagine, like Superman’s X-ray vision! They detect surface temperatures. However, they can indirectly reveal what’s behind a wall by detecting temperature differences on the surface caused by hidden problems.
For example, if there’s a water leak inside a wall, the moisture can affect the surface temperature, making that area appear cooler than the surrounding dry wall. Similarly, missing insulation can cause a wall to feel colder or hotter than it should, depending on the outside temperature. So, while they don’t “see through” walls, they can definitely help you diagnose hidden issues within them.
Verdict
Alright, you’ve journeyed through the world of thermal imaging, seen the contenders, and hopefully narrowed down your choices. Remember, the “best thermal imagers” aren’t necessarily the most expensive ones, but the ones that truly fit your specific needs and budget. Whether you’re a seasoned professional or just starting to explore the possibilities, the power of thermal imaging is now within your reach. Don’t be afraid to dive deep into the specs and compare models – this is an investment in efficiency, safety, and a whole new way of seeing the world.
The future is thermal! With this knowledge and our guide, you are well-equipped to choose the perfect thermal imager. Trust your instincts, review your needs, and get ready to unlock hidden worlds. Adventure awaits, problems are ready to be solved, and the unseen is about to become crystal clear. Now go out there and find the best thermal imager for you and get ready to change the way you see the world.