Remember that one time you spent hours meticulously crafting an anchor chart, only to have the markers bleed, fade, or, heaven forbid, run out of ink halfway through? I know I have! It’s the ultimate teacher frustration, right up there with glitter explosions and mysteriously disappearing pencils. That’s why the quest for the perfect marker is so real. We need markers that are vibrant, long-lasting, and won’t bleed through that precious chart paper. After all, these charts are our visual aids, our teaching companions, and deserve the very best.
Finding the right art supply can make all the difference, and when it comes to anchor charts, you deserve the very best. I’ve done the research and testing so you don’t have to! This review and buying guide is designed to help you navigate the sometimes overwhelming world of markers to help you discover the best anchor chart markers for your classroom, your budget, and your teaching style. Let’s ditch the marker mishaps and create anchor charts that truly shine!
We will review the best anchor chart markers later in this article. But before that, take a look at some relevant products on Amazon:


Last update on 2025-12-02 / Affiliate links / #CommissionsEarned / Images from Amazon Product Advertising API
Choosing Your Weapon: Finding the Best Anchor Chart Markers
Okay, let’s talk anchor charts. We all love them, right? They’re the visual backbone of our classrooms, those vibrant, collaborative displays that capture key learning points and serve as a constant reminder of what we’ve explored. But let’s be honest, a great anchor chart is only as good as the markers used to create it. How many times have you painstakingly crafted a beautiful chart only to have the markers bleed, fade, or dry out halfway through a lesson?
That’s why choosing the right marker is so crucial. It’s not just about color – it’s about legibility, longevity, and ease of use. Think about it: The average anchor chart, if cared for properly, can stay displayed in a classroom for weeks, sometimes even a whole semester! That’s a lot of exposure to little eyes (and little hands!), which makes finding reliable, vibrant, and non-toxic options even more important.
So, what makes a marker truly exceptional? We’re diving deep into the world of pigments, tips, and bleed-resistance to help you make an informed decision. We’ll be exploring the different types of markers available, from broad chisel tips for bold headings to fine tips for intricate details. We’ll also be considering factors like ink capacity and lightfastness – because no one wants a chart that fades faster than a summer tan.
This isn’t just a product review; it’s a guide to empower you, the educator, to create anchor charts that are not only informative but also visually appealing and durable. After all, finding the best anchor chart markers is an investment in your teaching, your students’ learning, and the overall vibrancy of your classroom environment. Get ready to arm yourself with the knowledge needed to choose the perfect “weapons” for your anchor chart arsenal!
The Best Anchor Chart Markers
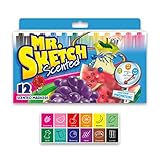
Mr. Sketch Scented Markers
Ah, Mr. Sketch. These markers aren’t just about writing; they’re about creating an experience! Remember the sweet smell of licorice or cinnamon filling the classroom? The vibrant colors jump off the page, making your anchor charts instantly engaging. Plus, the thick barrel is comfortable to hold, even during extended brainstorming sessions. They’re a classic for a reason, and the nostalgia factor definitely adds to the appeal.
However, while those delicious scents are a major draw, they can be a bit overwhelming for some students (and teachers!). Also, Mr. Sketch markers tend to bleed a little on thinner paper, so sticking to chart paper specifically designed for markers is crucial. The chisel tip is versatile but can be tricky for fine details, so they’re best for bold lettering and broader strokes.
Sharpie Art Pens
Looking for vibrant colors that won’t bleed? Sharpie Art Pens are a great option! These markers boast a fine point, allowing for detailed drawings and precise lettering on your anchor charts. With a rainbow of colors at your fingertips, you can create eye-catching visuals that truly pop. And because they’re Sharpies, you know you can count on the quality and durability.
The one downside is that they may not be as bold as some of the thicker options on the market. While the fine tip is great for detail, it can take longer to fill in larger areas. Also, they don’t have the same visual impact from afar as broad chisel tips. But if you are needing crisp lines and neat handwriting, Sharpie Art Pens are a must-have.
Expo Dry Erase Markers
For anchor charts that evolve and change with your lessons, look no further than Expo Dry Erase Markers! The vibrant colors erase cleanly from laminated surfaces, making them perfect for interactive charts and brainstorming sessions. Imagine being able to add, remove, and rearrange information on the fly – it’s a game-changer for dynamic teaching.
Just be sure to use them on the correct surface! Expo markers won’t work on standard paper. Plus, remember to keep the caps on tightly to prevent them from drying out. Some teachers also find the fumes a bit strong, so proper ventilation is always a good idea, but for a reusable chart, these are king.
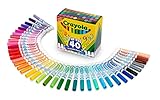
Crayola SuperTips Markers
Crayola SuperTips offer impressive versatility at a budget-friendly price. The unique conical tip allows you to create both broad strokes and fine lines simply by adjusting the angle. This makes them ideal for everything from bold headings to detailed illustrations on your anchor charts. They’re also washable, which is a huge plus for classrooms with younger students (or just accident-prone teachers!).
While they are washable, this can also be a con as they smear easily if they come in contact with moisture. The lighter colors may also appear a little faint compared to some other markers. However, for affordability and adaptability, SuperTips are a solid choice.
Paper Mate Flair Felt Tip Pens
Want vibrant colors and smooth, skip-free lines on your anchor charts? Paper Mate Flair Pens deliver just that. The felt tip glides effortlessly across the paper, creating crisp, clean lettering and colorful illustrations. They don’t bleed through most papers, making them a worry-free option for your classroom creations. The comfort grip will also allow you to create chart after chart.
While they don’t bleed, they do have a tendency to ghost on thinner paper, especially dark colors. Also, the tip can fray over time if you apply too much pressure. But if you treat them with care, Paper Mate Flair Pens are a fantastic choice for adding a touch of vibrancy to your anchor charts.
Why Anchor Chart Markers Are a Must-Have for Educators
Imagine you’re knee-deep in a lesson about fractions, and your anchor chart, the cornerstone of your visual aid, is fading into the background. The thin, streaky lines from your regular markers are hardly legible, and the students in the back are squinting, missing crucial information. This is where the power of proper anchor chart markers shines. Investing in the right markers isn’t just about aesthetics; it’s about ensuring that your teaching is clear, impactful, and accessible to every student in the room. High-quality markers create bold, vibrant lines that capture attention and effectively communicate complex concepts.
Think about the engaging discussions you foster during a unit on character development. You’re scribbling down insightful student contributions on your anchor chart, but if the ink is too light or the marker dries out quickly, the flow is interrupted, and the momentum stalls. The “best anchor chart markers” boast a smooth, consistent flow, allowing you to effortlessly document those golden teaching moments. They also have wider tips, perfect for creating headings and subheadings that stand out, instantly organizing the information for visual learners. A well-crafted, visually appealing anchor chart serves as a constant reminder of what they have learned.
Moreover, consider the longevity of your meticulously crafted anchor charts. Flimsy markers tend to bleed, fade, or dry up quickly, rendering your hard work useless after a few uses. Investing in quality anchor chart markers means investing in reusable learning tools that can be brought out year after year. The superior pigment quality ensures that your charts remain vibrant and legible, saving you time and money in the long run. Imagine being able to pull out a vibrant, well-preserved chart from a previous year to refresh students’ memories and build upon prior knowledge – a true testament to the value of durable, high-quality markers.
Ultimately, anchor chart markers are more than just stationery; they are an essential tool for effective teaching. They provide the visual clarity, smooth application, and long-lasting quality that empowers you to create engaging and impactful learning experiences. From fostering vibrant classroom discussions to creating enduring learning resources, the “best anchor chart markers” help bring your lessons to life, ensuring that your message reaches every student with clarity and impact. Treat yourself to these tools and watch your teaching, and your anchor charts, flourish!
Caring for Your Anchor Chart Markers
So, you’ve invested in some amazing anchor chart markers – fantastic! But like any good tool, they need a little TLC to keep them working their best. Think of it like this: you wouldn’t leave your favorite pen uncapped, would you? Same principle applies here. Proper care ensures your markers last longer and deliver consistent, vibrant results every time you use them to create stunning visual aids for your students.
One of the biggest culprits behind dried-out markers is improper storage. Always store your markers horizontally. This helps to keep the ink evenly distributed within the marker, preventing the tip from drying out. Imagine a glass of water standing upright for too long; the water at the top evaporates first. The same thing happens to marker ink!
Another essential tip is to recap your markers immediately after use. Even a few minutes of exposure to air can start to dry out the ink, shortening the lifespan of your marker. Make it a habit, like clicking your pen after writing. You can even make it a classroom rule, engaging students in the maintenance of classroom supplies.
Finally, consider purchasing a marker storage container with individual slots. This not only keeps your markers organized, making it easy to find the color you need quickly, but also prevents them from rolling around and potentially getting damaged. It’s a small investment that can significantly extend the life of your anchor chart markers and keep your classroom organized.
Troubleshooting Common Marker Problems
Ever experienced the frustration of a marker that just refuses to write? Don’t despair! Often, the problem is easily solvable. Think of it like troubleshooting a simple computer issue before calling tech support. A little detective work can save you time and money.
A common issue is a dried-out marker tip. Before tossing it in the bin, try dipping the tip in a small amount of water for a few seconds. This can often rehydrate the tip and get the ink flowing again. Imagine you are bringing life back to a thirsty plant.
Another frequent problem is a clogged marker tip. This can happen when using markers on dusty surfaces or when different colors get mixed on the tip. Try gently wiping the tip with a clean, damp cloth to remove any debris. You might be surprised at how much of a difference this simple action can make.
Sometimes, a marker may appear to be dry but is actually just low on ink. If you have refillable markers, simply refill them with the appropriate ink. If not, consider purchasing a marker that is similar to the one you have, but only if it is something you use often. Remember you want to reduce, reuse, and recycle!
Maximizing Marker Color Variety
Who says you need to buy every single color of marker available? With a little creativity, you can expand your color palette without breaking the bank! This is like learning how to mix paint colors; you can create a whole spectrum of hues with just a few base colors.
One simple trick is layering colors. Try drawing one color over another to create a new shade. For example, layering a light blue over a yellow can create a beautiful sea-foam green. Experiment with different combinations to see what you can discover!
Another fun technique is using a blender marker. A blender marker is a colorless marker that can be used to blend two different colors together, creating smooth transitions and gradients. This is perfect for adding depth and dimension to your anchor charts. Think of it as a magic wand that transforms your drawings.
Consider using water-based markers with a water brush. You can wet the marker ink and spread it to create watercolor effects. It will give you a great look without needing a lot of different art supplies.
Anchor Chart Marker Hacks for Educators
Beyond just writing and drawing, anchor chart markers can be used in a variety of creative ways to enhance your lessons and engage your students. These are the kind of tricks that make your lessons more memorable and interactive.
Try using different marker thicknesses to create emphasis and visual hierarchy on your anchor charts. Use thicker markers for headings and key points, and thinner markers for supporting details. This helps students quickly identify the most important information. It’s like creating a visual roadmap for their learning.
Use different colors of markers to represent different concepts or categories. For example, you could use blue for facts, green for opinions, and red for questions. This color-coding system can help students organize their thoughts and ideas. It’s a simple but effective way to promote critical thinking.
You can use markers to create interactive anchor charts that students can contribute to. For example, you could create a chart with open-ended questions and have students use markers to write their answers. This turns your anchor chart into a collaborative learning tool. It’s a great way to foster active participation and make learning more engaging.
Consider using dry-erase markers on laminated anchor charts for easy editing and reuse. This is a great way to save paper and create reusable resources. You can update the information on the chart as needed, making it a flexible and adaptable tool for your classroom. It’s a sustainable and practical way to enhance your teaching.
Your Guide to Finding the Best Anchor Chart Markers
Hey there, fellow educator! Creating engaging and informative anchor charts is a fantastic way to bring your lessons to life. But let’s be honest, using subpar markers can turn your chart-making dreams into a frustrating mess. Streaky lines, bleeding colors, and markers that dry out mid-sentence are the enemies of a good anchor chart. That’s why choosing the right markers is crucial. This guide is designed to help you navigate the world of anchor chart markers and find the absolute best anchor chart markers for your classroom needs. Let’s dive in and find the perfect tools to unleash your anchor chart artistry!
Color Vibrancy and Pigmentation
Okay, first things first, let’s talk about color! A dull, washed-out anchor chart is about as exciting as watching paint dry. You want colors that pop and grab your students’ attention from across the room. Look for markers that boast rich, vibrant pigmentation. Think about it: a bright blue sky illustrating weather patterns or a fiery red volcano diagram – those visuals are only effective if the colors are truly eye-catching.
Trust me, I’ve been there. I bought a set of markers once that promised vibrant colors, but the blues were more like sad, muted grays. My anchor chart on the water cycle looked like it was depicting a perpetual cloudy day. Save yourself the disappointment and read reviews, check out online swatches, and if possible, test the markers yourself before committing to a whole set. Your students (and your artistic soul) will thank you.
Tip Size and Variety
Next up: the all-important tip size! Consider this: Are you mostly filling in large areas, or are you adding intricate details? Do you need to create bold headings and titles? A single tip size just won’t cut it. You’ll want a variety of tip sizes to handle different tasks. Think fine tips for outlining, medium tips for writing, and broad tips for coloring in large areas.
Think of it like having a toolbox: a single hammer can’t do everything. Similarly, one marker tip can limit your anchor chart potential. Sets with multiple tip sizes give you the freedom to experiment with different styles, create visual hierarchy, and generally make your anchor charts more dynamic and effective. Plus, having options makes it easier to avoid that dreaded feeling of being “stuck” halfway through a project because you don’t have the right tool. For the best anchor chart markers, versatility is key.
Bleed Resistance and Paper Type
This is a big one, especially if you’re using thinner chart paper! Bleeding is when the ink seeps through the paper, creating blurry lines and a messy look. It’s the nemesis of crisp, clean anchor charts. Look for markers specifically designed to resist bleeding, especially if you’re planning to use them on standard chart paper.
Consider the type of paper you’ll be using most often. Some markers perform beautifully on thick paper but bleed like crazy on thinner varieties. Experiment with different marker and paper combinations to find what works best for you. You can even use a barrier sheet behind your chart paper for extra protection. No one wants to spend time creating a masterpiece only to have it ruined by ink bleeding through to the next page! Finding bleed-resistant markers is crucial for creating professional-looking and long-lasting anchor charts.
Smear Resistance and Drying Time
Smearing is another common frustration, especially for left-handed individuals (I feel your pain!). Nobody wants to accidentally wipe away a perfectly good definition or equation with the swipe of a hand. Look for markers that dry quickly and are resistant to smearing once dry.
The drying time of the ink can also impact your workflow. Super slow-drying markers can be a real drag, especially if you’re working on a tight schedule. Imagine trying to add labels or details only to keep smudging the ink underneath. Look for markers that strike a good balance: they shouldn’t dry so fast that they become streaky, but they should dry quickly enough to prevent smearing. The best anchor chart markers won’t betray you with unsightly smudges.
Odor and Ventilation
Believe it or not, marker odor can be a real issue, especially if you’re sensitive to smells or working in a poorly ventilated classroom. Some markers have a strong, chemical odor that can be quite unpleasant, and even cause headaches or dizziness for some people. Look for low-odor or non-toxic markers, especially if you’re working with younger students.
Think about it: you’re already trying to manage a classroom full of energetic kids, the last thing you need is a headache induced by marker fumes. Opting for low-odor markers is not only better for your health but also creates a more pleasant learning environment for your students. Remember to always use markers in a well-ventilated area, even if they are low-odor. Creating awesome anchor charts shouldn’t come at the expense of your well-being!
Longevity and Value
Let’s be real: markers aren’t cheap, especially if you’re buying them in bulk for your classroom. You want markers that will last a reasonable amount of time and provide good value for your money. Consider factors like ink capacity and tip durability when making your decision. A marker that dries out after only a few uses is a major disappointment.
Read reviews to get an idea of how long the markers typically last. Look for markers with a reputation for longevity and consistent performance. While it might be tempting to go for the cheapest option, remember that you often get what you pay for. Investing in slightly more expensive, high-quality markers can actually save you money in the long run by reducing the frequency with which you need to replace them. The best anchor chart markers are a worthwhile investment.
Storage and Organization
Finally, don’t underestimate the importance of storage and organization! Having a system for storing your markers will not only help them last longer but also make it easier to find the color you need when you need it. Consider markers that come with their own storage case or invest in a marker organizer.
A disorganized mess of markers rolling around in a drawer is a recipe for disaster. Tips get damaged, colors get mixed up, and finding the right marker becomes a frustrating scavenger hunt. A good storage solution keeps your markers organized, protects the tips, and prevents them from drying out prematurely. Plus, it just makes your workspace look more professional and inviting. A little organization goes a long way in making your anchor chart creation process smoother and more enjoyable.
FAQ
What makes a marker good for anchor charts?
Great question! When you’re choosing markers for anchor charts, you want to think about a few key things. First, consider vibrancy. You want colors that really pop and grab attention, so your students can easily read and understand the information you’re presenting. Think about how far away the chart will be viewed and how well the colors will hold up under classroom lighting.
Beyond color, think about bleed-through and longevity. No one wants a marker that soaks through the chart paper and ruins the wall behind it! And obviously, you want markers that last and don’t dry out quickly, so you’re not constantly replacing them. Good anchor chart markers offer the perfect balance of bold color, minimal bleed-through, and a decent lifespan.
Are permanent markers okay to use on anchor charts?
Permanent markers can be tempting because they’re known for their vibrancy and resistance to smudging. However, when it comes to anchor charts, it’s generally best to avoid them. The main issue is bleed-through. Permanent markers tend to soak through the paper much more easily than water-based markers, which can ruin your chart and anything behind it.
Also, consider the longevity of your anchor chart. While permanent ink will definitely last, you might want the flexibility to make changes or updates later. If you’re absolutely set on using permanent markers, test them in an inconspicuous corner of your chart paper first to see how much they bleed.
How do I prevent my anchor chart markers from drying out?
Marker dryness is a common problem, but there are some simple steps you can take! First, always make sure you tightly cap your markers immediately after use. This prevents air from getting in and drying out the ink. It’s a good habit to get into, even if you’re in the middle of a project.
Another helpful tip is to store your markers horizontally. This helps to keep the ink distributed evenly throughout the marker, preventing it from settling at one end and leaving the other end dry. If you have markers that are already starting to dry out, you can try storing them tip-down for a little while, but this is just a temporary fix.
What’s the difference between chisel tip and bullet tip markers for anchor charts?
The type of tip you choose really depends on your personal preference and the specific needs of your anchor chart. Chisel tip markers have a slanted, wedge-shaped tip. This allows you to create both thick and thin lines, depending on how you hold the marker. They’re great for headings, bold outlines, and filling in larger areas.
Bullet tip markers, on the other hand, have a rounded, conical tip that produces a consistent line width. They’re ideal for writing smaller text, drawing detailed illustrations, and adding fine details to your anchor chart. Ultimately, it’s a matter of finding what works best for your style and the types of charts you create. Some teachers even like to have both on hand!
Are there any eco-friendly options for anchor chart markers?
Yes, there are definitely more eco-friendly options available for anchor chart markers these days! Look for markers that are made from recycled materials or that can be refilled. This helps to reduce waste and lessen your environmental impact.
Additionally, some brands offer markers with water-based inks, which are generally considered to be less harmful to the environment than solvent-based inks. Do a little research and read reviews to find brands that are committed to sustainability. Every little bit helps!
How do I clean up marker mistakes on my anchor charts?
Oops, made a mistake? Don’t worry, it happens to the best of us! For washable markers, a damp cloth or baby wipe is usually all you need to gently wipe away the error. Just be careful not to scrub too hard, as this could damage the paper.
If you’ve accidentally used a permanent marker, it’s a bit trickier, but not impossible to fix. Try using a small amount of rubbing alcohol or hand sanitizer on a cotton swab to gently blot the ink. Again, test this in an inconspicuous area first to make sure it doesn’t damage the paper. For larger mistakes, sometimes the best option is to simply cover it up with a piece of paper or a decorative sticker.
How much should I expect to spend on a good set of anchor chart markers?
The cost of a good set of anchor chart markers can vary depending on the brand, the number of markers in the set, and the quality of the materials. You can find decent sets for as little as $10-$15, but these might not have the best color vibrancy or longevity.
For a higher-quality set that will last longer and provide more vibrant colors, you might need to spend $20-$40 or more. Ultimately, it’s about finding a balance between price and quality that fits your budget and needs. Consider how often you’ll be using the markers and how important factors like color richness and durability are to you.
Final Words
So, there you have it! We’ve unpacked the world of anchor chart markers, explored the best options, and armed you with the knowledge to make an informed choice. Remember, choosing the best anchor chart markers isn’t just about picking the brightest colors or the smoothest glide. It’s about investing in a tool that amplifies your teaching, captures your students’ attention, and makes learning truly engaging.
Now, go forth and create! Don’t be afraid to experiment, explore different styles, and find the markers that perfectly suit your needs and teaching style. With the right tools and a little bit of creativity, you can transform your classroom into a vibrant hub of learning. You’ve got this!