You’ve just woken up to that perfect blanket of fresh snow, the kind that calls you to the backcountry with an almost irresistible pull. Your gear is laid out, spirits are high, and the excitement for a deep powder day is palpable. As you double-check your pack – shovel, probe, first-aid kit – you’re reminded that the best days in the mountains are always the safest ones. It’s not just about chasing the thrill, but ensuring you and your crew are prepared for anything, especially when venturing into avalanche terrain.
That preparation includes having reliable, top-tier safety equipment. While investing in your backcountry setup can feel like a significant undertaking, ensuring you have a dependable avalanche beacon is non-negotiable. Knowing that safety doesn’t have to break the bank, we’ve done the research to help you find the best avalanche beacons under $500. We’ll dive into what makes a great beacon and review options that offer crucial features without compromising your budget or, more importantly, your safety.
We will review the best avalanche beacons under $500 later in this article. But before that, take a look at some relevant products on Amazon:


Last update on 2026-02-16 / Affiliate links / #CommissionsEarned / Images from Amazon Product Advertising API
Choosing Your Lifeline: A Friendly Guide to Avalanche Beacons
Imagine yourself standing atop a pristine, snow-covered peak, the air crisp, the silence profound. You’ve earned this view, this moment of freedom. But as any seasoned backcountry enthusiast knows, the beauty of the mountains also harbors powerful, unpredictable forces. Avalanche safety isn’t just a recommendation; it’s a fundamental pillar of responsible winter adventuring. It’s about more than just knowing; it’s about being prepared for the unimaginable, ensuring you have the tools to protect yourself and your partners.
At the heart of that preparedness lies the avalanche beacon (also known as a transceiver). This small, yet mighty, device is your lifeline, designed to emit a signal if you’re buried and receive one if you’re searching. Studies consistently show that the survival rate for avalanche victims found within the first 15 minutes can be over 90%, but this rate plummets dramatically thereafter. A reliable beacon, paired with a shovel and probe, is the cornerstone of a quick, effective rescue, turning a terrifying incident into a survivable one.
Now, you might be thinking, “Safety is priceless, but my wallet isn’t limitless!” And you’d be right to consider your budget. The good news is that advancements in technology have made high-quality, reliable avalanche beacons more accessible than ever. You don’t necessarily need to break the bank to get a device that performs exceptionally well when it matters most. That’s precisely why we’ve put together this guide, focusing on the best avalanche beacons under $500 – proving that top-tier safety doesn’t always come with a top-tier price tag.
In the following sections, we’ll dive deep into what makes a beacon great, what features to look for, and how to choose the perfect model that fits both your safety needs and your budget. Our goal is to equip you with the knowledge to make an informed decision, so you can head into the backcountry with confidence, knowing you’ve made a smart investment in your safety and the safety of those you adventure with. Let’s make sure your mountain memories are always good ones.
5 Best Avalanche Beacons Under $500
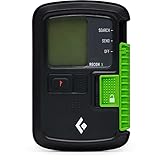
BCA Tracker4
When you’re out there, simplicity and speed can make all the difference, and the BCA Tracker4 delivers on both fronts. This beacon is a true workhorse, known for its intuitive interface that gets you searching faster. Whether you’re a seasoned pro or just starting to venture into the backcountry, its no-nonsense design makes it a reliable companion you can trust when seconds count.
The Tracker4 boasts a large, easy-to-read display and features a signal suppression mode and Big Picture mode, which are invaluable for handling multiple burial scenarios with less confusion. Its robust casing is built to withstand the rigors of the mountains, and the updated design offers improved durability. This beacon truly aims to reduce decision time in an emergency, allowing rescuers to focus on the task at hand.
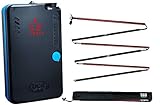
Mammut Barryvox
For many backcountry enthusiasts and professionals, the Mammut Barryvox stands as a benchmark for reliability and precision. This beacon is renowned for its impressive range and rock-solid performance, offering the kind of accuracy that provides real confidence in high-stress situations. It’s built to handle the toughest conditions and comes from a lineage of trusted avalanche safety gear.
The Barryvox features a large, clear display that guides users with precise distance and direction indicators. Its marking function for multiple burials is exceptionally intuitive, allowing for quick toggling between victims. With its powerful digital search strip and reliable operation, the Barryvox remains a top choice for anyone serious about their backcountry safety.
Ortovox Diract Voice
Imagine being guided through a chaotic rescue scenario by clear, calm voice commands – that’s precisely what the Ortovox Diract Voice offers. This beacon breaks new ground by providing audible instructions in a search, helping to reduce stress and improve efficiency, especially for less experienced rescuers or in high-pressure situations where every second matters.
Beyond its innovative voice navigation, the Diract Voice also includes smart antenna technology for improved range and a more stable signal. Its rechargeable battery is a convenient modern touch, and the robust design can stand up to harsh winter environments. This beacon truly provides a unique and reassuring approach to avalanche rescue.
Ortovox 3+
The Ortovox 3+ offers a superb blend of reliability, ease of use, and advanced technology, making it a fantastic all-around beacon for a wide range of backcountry users. It strikes a perfect balance between features and simplicity, ensuring that it performs effectively without overwhelming its operator. It’s a dependable choice that many rely on for their daily adventures.
A standout feature of the 3+ is its smart antenna technology, which automatically switches to the best transmitting antenna to ensure a stronger, more consistent signal, especially in a burial scenario. It has a clear, intuitive display for direction and distance, and its marking function works reliably for multiple burials. This beacon is a solid workhorse that consistently delivers.
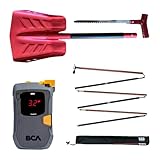
Arva Neo BT Pro
The Arva Neo BT Pro is a beacon designed for those who demand advanced features and connectivity from their safety equipment. It combines a wide search strip with excellent precision, making it a formidable tool for rapid and effective searches. It’s an ideal choice for experienced users who want every advantage in a rescue situation.
This beacon boasts a powerful processor for fast analysis of signals, along with multi-burial marking and a handy group check function. Its Bluetooth connectivity is a key modern feature, allowing users to update firmware and configure settings directly from their smartphone. The Neo BT Pro is built tough, ready for the rigors of the mountains, and packed with features to enhance your safety.
Your Lifeline in the Snow: Why a Sub-$500 Avalanche Beacon is Essential
Venturing into the majestic, untamed beauty of the backcountry offers unparalleled freedom and exhilaration. However, this incredible experience comes with inherent risks, primarily the threat of avalanches. These powerful forces of nature can strike without much warning, burying individuals under tons of snow in a matter of seconds. In such a terrifying scenario, every moment counts. The grim reality is that survival rates plummet drastically after the first 15-20 minutes. This is precisely why an avalanche beacon isn’t just a piece of gear; it’s a critical lifeline, often the difference between a tragic outcome and a successful rescue.
Many aspiring backcountry enthusiasts might assume that life-saving avalanche safety equipment comes with an exorbitant price tag. Thankfully, this isn’t the case, especially when it comes to avalanche beacons. The market today offers an impressive array of high-quality, reliable avalanche beacons under $500 that deliver all the essential functionalities needed for effective search and rescue. These aren’t “budget” in terms of performance or reliability; rather, they represent excellent value, providing fast signal acquisition, intuitive interfaces, and accurate distance and direction indicators. Investing in one of these “best avalanche beacons under $500” means equipping yourself with a powerful tool without having to break the bank.
Consider a relatable scenario: you and your friends are enjoying a bluebird day, carving fresh tracks through untouched powder. Suddenly, the snowpack gives way. One of your group is swept away and buried. In that heart-stopping moment, panic can easily set in. But with everyone equipped with a properly functioning beacon, and having practiced rescue techniques, you can quickly switch your beacon to “search” mode, pinpointing the buried victim’s signal. Imagine the immense relief as you follow the beacon’s clear guidance, knowing that you’re actively working to save a life, potentially your friend’s, or even your own if roles were reversed. It’s not just about rescuing others; it’s about ensuring that if you find yourself in a similar situation, your companions have the means to find you.
Ultimately, purchasing an avalanche beacon under $500 is a non-negotiable investment in your safety and the safety of your adventure partners. It’s a proactive step that demonstrates responsibility and preparedness for the inherent risks of venturing into avalanche terrain. These accessible, high-performing beacons provide peace of mind, empowering you and your group with the ability to conduct rapid, effective searches when every second truly matters. Don’t let cost be a barrier to vital safety; embrace the backcountry responsibly by ensuring one of these essential, affordable tools is always part of your kit.
Beyond the Beacon: Your Full Avalanche Safety Kit
Getting a top-notch avalanche beacon under $500 is a fantastic start, but let’s be real: it’s just one piece of a much larger, life-saving puzzle. Imagine you’re out in the backcountry, the snow is epic, and suddenly, an avalanche hits. Your beacon is designed to transmit a signal if you’re buried, or help you find a buried partner. But once you’ve pinpointed that signal, what then? You can’t exactly dig someone out with just your hands, especially not quickly enough. That’s why your beacon needs friends – essential gear that completes your safety arsenal. Think of it like a superhero team; each member has a vital role.
The two best friends your beacon can have are a reliable avalanche shovel and a sturdy probe. These aren’t optional extras; they’re as critical as the beacon itself. The probe is your elongated arm, helping you pinpoint the exact location of a buried victim once your beacon has gotten you into the right area. Every inch matters when time is running out. And once you’ve got a probe strike, that shovel becomes your most powerful tool. You might be surprised how hard it is to move compacted avalanche debris, so a robust, packable shovel is non-negotiable for efficient, frantic digging. Without these two, your beacon is essentially just a fancy metal detector.
Beyond the “big three” (beacon, shovel, probe), consider other elements that contribute to overall safety. Things like a first-aid kit, navigation tools (map, compass, GPS), a fully charged phone or satellite messenger for communication, and even an avalanche airbag pack can significantly increase your chances of survival or a successful rescue. While not every piece is budget-friendly or necessary for every trip, understanding the full spectrum of gear helps you make informed decisions as you expand your backcountry adventures and prepare for more complex scenarios.
Ultimately, investing in an avalanche beacon, even one under $500, is a commitment to safety. But that commitment is incomplete if you don’t equip yourself with the entire kit. Think of it as preparing for a marathon – you wouldn’t just wear running shoes; you’d consider your clothes, hydration, and nutrition too. In the backcountry, your full safety kit is your hydration, nutrition, and everything else rolled into one. It’s about having the right tools for every stage of a potential emergency, ensuring that if the worst happens, you’re truly prepared to act.
Practice Makes Perfect: Mastering Your Beacon Skills
Owning a shiny new avalanche beacon is a fantastic step, but let’s be honest, it’s not a magic talisman. Just like owning a car doesn’t make you a race car driver, having a beacon doesn’t automatically make you an avalanche rescue expert. The most crucial part of beacon ownership is practice – consistent, realistic, and often. Imagine you’re in a high-stress, time-critical situation, perhaps with a loved one buried under several feet of snow. Your ability to quickly and accurately use your beacon, probe, and shovel under pressure is what will make the difference between life and death. Those skills are perishable, meaning if you don’t use them, you lose them.
So, how do you practice? It’s not just about turning it on and seeing if it beeps. Real practice involves simulating actual rescue scenarios. This means setting up mock burials – perhaps hiding a beacon in a backpack and burying it a few feet deep, then having a partner try to find it. You should practice single burials, multiple burials, and even complex scenarios where signals might overlap. Time yourself. Compete with your friends. The goal is to build muscle memory and mental shortcuts so that when adrenaline is coursing through your veins, your hands and mind instinctively know what to do.
Many ski resorts and backcountry areas now offer “beacon parks” – designated zones where you can practice finding buried transmitters. These are incredibly valuable resources for honing your skills in a controlled environment. Beyond self-guided practice, consider signing up for a formal avalanche safety course, like an Avalanche Skills Training (AST) Level 1 or higher. These courses provide expert instruction, structured drills, and invaluable feedback on your technique, helping you understand the nuances of beacon searching, probing patterns, and efficient shoveling. They also teach you how to work as a cohesive team, which is vital in a real-world emergency.
The bottom line is this: your avalanche beacon, no matter how advanced or budget-friendly, is only as good as your ability to use it effectively and efficiently. You can have the best gear in the world, but if you fumble with the controls, get lost in a signal search, or can’t dig effectively, those precious minutes tick by, reducing the chances of a positive outcome. Make beacon practice a regular part of your backcountry routine. It’s an investment of time that pays dividends when it truly counts, giving you the confidence and competence to respond decisively when faced with the ultimate test.
Beacon Care & Longevity: Protecting Your Investment
You’ve just bought one of the best avalanche beacons under $500, and it’s a critical piece of safety gear. So, just like you’d meticulously care for your skis or snowboard, your beacon deserves the same attention. It’s not just about protecting your investment financially; it’s about ensuring this device, which could literally save a life, functions perfectly when that critical moment arises. Imagine your beacon dying on you in the middle of a search, or transmitting a weak signal when you’re the one buried. Proper care isn’t a suggestion; it’s a necessity for reliable performance.
One of the most common issues people face with beacons is battery-related. Always use the specified type of batteries (usually alkaline, sometimes lithium for extended cold-weather performance if recommended by the manufacturer). Change them regularly, often after every few trips or at the start of a new season, even if the indicator shows some charge left. Don’t mix old and new batteries, and never, ever leave dead or corroded batteries in the unit for long-term storage. When storing your beacon for the off-season, remove the batteries entirely to prevent leakage and damage to the internal electronics.
Beyond batteries, consider the physical well-being of your beacon. These devices are designed to be durable, but they’re not indestructible. Avoid dropping them, especially on hard surfaces. Keep them away from strong magnetic fields (like magnets on ski boots or speakers) when in use or storage, as this can interfere with their performance. Regularly inspect the casing for cracks, ensure the battery compartment closes securely, and check that all switches and buttons are functioning smoothly. A little visual check before each outing can catch potential issues before they become problems in the field.
Finally, stay up-to-date with your beacon’s software. Many modern beacons have firmware updates that can improve performance, add features, or fix bugs. Check the manufacturer’s website periodically for updates and follow their instructions for installation. Think of it like updating your phone – it keeps everything running smoothly. Before every single backcountry trip, perform a quick function check: turn the beacon on, ensure it transmits, and have a partner confirm they can receive your signal. Then, switch to search mode and verify it works. This routine ensures that your beacon, your life insurance in the snow, is always ready to perform its critical function.
The Human Element: Responding to an Avalanche Emergency
When an avalanche hits, the raw power of nature is terrifying, and the immediate aftermath is a blur of adrenaline and panic. But amidst that chaos, your avalanche beacon, and your training, become the linchpins of a successful rescue. While your beacon is an incredible piece of technology, it’s merely a tool. The real hero is the human element: the well-trained, calm, and decisive individual or team using that tool. Imagine the scenario: you witness your friend get swept away. Your beacon is on, but what do you do? This is where practice, communication, and clear roles become critically important.
The first step in a real-world rescue, once the slide has settled, is to switch your beacon from transmit to search mode, ensuring your remaining partners are still transmitting. Then, it’s about executing a systematic search pattern, typically a signal search, to pick up the first faint beeps from the buried victim’s beacon. This requires a steady hand, a clear head, and the ability to interpret the beacon’s directional and distance indicators accurately. You’ll move quickly but methodically, following the loudest signal, narrowing your focus from a wide search to a more precise pinpointing. Time is the enemy, so efficiency here is paramount.
Once your beacon leads you to the strongest signal, the next critical phase begins: probing. This is where your probe comes into play, used in a methodical spiral pattern to physically locate the victim. It’s a surprisingly tiring and precise task, requiring concentration and a coordinated effort if you’re working with a team. A positive probe strike is a moment of intense relief, but it’s immediately followed by the most physically demanding part of the rescue: strategic shoveling. Avalanche debris can be as hard as concrete, and knowing how to move snow efficiently (not just wildly digging) can shave precious minutes off the extraction time.
In these high-stakes moments, the human element extends beyond individual skills to team dynamics. Assigning roles (e.g., search leader, beacon operator, shovelers), maintaining clear communication, and staying calm under immense pressure are vital. It’s easy to get flustered, but your practice sessions (like those discussed earlier) kick in, allowing you to operate on instinct and training. A successful avalanche rescue isn’t just about having a beacon; it’s about the prepared, resilient, and collaborative efforts of people who understand how to use their tools and their training to bring a friend back from the brink.
Best Avalanche Beacons Under $500: A Comprehensive Buying Guide
Hey there, fellow snow enthusiast! Are you gearing up for some incredible backcountry adventures this winter? That’s awesome! There’s truly nothing quite like the serenity and thrill of earning your turns in untouched powder. But as you well know, with that incredible freedom comes a crucial responsibility: safety. And when we talk about safety in avalanche terrain, your beacon – your avalanche transceiver – is without a doubt the most critical piece of gear you’ll carry, right up there with your shovel and probe. It’s your lifeline, and the lifeline of your partners, should the unthinkable happen. We get it, the price tag on some of these essential safety devices can feel a bit daunting, but here’s the good news: you absolutely don’t need to break the bank to get a highly effective and reliable beacon. In fact, there are some truly fantastic options out there, all falling comfortably under the $500 mark. We’re going to walk you through exactly what to look for when you’re trying to find the best avalanche beacons under $500, so you can make an informed decision and feel confident in your choice. Let’s dig in and make sure you’re ready for anything the mountains throw your way!
1. Ease of Use and Intuitive Interface
When you’re under the extreme stress of an avalanche rescue, every second counts, and your ability to operate your beacon quickly and efficiently becomes paramount. Imagine being in a high-stakes situation, your adrenaline pumping, and you suddenly find yourself fumbling with complex menus or tiny buttons. It’s not a scenario anyone wants to be in! That’s why, when you’re looking at the best avalanche beacons under $500, a simple, intuitive interface should be at the very top of your priority list. Look for models with large, clear displays that are easy to read in varying light conditions, even with gloves on. Think about how the device switches between send and search modes – is it a simple, definitive slide switch or a button you need to hold? The simpler and more tactile, the better, ensuring you won’t hesitate or make mistakes when it truly matters.
Think about how you’ll practice with your beacon, because regular practice is key to proficiency. A beacon that’s easy to pick up and understand means you’ll be more likely to actually get out and practice with your partners, turning what could be a complex task into second nature. You want a beacon where the directional arrows and distance readings are unambiguous and respond quickly, guiding you directly to the signal. Some beacons even have a “group check” mode that makes pre-trip checks a breeze. Remember, the best beacon for you is the one you can operate flawlessly under pressure, and often, that’s the one that keeps things simple and straightforward.
2. Range and Search Strip Width
Alright, let’s talk about one of the most critical performance metrics: range. When an avalanche hits, the wider the area your beacon can “hear” a buried signal from, the faster you can get a preliminary lock on the victim. This is often referred to as the “search strip width,” and it directly translates to how quickly you can cover ground during a search. While manufacturers often boast impressive maximum ranges in ideal conditions, what you really need to pay attention to is the effective or practical range – the distance at which you can reliably pick up a signal without it being too weak or jumpy. When comparing the best avalanche beacons under $500, you’ll find that some offer a significantly better effective range than others, meaning fewer zig-zags across the slide path and quicker initial signal acquisition.
Think of it this way: a wider search strip means you spend less time searching and more time pinpointing and digging. In a real-life scenario, a few extra meters of effective range can save precious minutes, and those minutes could be the difference between life and death. Look into user reviews and independent tests that specifically talk about a beacon’s real-world range performance, not just the numbers on the box. You want a beacon that gives you confidence in covering a large search area efficiently, guiding you smoothly from the initial signal acquisition all the way to the fine search. A strong, stable signal at greater distances is a hallmark of a high-performing beacon, even within this budget.
3. Multiple Burial Marking Functionality
While we always hope for single-victim scenarios, the reality is that multiple burials can and do happen in avalanches, especially if you’re touring in a group. This is where multiple burial marking, or “flagging,” functionality becomes absolutely indispensable. Imagine you’ve located one signal, but your beacon also indicates there are two or more other signals nearby. A good beacon will allow you to “mark” or “suppress” the signal of the first victim once you’ve pinpointed them, allowing you to move on and search for the next signal without interference. This literally saves lives by enabling a systematic and efficient search for all victims, rather than getting stuck on one signal.
When you’re evaluating the best avalanche beacons under $500, make sure this feature is present and easy to use. Some beacons allow you to mark multiple burials by simply pressing a button, while others might have a more complex sequence. You want a system that feels intuitive and quick in a crisis. Think about it: once you’ve marked a signal, the beacon should immediately re-orient itself to the next strongest signal, directing you to the next victim without delay. This capability transforms your beacon from a single-person search tool into a multi-victim rescue powerhouse, providing you with the vital ability to address the complexities of a group burial, which is a critical aspect of responsible backcountry travel.
4. Battery Life and Type
This might seem like a small detail, but battery life is a huge practical consideration for your avalanche beacon. You absolutely don’t want your beacon dying on you in the middle of a tour, let alone during a rescue! When looking for the best avalanche beacons under $500, pay close attention to the advertised battery life in both “send” and “search” modes. Remember that cold temperatures severely impact battery performance, so what might be listed as 300 hours at room temperature could be significantly less out on the snow. It’s always a good idea to factor in a substantial safety margin for cold weather and general degradation.
Most beacons use standard AA or AAA alkaline batteries, which are readily available and affordable. Some newer models might offer rechargeable options or use lithium batteries, which perform better in the cold but can be more expensive. Regardless of the type, always make sure you have fresh batteries at the start of every season, and carry spares in your pack, ideally not in the same pocket as your beacon to prevent accidental draining if they touch metal. Consider how easy it is to change the batteries in the field with gloved hands – is it a simple twist-and-lock mechanism or does it require tiny screws? A beacon with a robust battery life and an easy-to-change battery compartment gives you one less thing to worry about when you’re out enjoying the winter wilderness.
5. Durability and Build Quality
Let’s face it, your avalanche beacon is going to take a beating. It’ll be exposed to snow, ice, cold, and occasional bumps or drops as you navigate rugged terrain or just take it on and off. You need a device that’s built like a tank, or at least like a very resilient snow leopard. When you’re sifting through options for the best avalanche beacons under $500, really scrutinize the materials and construction. Look for a robust casing that feels solid in your hand, not flimsy plastic. Consider if the screen is recessed or protected to prevent scratches and cracks, as a damaged display could render your beacon useless in a critical moment.
Furthermore, water and dust resistance are non-negotiable. Your beacon will inevitably get wet, whether from falling snow, melting ice, or simply the condensation from your body heat. Look for an IP rating (Ingress Protection rating) if available, which indicates its resistance to water and dust. A higher IP number means better protection. A durable, well-sealed beacon ensures that its internal electronics remain protected from the elements, guaranteeing reliable performance when you need it most. Investing in a beacon with excellent build quality means you won’t have to worry about it failing when you’re miles from civilization and counting on it for your survival.
6. Weight, Size, and Harness System
While performance is paramount, the practicalities of carrying your beacon shouldn’t be overlooked, especially if you’re embarking on long tours or multi-day expeditions. A beacon that’s too bulky or uncomfortable to carry is one that might get left behind or carried improperly, defeating its entire purpose. When you’re looking at the best avalanche beacons under $500, consider its overall footprint and weight. While most modern beacons are quite compact, some are noticeably sleeker and lighter than others, making them virtually unnoticeable once secured.
Equally important is the included harness or carry system. This isn’t just about comfort; it’s about quick access and secure placement. A well-designed harness will keep the beacon snugly against your body, typically in a chest harness, preventing it from swinging around or getting snagged on branches. It should also allow for rapid deployment and transition from send to search mode with minimal fuss. Test out the harness – does it feel comfortable under your layers? Can you easily operate the beacon while it’s still in the harness? A system that integrates seamlessly with your touring setup ensures that your beacon is always where it needs to be, ready for action, without adding unnecessary bulk or discomfort to your adventure.
7. Software Updates and Standards
Finally, let’s talk about the more “techy” side of things, but it’s super important for the longevity and reliability of your beacon: software updates and adherence to standards. All modern avalanche beacons operate on a universal frequency of 457 kHz, which is critical for interoperability – meaning your beacon will work with anyone else’s, regardless of brand. This is a non-negotiable standard, and any beacon you consider will (or should) adhere to it. What sets some beacons apart, however, is their ability to receive software updates.
Think of it like the operating system on your phone; occasional updates can improve performance, fix bugs, and sometimes even add new features. Some manufacturers offer firmware updates that you can download and install yourself, or have done by a service center. This means that even if you buy one of the best avalanche beacons under $500 today, it has the potential to evolve and improve over its lifespan, ensuring it remains at peak performance. When researching, check if the manufacturer offers this capability and how accessible it is. A beacon that can be updated is a beacon that can stay reliable and cutting-edge for years to come, providing you with ongoing peace of mind and maximizing your investment in safety.
Choosing the best avalanche beacons under $500 doesn’t have to be overwhelming. By focusing on these key factors – ease of use, range, multi-burial functionality, battery life, durability, comfort, and software support – you’ll be well on your way to selecting a reliable, life-saving device that fits your budget. Remember, the most important “feature” of any beacon is your proficiency in using it, so once you’ve made your choice, commit to regular practice with your partners. Stay safe out there, have an incredible season, and enjoy the mountains responsibly!
FAQ
Why should I consider an avalanche beacon under $500? Does a lower price mean less performance?
Not at all! You might be pleasantly surprised to hear that many excellent, feature-rich avalanche beacons are available well within the $500 budget. This price point often represents a sweet spot where you get robust, reliable technology that’s more than capable of aiding in a life-saving rescue, without needing to invest in the very top-tier, most advanced models that might have features beyond what most recreational users need.
These beacons are designed with core functionality and user-friendliness in mind, ensuring they provide accurate and swift searches when it matters most. Focusing on models in this range allows you to allocate your budget effectively, perhaps even leaving room for other essential avalanche safety gear like a shovel and probe, which are equally vital components of your backcountry kit.
What’s the single most important feature to look for in an avalanche beacon?
While many features contribute to a beacon’s effectiveness, the absolute most important one is arguably its ease of use under stress. In an actual avalanche scenario, your adrenaline will be pumping, and fine motor skills can diminish. You want a beacon that feels intuitive, with clear displays and simple controls that you can operate quickly and confidently, even if your hands are cold or shaky.
Look for a beacon with a logical interface and clear directional indicators. While range and multi-burial capabilities are crucial, if the beacon is difficult to operate when every second counts, those features become less impactful. Simplicity and clarity in a high-pressure situation are truly paramount for a successful rescue.
Are beacons in this price range suitable for beginners, or are they more for experienced users?
Absolutely, beacons under $500 are often perfectly suited for beginners! Many manufacturers prioritize user-friendly designs and straightforward interfaces for their mid-range models, knowing that many first-time beacon owners will be choosing from this category. The goal is to make learning how to use the device as simple and intuitive as possible.
While the beacon itself might be easy to operate, remember that proficiency comes with practice. Regardless of your experience level, it’s crucial to thoroughly read your beacon’s manual and practice with it regularly in a safe, controlled environment. Pairing a beginner-friendly beacon with consistent practice sessions is the best way to build confidence and readiness.
How often should I practice with my avalanche beacon to ensure I’m proficient?
Regular practice is absolutely critical for proficiency with your avalanche beacon! We recommend practicing at least once before the start of each winter season, ideally with your backcountry partners, to ensure everyone is on the same page. Beyond that, quick refreshers throughout the season, even just a few minutes of turning it on and doing a mock search, can help keep the skills sharp.
Think of it like any other critical safety skill – you wouldn’t expect to be proficient in CPR without regular training. The more you practice with your beacon, shovel, and probe as a complete system, the more automatic and effective your response will be if you ever face a real-world emergency. Every minute counts in an avalanche rescue, and practice saves lives.
What’s the main difference between a 1-antenna and a 3-antenna beacon, and which should I choose?
The primary difference lies in their ability to pinpoint a buried victim. A 1-antenna beacon can detect a signal, but it requires the user to perform a complex grid search to determine direction and distance, which can be very time-consuming and difficult under stress. They are largely outdated for serious backcountry travel.
A 3-antenna beacon, on the other hand, uses three antennae oriented in different directions to provide highly accurate directional and distance information directly on the display. This significantly simplifies and speeds up the search process, making it much easier to pinpoint the victim quickly. You should always choose a 3-antenna beacon; virtually all modern beacons, including those under $500, are now equipped with three antennae, making them the standard for effective avalanche rescue.
Can an avalanche beacon really save a life? How effective are they?
Yes, an avalanche beacon is an absolutely critical tool that significantly increases the chances of survival for someone caught in an avalanche. Its primary purpose is to allow rescuers to quickly locate a buried victim, which is paramount because survival rates drop dramatically after the first 15-20 minutes under the snow. Without a beacon, finding someone buried by an avalanche can be incredibly difficult, often impossible, in time.
However, it’s important to remember that a beacon is just one piece of the essential avalanche safety puzzle. It works in conjunction with a shovel and a probe, as well as crucial avalanche education and training. While the beacon helps you find a signal, the probe helps pinpoint the exact location, and the shovel is used for the physical excavation. Used together by a trained individual or group, these tools dramatically improve the outcome in an emergency.
Should I buy a new or used avalanche beacon to save money?
When it comes to essential safety equipment like an avalanche beacon, we strongly recommend purchasing a new unit. While saving money is always appealing, the reliability and performance of a beacon are simply too critical to risk with a used device. A new beacon ensures you have the latest technology, a full manufacturer’s warranty, and confidence in its battery life and internal components.
Used beacons can have unseen internal damage, degraded battery contacts, or outdated software that might compromise their performance when you need them most. Furthermore, technology in avalanche safety advances, and newer beacons often have better processing speeds, search ranges, and user interfaces. For peace of mind and optimal safety, investing in a new beacon is always the best choice.
Conclusion
You’ve just equipped yourself with a wealth of knowledge, exploring the ins and outs of what makes a reliable backcountry companion. From understanding crucial features to weighing performance against your budget, you’re no longer just a shopper; you’re an informed adventurer. We’ve delved deep to uncover the absolute best avalanche beacons under $500, ensuring that top-tier safety technology is within reach, not a distant dream.
Now, with that essential intel under your belt, the next step is yours. Imagine the peace of mind knowing you’ve invested wisely in your safety, allowing you to focus purely on the thrill of untouched powder and the breathtaking serenity of the winter wilderness. Don’t just dream of epic days; confidently equip yourself and make them a reality. Your chosen beacon isn’t just gear; it’s your ticket to safer, more exhilarating adventures this season and beyond. Go forth and explore!