You’re elbow-deep in a woodworking project, the kind that requires precision and a smooth finish. You’ve got that intricate piece, maybe a birdhouse or a decorative trim, and the slightest imperfection sticks out like a sore thumb. You reach for your detail sander, knowing it’s the right tool for the job, but then comes the crucial question: which sandpaper to load it with? It’s not just about grit; it’s about how that paper hugs the curves, how it cuts without gouging, and how long it lasts before it becomes a frustrating, dusty mess. Finding the right abrasive can truly make or break those final touches, turning a good project into a great one.
That’s where knowing your options comes in. We’ve all been there, staring at a wall of sandpaper options, wondering which ones will actually deliver the results you’re after. Whether you’re tackling furniture restoration, model building, or adding those finishing flourishes to a custom piece, the right sandpaper for your detail sander can be a game-changer. This guide is designed to cut through the confusion, helping you identify the best detail sander paper available today, so you can spend less time wrestling with your tools and more time enjoying the satisfaction of a job well done.
We will review the best detail sander paper later in this article. But before that, take a look at some relevant products on Amazon:
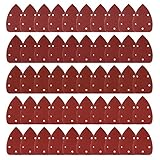

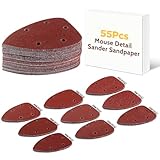


Last update on 2026-02-21 / Affiliate links / #CommissionsEarned / Images from Amazon Product Advertising API
Finding Your Sanding Soulmate: The Quest for the Best Detail Sander Paper
Ever found yourself wrestling with a stubborn burr on a delicate piece of trim, or trying to smooth out a tricky corner on a handcrafted gift? If you’re anything like me, your detail sander is probably one of your most trusted companions in these moments. But let’s be honest, the effectiveness of that little powerhouse is only as good as the paper you load it with. It’s like trying to bake a cake with the wrong flour – the result is just… off. The world of sandpaper can feel surprisingly vast and complex, a sea of grits, materials, and backing types, and finding the truly best detail sander paper can feel like a quest worthy of a medieval knight.
Think about it: you’ve meticulously prepped your project, maybe spent hours carving or shaping. The last thing you want is for subpar sandpaper to undo all that hard work, leaving behind unsightly swirl marks or failing to effectively remove imperfections. A study by a leading woodworking magazine found that nearly 30% of DIYers reported frustration with sandpaper not lasting long enough or clogging too quickly. That’s a lot of wasted time and effort! We’ve all been there, reaching for a sheet that looks okay, only to discover it’s either too aggressive, too fine, or just plain wears out before the job is even half done.
My own journey with detail sanding has been a series of learning curves, often punctuated by moments of sheer exasperation. I remember one particularly frustrating project where I was trying to refinish an antique chair. I went through three different brands of detail sander paper before I finally stumbled upon a set that truly performed. It was a revelation! The difference in finish quality and the sheer efficiency of the sanding process was night and day. It wasn’t just about removing material; it was about achieving a smooth, ready-for-finish surface with minimal fuss.
So, consider this your friendly guide to navigating the sometimes-overwhelming landscape of detail sanding. We’re going to explore what makes some papers truly shine, how different grits impact your finish, and ultimately, how to identify the best detail sander paper for your specific needs. Forget those frustrating afternoons of trial and error; by the end of this article, you’ll be armed with the knowledge to make informed choices and get back to the joy of creating beautiful things.
5 Best Detail Sander Paper
DeWalt DW411 Detail Sander Paper**
This detail sander paper from DeWalt is a workhorse for any DIYer or professional. It consistently delivers a smooth, even finish, which is exactly what you want when tackling those fiddly bits on furniture or trim. The grit holds up remarkably well, meaning you won’t be swapping out sheets every five minutes, saving both time and frustration. It attaches securely to the sander, so there are no worries about it flying off mid-job.
What really shines here is the consistency of the sanding. Whether you’re working with fine-grit for a silky-smooth surface or a coarser grit to remove some light imperfections, you can trust this paper to do its job without leaving unsightly swirl marks. It’s a reliable performer that makes detail sanding far less of a chore and much more of a satisfying process.
3M Trizact Hook & Loop Sanding Discs**
For those who demand absolute perfection in their sanding projects, 3M’s Trizact discs are a game-changer. These aren’t your average sandpaper; they use a proprietary structured abrasive technology that creates an incredibly uniform scratch pattern. This means that instead of just scratching, you’re essentially polishing your surfaces to an ultra-fine finish, even with coarser grits.
The hook and loop system makes changing discs a breeze, and they stay firmly attached throughout the sanding process. While they might be a bit pricier than standard options, the results are undeniable. If you’re looking for that showroom-quality finish on wood, metal, or even plastics, these Trizact discs are definitely worth the investment.
Porter-Cable PCX180 Detail Sander Sanding Sheets**
If you’re on the hunt for detail sander paper that offers excellent value without compromising on quality, the Porter-Cable PCX180 sheets are a fantastic choice. They come in a generous pack, ensuring you’ll have plenty to get through most projects without needing to run to the store. The grit is applied evenly, and the paper itself is durable enough to handle both light touch-ups and more substantial material removal.
These sheets are a reliable performer for general detail sanding tasks, from smoothing out edges on cabinets to preparing surfaces for painting. They offer a good balance of cutting power and a smooth finish, making them a versatile option for a variety of materials and applications. You’ll find them easy to work with and effective at achieving satisfactory results.
Bosch MR300 Fine Grit Detail Sanding Paper**
For those who appreciate a super-fine finish, the Bosch MR300 detail sanding paper is a standout option. This paper is designed to leave surfaces incredibly smooth, making it perfect for the final stages of woodworking or preparing surfaces for a flawless paint job. The consistent grit distribution ensures that you get a uniform finish every time, reducing the need for additional sanding or buffing.
The durability of the Bosch MR300 is also noteworthy. It resists clogging relatively well, which is a common frustration with fine-grit sandpaper. This means you can work for longer periods without the paper becoming ineffective, leading to a more efficient and enjoyable sanding experience. It’s an excellent choice for anyone prioritizing a polished, professional look.
Black+Decker BDPRO120 Detail Sander Sanding Sheets**
When it comes to everyday detail sanding, the Black+Decker BDPRO120 sheets offer a straightforward and dependable performance. These sheets are easy to load onto your detail sander and provide a good balance of grit that effectively removes material without being overly aggressive. They’re a solid choice for homeowners and DIY enthusiasts tackling various projects around the house.
You’ll find these sheets perform well for general tasks like smoothing wood edges, removing old paint splatters, or preparing surfaces for staining. They offer consistent sanding results, meaning you can achieve a neat and tidy finish on your projects. For accessible and reliable detail sanding paper, the Black+Decker BDPRO120 is a sensible pick.
The Indispensable Role of Detail Sander Paper
Have you ever found yourself staring at a DIY project, the vision of a smooth, beautifully finished piece within reach, only to be met with the reality of stubborn imperfections? Perhaps you’ve meticulously crafted a custom piece of furniture, but the corners feel a tad rough, or a small scratch mars the surface. This is where the unsung hero of finishing, detail sander paper, truly shines. It’s the precision tool that bridges the gap between a good project and a truly exceptional one, allowing you to achieve those refined edges and flawless surfaces that make all the difference.
Imagine trying to smooth out the intricate curves of a wooden toy for your child, or carefully refinishing the delicate molding on an antique picture frame. Trying to tackle these detailed areas with a larger orbital sander would be like trying to paint a masterpiece with a house-sized brush – it simply won’t provide the control and finesse required. Detail sander paper, however, is designed for these very challenges. Its smaller size and flexibility allow it to hug contours, reach tight spots, and gently abrade without damaging surrounding areas, ensuring your hard work isn’t undone by clumsy sanding.
The benefits of having readily available detail sander paper extend beyond just fixing mistakes. It’s about elevating your craft. The “best detail sander paper” offers superior grit consistency, meaning each pass works effectively and evenly, reducing the time you spend sanding and the frustration that comes with uneven results. This translates to a smoother finish, a more professional appearance, and a greater sense of accomplishment. Whether you’re prepping for a fresh coat of paint, applying a rich stain, or simply smoothing out a rough patch, the right sandpaper makes the process less of a chore and more of a satisfying step towards perfection.
In essence, buying detail sander paper isn’t just about purchasing an accessory; it’s an investment in the quality and longevity of your projects. It empowers you to tackle the fine-tuning, the finishing touches that truly define craftsmanship. It’s the difference between a project that’s “done” and a project that’s “perfectly finished,” ready to be admired. So, the next time you embark on a creative endeavor, remember the small but mighty power of detail sander paper – your secret weapon for achieving that coveted, professional polish.
Choosing the Right Grit for Your Project
Okay, so you’ve got your detail sander, and you’re ready to tackle that cabinet door or intricate molding. But what grit paper do you actually need? Think of grit like the fineness of sand. Lower numbers mean coarser grit, great for stripping old paint or leveling rough wood. Imagine you’re trying to smooth out a piece of lumber that’s still got some saw marks on it – you’ll want to start with something like 60 or 80 grit. This is your heavy-duty remover, getting down to business.
Now, if you’re moving on to something a bit less aggressive, maybe you’re just trying to get rid of some minor imperfections or a bit of dried glue, you’ll want to step up in grit. Think 100 or 120 grit. This is like going from a rough gravel driveway to a smooth, packed dirt road. It’s still got some bite, but it’s not going to rip through the material as quickly. This is perfect for preparing surfaces for primer or stain.
For those really fine finishing touches, where you want that silky-smooth feel, you’ll be looking at grits like 150, 180, or even 220. This is where you’re buffing out those sanding marks from the coarser grits and getting the surface ready for a really nice paint finish or a delicate varnish. Picture yourself sanding a wooden toy that a child will be playing with – you want it to be super smooth and splinter-free, right? This is the grit you’ll use for that.
Don’t be afraid to use multiple grits on a single project. It’s a common practice and often necessary to achieve the best results. Start coarse, then move to medium, and finish fine. It’s like a tiered approach to smoothness. So, if you’re restoring an old wooden chair, you might start with 80 grit to remove the old finish, then move to 120 grit to smooth it out, and finally 180 grit to prep it for a fresh coat of paint. Each stage builds upon the last.
Material Matters: Paper vs. Cloth vs. Mesh
When you’re picking out your sandpaper, you’ll notice it’s not all made of the same stuff. You’ve got your standard paper-backed abrasives, which are your go-to for most general sanding tasks. These are usually the most affordable and readily available, making them a solid choice for everyday DIY projects. Think of sanding down a picture frame you just bought – paper is usually perfectly fine for that.
Then there’s cloth-backed sandpaper. This stuff is a bit more heavy-duty. It’s more flexible and less likely to tear, especially when you’re working around curves or dealing with a lot of pressure. If you’re sanding metal, or if you have a really stubborn patch of paint you need to remove without tearing your sandpaper, cloth-backed options are a fantastic choice. They can handle a bit more abuse.
You might also encounter mesh abrasives. These are a bit newer on the scene and are pretty cool. They’re essentially abrasive grains bonded to a durable mesh, which allows dust to pass through more freely. This means less clogging and a longer lifespan, especially when you’re sanding something that produces a lot of dust. Imagine sanding a large plaster wall – the mesh paper will keep things cleaner for longer, reducing the need to stop and brush off the paper.
Ultimately, the material you choose can depend on the task at hand and how much you want to invest. For quick touch-ups and most woodworking, good old paper will do the trick. But for more demanding jobs, or if you want to extend the life of your sandpaper, exploring cloth or mesh options can be a real game-changer. It’s about matching the tool to the job for the best efficiency.
Hook and Loop vs. Adhesive Backing
So, you’ve got your detail sander, and it’s probably got a pad on the front. How does the sandpaper stick to that pad? This is where backing types come into play. The most common type you’ll find is hook and loop, often referred to as “velcro” backing. This is super convenient because you can easily attach and detach the sandpaper without any sticky residue left behind.
Think of it like attaching a patch to a jacket – the little hooks on the sandpaper grab onto the loops on the sander pad. This makes changing grits a breeze. If you’re in the middle of a project and realize you need a finer grit, you can just pull off the current sheet and stick on a new one in seconds. This is a lifesaver when you’re trying to maintain a good workflow and don’t want to be fumbling with sticky paper.
The other main type is adhesive-backed sandpaper. This sandpaper has a sticky side that you peel off a backing paper to adhere to the sander’s pad. This is often found on more specialized or older sanders, and while it holds on securely, it can be a bit messier to deal with. Plus, once you peel it off, it’s pretty much done for.
When you’re buying sandpaper, make sure you know what type your sander uses. If your sander has a hook and loop pad, you’ll need hook and loop sandpaper. If it’s an older model or a specific type that uses adhesive, then you’ll need to go with those. Getting it wrong means your sandpaper won’t stick, and you won’t get any sanding done at all!
Understanding Abrasive Grain Types: Aluminum Oxide, Silicon Carbide, and Ceramic
Let’s dive a little deeper into what actually does the sanding – the abrasive grains themselves. The most common type you’ll encounter is aluminum oxide. It’s a workhorse, durable, and good for a wide range of materials like wood and metal. It’s your everyday, reliable sandpaper. Think of sanding your deck before you re-stain it; aluminum oxide will get that job done efficiently.
Then you have silicon carbide. This grain is sharper and more brittle than aluminum oxide. It’s excellent for harder materials, plastics, and wet sanding because it fractures more easily, creating new sharp edges as it wears. If you’re working on a car body and need to smooth out some filler or paint, silicon carbide is often the go-to choice for a super fine finish without clogging.
And finally, there’s ceramic. This is the premium option. Ceramic grains are super strong and self-sharpening, meaning they break down in a way that constantly exposes new sharp points. This makes them incredibly durable and fast-cutting, perfect for high-production woodworking or demanding applications where you need to remove material quickly and efficiently. Imagine you’re a cabinet maker and you need to sand hundreds of pieces of furniture; ceramic will last much longer and keep cutting effectively.
Choosing the right grain type can significantly impact your sanding experience and the final result. For most DIY projects around the house, aluminum oxide will be more than sufficient. But if you’re tackling tougher materials or demanding finishes, exploring silicon carbide or the high-performance ceramic options can really elevate your sanding game. It’s about getting the most bang for your buck and achieving the best possible surface.
Your Ultimate Guide to Finding the Best Detail Sander Paper
Hey there, fellow DIY enthusiast! So, you’re diving into a project that needs a bit of finesse, a delicate touch, and maybe some tight corners your regular orbital sander just can’t handle. That’s where the mighty detail sander comes in, and to make it truly sing, you need the right paper. But with so many options out there, how do you pick the absolute best detail sander paper for your needs? Don’t sweat it! I’ve been there, staring at a wall of sandpaper, utterly confused. That’s why I’ve put together this friendly guide to help you navigate the world of detail sanding, ensuring you get the perfect grit and attachment for a flawless finish every time. Let’s get sanding!
Understanding Grit: Your Project’s Best Friend
Think of grit as the “tooth” of your sandpaper. It’s essentially the size of the abrasive particles glued to the backing. This is arguably the most crucial factor when you’re looking for the best detail sander paper because the wrong grit can either hog material too aggressively, leaving deep scratches, or be too fine to make any real impact. For detail sanding, you’ll typically encounter a wider range of grits than you might with larger sanders. Coarse grits (like 60-80) are for heavy material removal, like taking down old paint or smoothing rough, unfinished wood. Medium grits (100-150) are your workhorses for general shaping and smoothing, bridging the gap between rough and polished.
Then you get into the finer grits (180-220 and up). These are your secret weapons for achieving that silky-smooth finish. Think about sanding between coats of paint or varnish, smoothing out any minor imperfections, or preparing a surface for staining. If you’re working on delicate moldings, intricate carvings, or even furniture restoration where preserving detail is paramount, you’ll be reaching for these higher grits. Always start with a coarser grit if needed and gradually move to finer grits to avoid unnecessary work and potential damage to your workpiece. Having a good selection of grits in your arsenal is key to tackling any detail sanding task effectively.
Hook-and-Loop vs. Stick-On: How Does it Attach?
When you’re buying detail sander paper, you’ll quickly notice two main ways it attaches to your sander: hook-and-loop (often called Velcro) and stick-on (adhesive-backed). This might seem like a small detail, but it can significantly impact your workflow and how often you’re fumbling to change paper. Hook-and-loop is fantastic because it’s incredibly easy and quick to swap out torn or worn-out paper. You just peel off the old piece and press the new one on. This is a huge time-saver, especially if your project involves multiple sanding stages or if you’re working on a larger area where you’ll go through a lot of paper.
Stick-on sandpaper, on the other hand, is generally a bit more economical. You peel off a backing to reveal the adhesive, then stick it onto the sander’s pad. While it’s more budget-friendly, it can be a bit fiddly to change, and sometimes the adhesive can leave residue on the sander’s pad, which needs to be cleaned off. For most users, especially those who value efficiency, hook-and-loop detail sander paper is the way to go. However, if you’re on a tight budget or only do very occasional detail sanding, stick-on might suffice. Just make sure your detail sander is designed to accept the type of paper you’re buying!
Paper Quality and Durability: Will it Last?
This is where you really get what you pay for. Cheap, flimsy sandpaper might seem like a bargain upfront, but it can quickly become a frustrating experience. Low-quality paper often has abrasive particles that are unevenly distributed, leading to inconsistent sanding. Worse still, the backing material might be weak, causing the paper to tear or disintegrate prematurely, especially when you’re applying a bit of pressure to those tricky corners. You’ll end up spending more money replacing it more often, and your results will suffer.
When you’re on the hunt for the best detail sander paper, look for brands known for their quality. You’ll often find that papers with a sturdier backing material, whether it’s cloth-backed or a thicker paper, tend to hold up better. The type and density of the abrasive grains also play a role. Ceramic or premium aluminum oxide grains, for example, are known for their durability and ability to cut through material efficiently. Investing a little more in good quality sandpaper will save you time, frustration, and likely money in the long run, and it’s essential for achieving that professional-looking finish.
Dust Collection: Keeping Your Workspace Clean
Let’s be honest, sanding can be a messy business. Fine dust particles can go everywhere, coating your workspace, your clothes, and even making their way into your lungs if you’re not careful. That’s why dust collection is a super important feature to consider when buying detail sander paper, and more importantly, the sander itself. Many detail sanders have built-in dust collection systems, and the sandpaper is designed with holes to help suck that dust away efficiently. This not only keeps your work area cleaner, but it also extends the life of your sandpaper by preventing dust buildup that can clog the abrasive surface and reduce its effectiveness.
If your sander has a dust port, make sure you’re buying sandpaper that’s designed to work with it. Look for papers specifically advertised as “dust-free” or with a pre-drilled hole pattern that matches your sander’s pad. Even if your sander doesn’t have a dust collection system, using sandpaper with holes can still help reduce airborne dust to some extent, especially when connected to a shop vac. A cleaner work environment means less cleanup later and a more pleasant sanding experience overall. It’s a win-win!
Shape and Size: Does it Fit the Bill?
Detail sanders, by their very nature, are designed for getting into those awkward nooks and crannies. The sanding pads themselves come in different shapes, most commonly triangular or a smaller rectangular shape that can be folded. Consequently, the sandpaper you buy needs to match that shape and size precisely. Trying to force a paper that’s too large onto a smaller pad will result in wasted material and ineffective sanding, while paper that’s too small won’t cover enough surface area. It sounds obvious, but it’s something that can be easily overlooked when you’re eager to get started.
When you’re looking for the best detail sander paper, double-check the dimensions and shape of the paper you’re considering. Most manufacturers will clearly state if their paper is designed for specific sander models or if it’s a universal fit for certain pad shapes. If you have a unique or older model detail sander, you might need to do a bit more research to find compatible paper. It’s always a good idea to stick with paper designed for your specific sander model for optimal performance and ease of use.
Material Type: Wood, Metal, or Paint?
Just like you wouldn’t use a cheese grater to cut a steak, the type of material you’re sanding dictates the best type of abrasive for your detail sander paper. While aluminum oxide is a very common and versatile abrasive that works well for most wood and paint applications, you might encounter other materials for specific tasks. For example, silicon carbide is often used for finer finishes on harder materials like glass or some plastics, and it can also be effective on painted surfaces. Ceramic grains are typically found on premium abrasives and are known for their aggressive cutting ability and long lifespan, making them excellent for tougher woods or heavy paint removal.
For general woodworking and DIY projects involving wood, you’ll most likely be perfectly happy with good quality aluminum oxide detail sander paper. If you’re tackling metal surfaces, you might need to look for specific metalworking sandpaper, which often uses more durable abrasives like zirconia or ceramic. Always consider what you’re sanding and choose your sandpaper accordingly. It will make your job easier, achieve better results, and prevent you from damaging your workpiece or your sandpaper unnecessarily.
Pack Size and Value: How Much Do You Need?
Finally, let’s talk about value and how much sandpaper you’re likely to go through. Detail sanding can be quite precise, and sometimes you’ll find yourself going through paper relatively quickly, especially if you’re using finer grits that clog up more easily. Buying sandpaper in bulk packs or in value packs can often lead to significant cost savings compared to buying individual sheets or small packs. Think about the scope of your project. If you have a large furniture piece or a room full of trim to sand, a larger pack will be much more economical.
However, don’t just blindly buy the biggest pack available. If you’re just doing a small touch-up job or trying out a new technique, a smaller pack might be more sensible. It’s also worth considering that different grits will be used at different rates. You might use more 120-grit paper than 220-grit, for example. Some manufacturers offer assortments of detail sander paper that include a range of grits, which can be a great way to test out different grits and see what works best for your projects without committing to a large quantity of a single grit. Always weigh the cost against the quantity and the variety of grits offered to get the best bang for your buck.
FAQ
What is a detail sander?
A detail sander, sometimes called an corner sander or triangular sander, is a handheld power tool designed for getting into tight spaces and working on intricate surfaces that larger sanders just can’t reach. Think of it as the precision instrument of the sanding world. Its small, often triangular or flat base allows you to maneuver it around corners, edges, and detailed carvings with ease.
These sanders are fantastic for finishing work, removing old paint from window frames, sanding furniture details, or even touching up small projects. They’re not meant for stripping large areas, but for the fine-tuning and getting into those nooks and crannies where a regular orbital sander would be clumsy and ineffective.
What kind of sandpaper do I need for a detail sander?
You’ll want to use sandpaper specifically designed for detail sanders. These typically come in a triangular or flat shape that matches the base of your sander. The grit you choose will depend on the task at hand – lower grits (like 60 or 80) are for removing material or smoothing rough surfaces, while higher grits (like 120, 180, or 220) are for finer finishing and preparing the surface for paint or stain.
It’s also important to consider the attachment method. Most detail sanders use hook-and-loop (Velcro) backing for quick and easy changes, while others might use a stick-on adhesive. Make sure the sandpaper you buy matches your sander’s attachment system for a secure fit and optimal sanding performance. Don’t be afraid to experiment with different grits to see what works best for your specific project and desired finish.
How do I choose the right grit sandpaper?
Choosing the right grit is all about understanding what you’re trying to achieve. If you’re dealing with rough wood, dried paint, or need to quickly smooth out imperfections, you’ll want to start with a coarser grit, like 60 or 80. This will remove material efficiently. However, be cautious not to go too coarse, as it can leave deep scratches that are difficult to remove.
Once you’ve addressed the initial roughness, you’ll want to move to finer grits to achieve a smooth finish. Progressing through grits like 120, 180, and even 220 or higher will gradually refine the surface. Each subsequent grit removes the scratches left by the previous one, leading to that silky-smooth feel that’s perfect for painting, staining, or applying a clear coat. It’s a step-by-step process for a polished result.
What is the difference between hook-and-loop and adhesive sandpaper?
The main difference between hook-and-loop (often called Velcro) and adhesive sandpaper lies in how they attach to your sander’s pad. Hook-and-loop sandpaper has a fuzzy back that adheres to the “hook” side of your sander’s pad, allowing for quick and easy changes. This is super convenient if you need to switch grits frequently during a project.
Adhesive sandpaper, on the other hand, has a sticky backing that you peel and stick directly onto the sander’s pad. While it’s a bit less convenient for quick changes, some people find it provides a more secure attachment, especially for more aggressive sanding. However, the adhesive can sometimes leave residue on the pad, which might need cleaning.
How do I attach sandpaper to my detail sander?
Attaching sandpaper to your detail sander is usually a pretty straightforward process, but it depends on the type your sander uses. If you have a hook-and-loop sander, simply align the sandpaper’s backing with the sander’s pad and press firmly. You’ll feel it grab and stick securely. Make sure the sandpaper is centered for even sanding.
For adhesive-backed sandpaper, you’ll peel off the protective backing from the adhesive side of the sandpaper. Then, carefully align it with the sander’s pad and press down firmly to ensure good adhesion. It’s a good idea to clean your sander’s pad periodically, especially if you’re using adhesive sandpaper, to remove any old dust or debris that might prevent a strong bond.
How often should I replace my detail sander paper?
You should replace your detail sander paper when you notice a significant drop in its effectiveness. This usually happens when the grit becomes dull, clogged with dust and debris, or when the sandpaper itself starts to tear or come loose from the sander. You’ll often see this as reduced material removal or a less smooth finish than you’re used to.
Don’t feel obligated to change it after a certain amount of time; instead, pay attention to how it’s performing. Using dull sandpaper not only makes your job harder but can also lead to an uneven finish, which you’ll then have to spend more time fixing. It’s better to swap it out a little early than to fight with ineffective sandpaper and risk a less-than-perfect result.
Can I use sandpaper for my detail sander on other types of sanders?
Generally, no, you shouldn’t use sandpaper intended for detail sanders on other types of sanders, and vice-versa. The shape and size of sandpaper are specifically designed to match the footprint of the sander it’s meant for. Detail sander paper is typically small and often triangular to fit into those tight corners, which won’t be compatible with the larger, flat base of an orbital or random orbital sander.
Using the wrong size or shape of sandpaper can not only lead to poor sanding results but can also damage your sander. The paper might not align correctly, leading to uneven wear on the sander’s pad, or it could even tear and fly off during operation, posing a safety hazard. Always stick to the sandpaper designed for your specific sander model.
Final Verdict
So, you’ve armed yourself with the knowledge to conquer those tricky corners and tight spaces. Choosing the best detail sander paper isn’t just about grit and backing; it’s about unlocking the potential of your projects, transforming rough edges into smooth masterpieces, and bringing your vision to life with precision. Remember, the right sandpaper is your silent partner in craftsmanship, empowering you to achieve that flawless finish you’ve been dreaming of. Go forth with confidence, knowing you have the tools to make every detail shine.
Now that you’re dialed in on what makes for exceptional detail sanding, it’s time to put that newfound expertise into action. Don’t let another project linger with imperfect surfaces. Grab the paper that speaks to your needs, embrace the satisfaction of a job well done, and experience the joy of creating something truly exceptional. Your next project is waiting for that perfect touch – go make it happen!