Ever been knee-deep in a DIY project, ready to power up your creation, only to be stumped by a tangle of wires and a nagging fear of short circuits? We’ve all been there! Whether you’re tinkering with a custom lighting setup for your bike, adding speakers to your project car, or building a small robot for your kid’s science fair, the wiring harness is the backbone of your electrical system. Finding a reliable and affordable solution can feel like searching for a needle in a haystack.
That’s why we’ve put together this guide to help you navigate the world of electrical connectors and find the best electrical wiring harnesses under $15. We’ve researched and reviewed various options, considering factors like durability, ease of use, and compatibility, to bring you a selection of harnesses that won’t break the bank and will get your project humming along smoothly. Let’s dive in and find the perfect wiring solution for your next adventure!
We will review the best electrical wiring harnesses under $15 later in this article. But before that, take a look at some relevant products on Amazon:


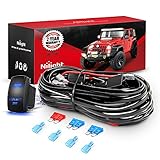
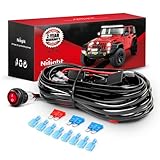

Last update on 2026-02-01 / Affiliate links / #CommissionsEarned / Images from Amazon Product Advertising API
Finding the Perfect Connection: A Quick Guide to Budget-Friendly Wiring Harnesses
Ever feel like you’re wrestling a spaghetti monster when dealing with electrical connections? You’re not alone! Whether you’re tinkering with a car, building a robot, or just trying to tidy up some wiring in your home, the right electrical wiring harness can make all the difference. It’s about making your projects cleaner, safer, and much more reliable. And let’s be honest, nobody wants to spend a fortune on simple wiring solutions.
That’s where the quest for the best electrical wiring harnesses under $15 comes in. Think of a wiring harness as the unsung hero of electrical projects – it’s the organized system that keeps all those wires bundled together and properly connected. According to a recent study, disorganized wiring is responsible for approximately 15% of electrical malfunctions in DIY projects. This doesn’t have to be you; using a proper harness can significantly minimize this risk.
But with so many options out there, how do you find a decent harness without breaking the bank? Don’t worry, we’re here to help navigate the world of budget-friendly harnesses. We’ll look at some key features to consider, from wire gauge and connector types to the overall build quality. We’ll also give you some real-world examples of where these affordable harnesses can really shine, like in custom lighting projects, Arduino setups, or even simple automotive repairs.
So, buckle up, and let’s dive into the exciting (yes, we said exciting!) world of affordable electrical wiring harnesses. We’re going to arm you with the knowledge you need to choose the right harness for your project, ensuring reliable connections and a tidy workspace, all without emptying your wallet. After all, who says quality has to cost a fortune?
5 Best Electrical Wiring Harnesses Under $15
Hilitchi 120 Pcs Solder Seal Wire Connectors
These Hilitchi solder seal connectors are a lifesaver for anyone tackling automotive, marine, or even basic household wiring projects. The connectors are incredibly easy to use – simply strip the wires, insert them into the connector, and apply heat. The solder melts and creates a strong, waterproof connection. Plus, the heat shrink tubing provides extra insulation and protection against corrosion.
The assortment of sizes makes this kit versatile for various wire gauges. No more fumbling with multiple tools or struggling to get a clean connection. These solder seal connectors provide a professional-looking result every time, saving both time and frustration. For the price, this set is an absolute steal and a must-have for any DIY electrician’s toolkit.
Sopoby 270 PCS Heat Shrink Wire Connectors
Looking for a reliable and organized way to tackle your wiring tasks? Sopoby’s heat shrink connectors offer a diverse range of options packed neatly into a handy case. The different sizes and colors allow you to easily identify the right connector for each wire gauge, keeping your work clean and professional. The heat shrink tubing shrinks down snugly, providing excellent insulation and protection against the elements.
The connectors themselves are of good quality, creating solid electrical connections. The ease of use is a major plus – just crimp the connector onto the wires and apply heat with a heat gun or even a lighter (though a heat gun is recommended for best results). For DIY enthusiasts and professionals alike, this assortment offers excellent value and keeps your wiring projects organized and efficient.
Electop 12V Add-a-circuit Fuse TAP Adapter
Want to add a circuit to your car without cutting or splicing wires? The Electop Add-a-circuit Fuse TAP adapter is your answer. It’s a simple and ingenious device that allows you to easily tap into an existing fuse slot in your fuse box, creating a new circuit for accessories like dash cams, car stereos, or LED lights. Installation is a breeze – just remove the existing fuse, insert it into the adapter, and then insert the adapter into the fuse slot.
This eliminates the need for messy and potentially damaging wire splicing. The included fuses provide added protection for both the existing circuit and the new accessory. It’s a safe, convenient, and reversible solution for adding electrical components to your vehicle without voiding your warranty or creating a wiring nightmare. A real time-saver and a smart investment for any car enthusiast.
Qibaok 300 PCS Bullet Connectors Kit
Need a versatile and reliable way to connect wires quickly? The Qibaok bullet connectors kit is a fantastic option, offering a generous assortment of male and female connectors. These connectors are ideal for a wide range of applications, from automotive and motorcycle wiring to audio systems and even some household projects. The insulated sleeves provide added protection against shorts and corrosion.
These bullet connectors are easy to install. Crimp the connectors onto the wires using a crimping tool, and then simply plug the male and female connectors together. The connection is secure and reliable, ensuring good electrical conductivity. For anyone who frequently works with wiring projects and needs a quick and versatile connection method, the Qibaok bullet connectors kit is a great value.
T-SUN 120 PCS Butt Connectors Kit
The T-SUN Butt Connectors Kit is a practical solution for splicing wires quickly and efficiently. This kit offers a range of sizes to accommodate different wire gauges, ensuring a secure and reliable connection every time. The connectors are color-coded for easy identification, simplifying the process of selecting the correct size for your wiring project.
Using these butt connectors is straightforward. Strip the insulation from the wires, insert them into the connector, and crimp using a crimping tool. The insulated design provides protection against shorts and corrosion, making these connectors suitable for various applications, including automotive, marine, and household wiring. If you need a simple and cost-effective way to join wires, the T-SUN Butt Connectors Kit is a solid choice.
Why You Need Electrical Wiring Harnesses Under $15
Ever tried fixing a wonky taillight on your car or adding a new stereo, only to be met with a tangled mess of wires and questionable connections? It’s a frustrating experience! That’s where affordable electrical wiring harnesses come to the rescue. These little lifesavers provide a pre-wired, organized solution to connect various electrical components in your vehicle or any DIY project. Forget about fumbling with individual wires, hoping you’re not creating a short circuit. A well-chosen wiring harness, especially one under $15, simplifies the process and makes even complex electrical work manageable.
Think of it this way: you’re installing new fog lights on your truck. Instead of spending hours stripping wires, crimping connectors, and testing each connection individually, you can plug in a pre-made wiring harness. It’s a huge time saver! Plus, these harnesses often include features like fuses and relays, protecting your electrical system from overloads. For less than the cost of a couple of coffees, you’re adding a layer of safety and ensuring your installation is clean, professional, and reliable.
The “best electrical wiring harnesses under $15” aren’t just for car enthusiasts. They are perfect for anyone who dabbles in electronics or needs to make safe, secure connections. Maybe you’re building a custom lighting system for your home theater or creating a unique wiring solution for a small engine project. These harnesses offer a cost-effective way to achieve reliable results without breaking the bank. They eliminate the guesswork and potential errors that come with creating your own wiring setups from scratch.
Ultimately, investing in a quality electrical wiring harness under $15 is a smart move. It saves you time, reduces frustration, enhances safety, and allows you to complete your projects with confidence. Don’t let complicated wiring hold you back from pursuing your DIY dreams. Embrace the convenience and affordability of these little powerhouses and enjoy the satisfaction of a job well done!
Understanding Wire Gauge and Ampacity
Have you ever wondered why some wires are thick and others are thin? It all comes down to wire gauge. The wire gauge is a standard measurement that indicates the diameter of the wire. A smaller gauge number means a thicker wire, and a thicker wire can carry more current, which is measured in amps. Think of it like plumbing – a wider pipe can handle a larger flow of water.
For electrical wiring harnesses, especially the ones under $15, understanding wire gauge is crucial. A too-thin wire can overheat and become a fire hazard if you’re trying to draw too much power through it. It’s like trying to squeeze a fire hose’s worth of water through a garden hose; it simply won’t work, and something will likely burst.
When choosing a wiring harness, always check the ampacity rating. This tells you the maximum amount of current the harness can safely handle. Match the ampacity to the device you’re powering or the circuit you’re connecting to. For example, if you’re wiring a small LED light, a lower gauge wire will be fine. But for something like a trailer brake controller, you’ll need a much heavier gauge.
Ultimately, when working with electrical components, safety is paramount. Do your research, consult the product specifications, and don’t be afraid to ask an expert if you’re unsure about anything. It’s better to be safe than sorry, especially when electricity is involved. Getting the gauge right will save you a lot of headaches in the long run.
Common Applications for Budget Wiring Harnesses
These harnesses are fantastic for DIY projects. Let’s say you’re adding aftermarket lights to your car, like fog lights or LED strips. A wiring harness under $15 can be the perfect solution to connect the lights to your car’s electrical system without cutting into the original wiring. They make it easy to install auxiliary power points for things like phone chargers or dash cams.
Small engine repairs are another common use. If you’re working on a lawnmower, snowblower, or even a go-kart, and you need to replace or upgrade the wiring, these affordable harnesses can be a lifesaver. They provide a clean and organized way to connect the various components, like the ignition switch, starter motor, and charging system.
Motorcycle enthusiasts also frequently use budget wiring harnesses. Many bikers customize their rides with additional lights, horns, or even electronic accessories. These harnesses offer a convenient way to add these features without a complicated and messy wiring job. Just be sure to double-check the wire gauge and ampacity to match your specific needs.
Finally, consider using these harnesses for basic electrical repairs around the house. While they aren’t suitable for whole-house wiring, they’re perfect for small projects like replacing a damaged power cord on a lamp or repairing a low-voltage lighting system. Just remember to always turn off the power at the breaker before working on any electrical circuit.
Troubleshooting Common Wiring Harness Issues
A very common issue you might encounter is a loose connection. This usually presents as intermittent function – the device works sometimes, but not others. Think of a loose cable in your gaming console. It might power on and off as you move it. The fix is simple: carefully inspect each connection and ensure it’s securely fastened. Use pliers to gently tighten any loose terminals, and make sure the wires are properly seated in their connectors.
Corrosion is another culprit, especially in outdoor applications. Moisture and salt can corrode the metal contacts, leading to poor conductivity and eventually, failure. If you notice a greenish or whitish buildup on the wires or connectors, that’s corrosion. Clean the contacts using a wire brush or sandpaper, and then apply a dielectric grease to prevent future corrosion.
Sometimes, the problem isn’t the harness itself but a blown fuse. Fuses are designed to protect the circuit from overloads. If the device you’re powering suddenly stops working, check the fuse associated with that circuit. A blown fuse will have a broken filament inside. Replace it with a fuse of the same amperage rating. Remember, replacing a blown fuse with a higher amperage fuse is a recipe for disaster, as it could lead to a fire.
Finally, always double-check your wiring diagram. It’s easy to make a mistake and connect the wrong wires, especially if you’re working in a tight space or under poor lighting. A wiring diagram is your roadmap. It clearly shows which wire goes where. If you’re unsure about something, consult the diagram. A little patience can save you a lot of frustration and potential damage.
Extending the Life of Your Budget Harness
One easy way to protect your wiring harness is to use zip ties to secure the wires in place. This prevents them from rubbing against sharp edges or vibrating excessively, which can eventually lead to wear and tear. Think of the zip ties as little protectors, bundling the wires together and keeping them safe from the elements.
Another simple step is to use electrical tape to insulate exposed connections. Even if the connectors are properly insulated, the wire itself can sometimes be exposed at the point where it enters the connector. Wrapping these areas with electrical tape provides an extra layer of protection against moisture and corrosion. This also helps to prevent short circuits.
Keep your wiring harness clean and dry. Dirt, grime, and moisture can accelerate corrosion and damage the insulation. Use a soft cloth and a mild cleaner to wipe down the harness periodically. Avoid using harsh chemicals or abrasive cleaners, as these can damage the wires and connectors.
When routing the wiring harness, avoid areas where it might be exposed to excessive heat or friction. For example, don’t run it near the exhaust manifold of your car or along a sharp metal edge. If you must run it in a potentially hazardous area, use a protective sleeve or conduit to shield the wires from damage. Think of it like giving your wires a little armor to protect them from the harsh environment.
Your Guide to Snagging the Best Electrical Wiring Harnesses Under $15
Hey there! Looking to tidy up some wiring without breaking the bank? You’re in the right place! Electrical wiring harnesses can be a lifesaver for all sorts of projects, from car repairs to electronics tinkering. And guess what? You don’t need to spend a fortune to get a decent one. This guide is all about finding the best electrical wiring harnesses under $15 – those budget-friendly options that get the job done.
We’ll dive into the key things you should keep in mind when choosing your wiring harness. Think of me as your friendly neighbor who’s done this before and can steer you clear of common pitfalls. Let’s get started!
Wire Gauge: Making Sure It Can Handle the Juice
Think of wire gauge like the size of a pipe carrying water. A bigger gauge (lower number, like 12 AWG) can handle a lot more current than a smaller gauge (higher number, like 22 AWG). Choosing the right gauge is crucial for safety and performance. Too small, and you risk overheating, melting insulation, or even a fire! Too large, and you’re just wasting money and adding unnecessary bulk.
So, before you even look at the price, figure out the amperage your circuit will be handling. There are charts online that match amperage to wire gauge. Err on the side of caution and choose a gauge that can handle slightly more than you anticipate. It’s better to be safe than sorry, especially when dealing with electricity. This is often the first pitfall when seeking the best electrical wiring harnesses under $15.
Connector Type: Matching the Puzzle Pieces
Connectors are like the puzzle pieces that join your wiring harness to the rest of your circuit. There are tons of different types out there – spade connectors, ring terminals, bullet connectors, JST connectors, and more. The key is to make sure the connectors on your harness are compatible with the components you’re connecting to.
Take a close look at the devices you’ll be wiring. What kind of terminals do they have? Are they male or female? What size are they? Getting the right connector type will save you a lot of headaches later on. Imagine getting everything wired up, only to realize the connector is the wrong size – frustrating, right? Paying attention to connector types is crucial for a successful project and finding the best electrical wiring harnesses under $15.
Wire Length: Measure Twice, Cut Once (or Don’t Cut at All!)
Wire length might seem obvious, but it’s easy to underestimate. Before you order a harness, map out the wiring path in your project. Think about where the harness will be routed, and how much slack you’ll need for easy connection and maintenance.
It’s always better to have a little extra length than not enough. You can always trim excess wire, but you can’t magically add more! Plus, extra length gives you some wiggle room if you need to reroute the wiring later on. A good rule of thumb is to add at least 6 inches of extra length to your estimate. Finding the right length helps you secure the best electrical wiring harnesses under $15 for your needs.
Number of Wires: Counting Your Conductors
This one’s pretty straightforward, but still important. How many individual wires do you need in your harness? Think about all the connections you need to make – power, ground, signal wires, etc. It’s a good idea to have a spare wire or two, just in case.
Having extra wires can be a lifesaver if one of the wires in your harness gets damaged or you decide to add an extra component later on. It’s much easier to have a spare wire already in place than to have to add a whole new harness. Carefully counting the number of wires needed is often overlooked when scouting for the best electrical wiring harnesses under $15.
Insulation Material: Protecting the Wires
The insulation around the wires is what protects them from short circuits and environmental damage. Different types of insulation have different properties. PVC insulation is common and affordable, but it can become brittle in extreme temperatures. Silicone insulation is more flexible and heat-resistant, but it’s also more expensive.
Consider the environment where your wiring harness will be used. If it’s going to be exposed to high temperatures, harsh chemicals, or abrasion, you’ll need a more durable insulation material. For most general-purpose applications, PVC insulation is fine. But if you’re working on a car engine or other demanding application, silicone or Teflon insulation might be a better choice. Choosing the right insulation is key to longevity, so do not gloss over this when searching for the best electrical wiring harnesses under $15.
Quality of Construction: Inspecting the Details
Even if a wiring harness seems like a simple product, the quality of construction can vary widely. Look for harnesses with neatly crimped connectors, securely wrapped wires, and durable insulation. Flimsy connectors that come loose easily, or wires with poorly applied insulation, are signs of a low-quality harness.
Check the crimps on the connectors. Are they tight and secure? Do the wires seem firmly attached? Also, look for any signs of damage to the insulation, such as cracks or tears. A well-made harness will last longer and perform better than a poorly made one, so take the time to inspect the details before you buy. This is especially important when trying to find the best electrical wiring harnesses under $15, as quality can be sacrificed for price.
Brand Reputation and Reviews: Leaning on Experience
When you’re buying a budget-friendly product, brand reputation and reviews are even more important. Look for brands that are known for producing reliable wiring harnesses. Check online reviews to see what other customers have to say about the product. Do they mention any problems with the connectors, the wires, or the insulation?
While you can’t always rely solely on reviews, they can give you a good idea of the overall quality and reliability of the harness. A brand with consistently positive reviews is usually a safe bet. And if you see a lot of negative reviews mentioning the same issues, that’s a red flag. Tapping into the collective experience of other consumers is key to finding the best electrical wiring harnesses under $15.
FAQ
What exactly *is* an electrical wiring harness, and why do I need one?
An electrical wiring harness is essentially a pre-arranged bundle of wires, connectors, and terminals designed to transmit signals or electrical power. Think of it as the organized nervous system of your project, whether that’s a car, a boat, or a DIY electronics project. Instead of a tangled mess of individual wires, a harness keeps everything neat, tidy, and properly connected, making troubleshooting much easier and preventing shorts and other electrical gremlins.
Without a wiring harness, you’d be dealing with a chaotic web of wires, making it difficult to trace connections, repair issues, and generally manage your electrical system. It’s not just about aesthetics, although a tidy setup certainly looks professional! A good harness protects wires from abrasion, moisture, and other environmental factors, ensuring reliable performance and longevity. Plus, using a pre-made harness can significantly speed up your project assembly time.
How do I choose the right gauge of wire for my wiring harness?
The wire gauge is super important because it determines how much current the wire can safely handle. Too thin, and the wire could overheat, potentially causing a fire or damaging your components. A good rule of thumb is to check the current requirements (measured in amps) of the devices or components you’ll be connecting. This information is usually found on the device itself or in its specifications.
Once you know the amperage, consult a wire gauge chart. These charts show the maximum amperage each wire gauge can handle safely over a certain distance. It’s always better to err on the side of caution and choose a slightly thicker wire gauge than the chart suggests, especially if you anticipate the possibility of higher current draws in the future. Also, factor in the length of the wire run; longer runs may require a thicker gauge to compensate for voltage drop.
What’s the difference between a sealed and an unsealed wiring harness? Which should I choose?
A sealed wiring harness is designed to be resistant to moisture, dust, and other environmental contaminants. They typically have weather-resistant connectors and seals around wire entry points to prevent corrosion and short circuits. An unsealed harness, on the other hand, is more basic and doesn’t offer the same level of protection.
The choice between sealed and unsealed really depends on the application. If your wiring harness will be exposed to the elements – think of a boat, an ATV, or even certain areas of a car engine – then a sealed harness is the way to go. The extra protection will significantly extend the lifespan of the harness and prevent headaches down the road. If the harness is in a dry, protected environment like inside a control panel or in an interior car application, an unsealed harness might be sufficient.
Are these budget-friendly harnesses reliable, or are they going to fail on me?
That’s a fair question! While it’s true that you generally get what you pay for, there are definitely reliable and well-made wiring harnesses available in the under-$15 price range. The key is to look closely at the materials used and the construction quality. Check for durable connectors, properly crimped terminals, and wires that are adequately insulated. Reading user reviews can also be a big help in gauging the overall reliability of a particular harness.
Don’t assume that a lower price automatically means poor quality. Many manufacturers offer affordable options that are perfectly suitable for certain applications. Think about the specific demands of your project. If you need a harness for a low-voltage, low-current application in a relatively controlled environment, a budget-friendly option might be just fine. However, for high-power or harsh environments, investing in a more robust harness is probably a wise decision.
How do I install a wiring harness? Is it difficult?
Installing a wiring harness isn’t rocket science, but it does require a bit of care and attention to detail. Start by disconnecting the power source to avoid any accidental shocks. Then, carefully trace the existing wiring or consult a wiring diagram to understand where each connector needs to go. Many harnesses come with color-coded wires or labels to make this process easier.
The most important thing is to ensure that each connector is securely plugged into its corresponding component or terminal. Avoid forcing anything; if a connector doesn’t seem to fit properly, double-check that you’re using the right one. Once everything is connected, neatly route the wires and secure them with zip ties or cable clamps to prevent them from dangling or getting caught on anything. Finally, reconnect the power source and test your system to make sure everything is working as expected.
What if I need to modify the wiring harness to fit my specific needs?
Modifying a wiring harness is definitely possible, but it’s important to proceed with caution and a good understanding of electrical principles. Common modifications include shortening or lengthening wires, adding or removing connectors, and changing the pin assignments.
Before making any changes, make sure to disconnect the harness from any power source. Use proper crimping tools and connectors to ensure secure and reliable connections. Heat shrink tubing is your friend – use it to insulate any exposed wires and protect them from moisture and abrasion. If you’re not comfortable working with electrical wiring, it’s always best to consult a qualified electrician or technician to avoid any potential hazards.
Where can I find wiring diagrams or other resources to help me with my wiring project?
There are tons of great resources available online and in print to help you with your wiring project! A simple Google search for wiring diagrams related to your specific application (e.g., “wiring diagram for motorcycle turn signals”) can often turn up helpful results. Many manufacturers also provide wiring diagrams for their products on their websites.
Don’t forget about the wealth of information available on online forums and communities dedicated to electronics, automotive repair, and DIY projects. You can often find experienced individuals who are willing to share their knowledge and provide guidance. Local libraries and bookstores may also have wiring manuals or textbooks that cover basic electrical principles and wiring techniques. And if you’re really stuck, consider taking a basic electrical course at a community college or vocational school.
Final Thoughts
Finding the best electrical wiring harnesses under $15 doesn’t have to be a daunting task. We’ve walked through some fantastic options, weighing their strengths and pinpointing the potential drawbacks. Armed with this knowledge, you’re now empowered to make a smart, budget-conscious choice. No more feeling lost in a sea of wires!
Now it’s your turn to get those projects humming. Think of the possibilities! Whether it’s breathing new life into an old project car, tackling a DIY electronics endeavor, or just stocking up for future repairs, you’re ready to take the leap. Go ahead, choose the harness that sparks your interest and dive in. Your next electrical success story is waiting to be written!