You’ve just wrapped up an epic filming session, your Mac is brimming with 4K footage, and the exciting prospect of editing your masterpiece is right in front of you. But then you hit a wall – your internal drive is screaming for mercy, and the thought of wrestling with slow transfers and dropped frames is enough to dampen your creative spirit. It’s a common scene for any Mac-based video editor, where the right storage solution isn’t just a convenience, it’s an absolute necessity for smooth, efficient workflow. Finding that perfect blend of speed, capacity, and reliability can feel like a quest in itself.
That’s precisely why we’ve dived deep into the world of external storage to bring you the definitive rundown on the best external hard drives for video editing on Mac. Whether you’re a seasoned professional juggling massive projects or a burgeoning creator just starting out, this guide is designed to cut through the noise. We’ll explore the drives that consistently deliver the performance you need to handle demanding video files, offering insights into what makes them stand out and helping you make an informed decision that fuels your passion without holding your workflow back.
We will review the best external hard drives for video editing on mac later in this article. But before that, take a look at some relevant products on Amazon:


Last update on 2026-02-17 / Affiliate links / #CommissionsEarned / Images from Amazon Product Advertising API
Unlocking Your Mac’s Video Editing Potential: Finding the Right Drive
So, you’ve got your sleek MacBook Pro or powerful Mac Studio, brimming with creative energy and a vision for your next cinematic masterpiece. You’ve probably already realized that your internal drive, while fast, can fill up quicker than a trending YouTube video. That’s where the magic of external storage comes in, especially when you’re diving deep into the world of video editing on your Mac. But with so many options out there, from tiny SSDs to massive HDDs, how do you navigate the sea of drives to find the absolute best external hard drives for video editing on Mac?
Think of your external drive as your video editing workstation’s dedicated powerhouse. When you’re working with high-resolution footage – say, 4K footage which can easily consume upwards of 100GB per hour of raw footage – you need a drive that can keep up without stuttering or causing frustrating lag. This isn’t just about storage space; it’s about speed. We’re talking about read and write speeds that allow you to scrub through timelines smoothly, import large files in seconds, and export your finished projects without watching the clock tick away for hours.
The good news is, the technology has advanced tremendously. Solid State Drives (SSDs) are now the undisputed champions for video editing due to their incredible speed and durability. They have no moving parts, meaning they’re quieter, more resilient to bumps, and offer sequential read/write speeds that can easily exceed 500MB/s, and even reach over 2000MB/s for NVMe SSDs. This translates directly into a much more fluid and enjoyable editing experience, making those long editing sessions feel a lot less like a chore.
Our goal here is to guide you through the landscape of external storage, highlighting the crucial factors that make a drive perfect for your Mac’s video editing needs. We’ll be looking at everything from raw speed and capacity to connection types like Thunderbolt and USB-C, and even considering portability and budget. So, let’s get started on finding the best external hard drives for video editing on Mac that will truly elevate your workflow and let your creativity shine.
Top 5 Best External Hard Drives For Video Editing On Mac
Samsung T7 Shield Portable SSD
When it comes to buttery-smooth 4K footage editing on a Mac, the Samsung T7 Shield Portable SSD is a seriously impressive contender. This little drive punches way above its weight class, offering blazing-fast transfer speeds that mean less time waiting and more time creating. Its robust design, complete with IP65 water and dust resistance, also provides a much-needed peace of mind for those who might be editing on the go or in less-than-ideal environments. For Mac users prioritizing speed and durability in a compact package, this is a top-tier choice that won’t disappoint.
The T7 Shield’s real magic lies in its ability to handle large video files with remarkable ease. Imagine dropping gigabytes of footage onto it and seeing them transfer in mere seconds – that’s the kind of workflow boost this SSD provides. The USB 3.2 Gen 2 interface ensures that your Mac can fully utilize its impressive read and write speeds, making even complex timeline scrubbing feel fluid. Plus, its sleek, pocketable design means it’s always ready to go when inspiration strikes, transforming any Mac into a powerful mobile editing station.
LaCie Rugged SSD Pro
For Mac professionals who demand ruggedness and relentless performance, the LaCie Rugged SSD Pro is an absolute workhorse. This drive is built like a tank, boasting an IP67 rating for water and dust resistance, along with drop and crush protection. But don’t let its tough exterior fool you; under the hood, it’s packing some serious speed thanks to its Thunderbolt 3 connectivity. If you’re regularly working with high-resolution footage, whether it’s 6K, 8K, or even higher, this drive is engineered to keep up without breaking a sweat.
The Thunderbolt 3 interface is the real game-changer here, unlocking sequential read speeds that can reach up to 2800MB/s. This means incredibly fast ingest times and the ability to edit uncompressed RAW footage directly from the drive. For video editors who often work with massive project files and require instant access to their media library, the Rugged SSD Pro offers a level of performance and reliability that’s hard to beat. It’s an investment, sure, but one that pays dividends in saved time and reduced frustration for serious Mac video editors.
SanDisk Extreme Portable SSD V2
The SanDisk Extreme Portable SSD V2 is a fantastic all-around option for Mac users looking for a speedy and reliable external drive for their video editing needs. It strikes a great balance between performance, portability, and affordability, making it a go-to for many creators. With its USB-C interface, it delivers impressive read speeds that can significantly cut down on transfer times for your video projects, allowing for a smoother editing workflow.
This drive is also surprisingly tough, featuring a silicon rubber coating and an IP55 rating for dust and water resistance. This adds a layer of durability that’s always welcome, especially for those who might be moving their editing setup around. The SanDisk Extreme V2 is small enough to slip into a pocket but powerful enough to handle most common video editing tasks with ease, making it a versatile and practical choice for any Mac-based video editor.
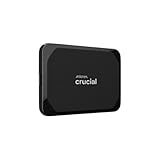
Crucial X8 Portable SSD
For Mac users seeking a blend of excellent speed and value for their video editing projects, the Crucial X8 Portable SSD is a compelling choice. This drive leverages its USB 3.2 Gen 2 interface to deliver swift data transfers, meaning you can quickly offload footage or access your editing files without significant delays. It’s a straightforward, no-nonsense SSD that gets the job done efficiently, allowing you to focus more on your creative process and less on waiting for files to move.
The Crucial X8’s compact and lightweight design makes it incredibly portable, easily fitting into a laptop bag or even a large pocket. Its durable casing also offers a good level of protection for everyday use. While it might not have all the bells and whistles of some higher-end drives, its consistent performance and attractive price point make it a smart investment for Mac users who need a reliable external SSD for their video editing workflows without breaking the bank.
WD_BLACK P50 Game Drive SSD
While its name might suggest a gaming focus, the WD_BLACK P50 Game Drive SSD is a powerhouse that Mac video editors should absolutely consider. This drive boasts a super-fast NVMe SSD internally, coupled with a USB 3.2 Gen 2×2 interface, which unlocks truly blistering transfer speeds. If your Mac supports this newer USB standard, you’re looking at speeds that can make transferring and working with massive video files feel almost instantaneous.
The P50’s performance makes it ideal for demanding video editing tasks, allowing for smoother playback of high-resolution footage and significantly reducing export times. Its sleek, industrial design not only looks good but also feels robust and well-built. For Mac users who are constantly battling large file sizes and need the fastest possible access to their media, the WD_BLACK P50 offers a top-tier solution that can dramatically improve editing efficiency.
Why do people need to buy external hard drives for video editing on mac
Are you a Mac user who’s passionate about video editing, but finding your internal storage groaning under the weight of your projects? You’re not alone! Think about it: every high-resolution video clip, every rendered masterpiece, and every temporary cache file consumes precious space. Your Mac’s sleek design is fantastic for portability and daily tasks, but when it comes to the demanding world of video editing, that internal drive can become a bottleneck, slowing down your workflow and potentially leading to frustrating data loss.
Imagine this: you’re in the zone, meticulously cutting and refining a client’s project, and suddenly, you’re met with that dreaded “disk full” notification. Panic sets in. Do you start deleting precious footage? Do you have to juggle files between different cloud services, hoping they upload quickly enough? It’s a scene many editors have experienced, and it’s precisely why investing in an external hard drive is such a game-changer. It’s not just about more space; it’s about creating a dedicated, high-performance workspace that keeps your creative flow uninterrupted.
The benefits of using external hard drives for video editing on Mac extend far beyond simply having more storage. You’ll experience significantly faster transfer speeds, crucial for importing large video files and exporting finished projects without lengthy wait times. Furthermore, an external drive acts as an invaluable backup solution. Accidents happen, and having your entire project mirrored on a separate drive can be the difference between a minor inconvenience and a catastrophic data loss. This peace of mind is priceless when you’re pouring hours of your creative energy into your work.
When considering the “best external hard drives for video editing on Mac,” you’re looking for drives that offer a combination of speed (like Thunderbolt 3 or USB-C interfaces), capacity to handle large files, and ruggedness for reliability. Whether you’re a hobbyist creating vlogs or a professional producing cinematic content, a dedicated external drive will not only boost your editing performance but also safeguard your valuable creations, making it an essential tool for any serious Mac-based video editor.
Understanding Storage Needs for Video Editing
So, you’re diving into video editing on your Mac, and you’re probably wondering just how much space all those raw footage files, project files, and exported videos are going to eat up. Think about it: even a short 4K video clip can be gigabytes in size, and if you’re working on a longer project, say a documentary or a wedding video, those numbers can skyrocket. You don’t want to be in the middle of a crucial edit, exporting your masterpiece, only to be met with that dreaded “disk full” notification. It’s a real project killer, and trust me, it happens to the best of us if we don’t plan ahead.
Let’s get practical here. If you’re shooting with a DSLR or mirrorless camera, your footage might be anywhere from 50-200MB per minute for 1080p, and then for 4K, that can jump to several hundred megabytes per minute. Now, imagine you’re shooting a wedding for 8 hours. That’s a lot of footage. Even if you only use a fraction of it, you need enough breathing room to store it all, plus your project files in Final Cut Pro or Premiere Pro, and then of course, your final exported versions. It’s like packing for a trip – you wouldn’t just bring one pair of socks for a week-long vacation, right?
Consider your workflow. Are you frequently transferring large files? Do you have a habit of keeping multiple versions of your edits? Maybe you’re working with multiple camera angles or using RAW footage which is notoriously large. All these factors contribute to your storage demands. It’s not just about the raw footage; it’s also about the caching files your editing software generates to speed up playback. These can also take up significant space over time. So, before you even look at a hard drive, take a moment to honestly assess how much data you’re realistically going to be dealing with.
A good rule of thumb is to aim for more storage than you think you’ll need. It’s always better to have extra space you’re not using than to constantly be juggling files, deleting old projects, or worse, running out of room mid-edit. Think of it as an investment in your creative sanity. Having ample storage means you can focus on the creative process, not on managing your digital hoard. It’s like having a spacious workshop versus a cramped corner – you can accomplish so much more when you’re not bumping into things.
Exploring Different Types of External Drives
When we talk about external hard drives for video editing on your Mac, it’s not just about capacity, but also about the type of technology inside. The two main players you’ll encounter are HDDs (Hard Disk Drives) and SSDs (Solid State Drives). Think of HDDs as the classic, more affordable option. They use spinning platters to store your data, which is great for holding a ton of information without breaking the bank. However, that spinning action can be slower when it comes to accessing and transferring files, which is a crucial bottleneck for video editing.
On the other hand, SSDs are the speed demons of the storage world. They don’t have any moving parts, relying on flash memory instead. This means lightning-fast read and write speeds, which translate directly to smoother playback, quicker loading times for your projects, and significantly faster export times. For video editing, especially if you’re working with high-resolution footage like 4K or even 8K, an SSD is often a game-changer. It’s like upgrading from a bicycle to a sports car – the difference in performance is palpable.
Now, let’s get real about the trade-offs. SSDs are generally more expensive per gigabyte than HDDs. So, if you need to store massive amounts of footage and your budget is tight, a large HDD might be your primary storage solution. However, many editors adopt a hybrid approach. They might use a fast SSD for their current projects, editing software, and operating system, while using a larger, more affordable HDD for archiving older projects, raw footage backups, or less frequently accessed files. It’s a smart way to get the best of both worlds.
There’s also the consideration of form factor. You’ll find traditional desktop external drives that are larger but often offer more capacity for the price, and then you have portable drives that are compact and easy to carry around. For editing on the go or if you move your setup frequently, a portable SSD or even a portable HDD is a must. But if your editing station is stationary, a larger desktop drive might offer better value and potentially more robust build quality. It really depends on how and where you plan to edit your videos.
Connecting and Optimizing Your Drive
Once you’ve got your shiny new external drive, the next step is getting it connected to your Mac and ensuring it’s set up for optimal video editing performance. For Mac users, the connection type is super important. Thunderbolt 3 and Thunderbolt 4 are the current kings of speed, offering incredible bandwidth that’s essential for handling massive video files without lag. USB-C is also a great option, and many drives will offer both, or at least USB 3.1 Gen 2 which is still very zippy. You want to make sure your Mac has the right ports and that your drive’s cable matches.
Formatting is another crucial step, and for Mac users, the recommended format is usually APFS (Apple File System) or Mac OS Extended (Journaled). APFS is the more modern choice and is optimized for SSDs, offering features like space sharing and snapshots. However, if you plan to use the drive with older Macs or even some Windows machines, you might consider exFAT, which is compatible with both operating systems. Just be aware that exFAT doesn’t have the same journaling features as the Mac formats, which can make it slightly less robust against data corruption if a transfer is interrupted.
To really get the most out of your drive, especially if it’s an SSD, you might want to consider enabling TRIM. TRIM is a command that tells your SSD which data blocks are no longer in use and can be wiped. This helps the SSD maintain its speed and performance over time. On Macs, TRIM is usually enabled automatically for Apple’s internal SSDs, but for third-party external SSDs, you might need to enable it manually using a utility like Terminal or a third-party app. It’s a little bit of tech wizardry, but it can make a noticeable difference in how responsive your drive feels.
Finally, think about how you organize your files on the drive. Don’t just dump everything into one massive folder. Create a clear folder structure – perhaps by project, by date, or by client. This will save you countless hours of searching later on. Also, avoid filling your drive to the absolute brim. Leaving about 10-15% of the drive free can help maintain optimal performance, especially for SSDs, as they need some space to manage their internal operations. It’s like leaving a little room in your pantry so you can actually get things in and out easily.
Future-Proofing Your Storage Solution
When you’re investing in an external hard drive for video editing, you’re not just buying storage for today; you’re making a decision that will impact your workflow for years to come. The world of video production is constantly evolving, with resolutions increasing, file sizes growing, and editing software becoming more demanding. So, it’s wise to think about future-proofing your storage solution. This means not just buying enough space for your current needs, but anticipating what your needs might be in the next 2, 5, or even 10 years.
Consider the trend towards higher resolutions and frame rates. If you’re editing 1080p footage now, you might be editing 4K or even 8K content in the near future. Raw footage from cinema cameras can be absolutely enormous, and the data requirements for these workflows are significantly higher. Buying a drive with ample capacity now, even if it feels like overkill, can save you from having to repurchase or upgrade your storage much sooner than you’d like. It’s like buying a slightly larger car than you need today, just in case you decide to expand your family down the line.
Another aspect of future-proofing is thinking about connectivity standards. While Thunderbolt 3 and 4 are current, the tech world always moves forward. Ensure the drives you’re considering use modern connection types that are likely to remain relevant. USB-C is also likely to be around for a while. If a drive only has older USB-A ports, you might find yourself needing adapters or facing slower transfer speeds as your Mac’s ports evolve. It’s about ensuring compatibility and speed as your overall setup gets an upgrade.
Lastly, think about the longevity of the drive itself and the technologies within it. SSD technology is rapidly advancing, and while current SSDs are incredibly fast, future iterations will likely be even faster and more cost-effective. When selecting a drive, consider reputable brands known for reliability. Also, think about potential expansion. Some drive enclosures allow you to swap out drives or even add more drives, giving you flexibility down the road. It’s about building a storage system that can grow with your editing ambitions, rather than having to start from scratch every few years.
The Ultimate Guide to Choosing the Best External Hard Drives for Video Editing on Mac
Hey there, fellow Mac users and video editing enthusiasts! So, you’ve dived headfirst into the exciting world of filmmaking, vlogging, or maybe even creating some awesome tutorials, and your Mac’s internal storage is screaming for mercy. I totally get it. When you’re dealing with massive video files, especially in high resolutions like 4K or even 8K, your internal SSD can fill up faster than a TikTok trend. That’s where the magic of external hard drives comes in, and finding the best external hard drives for video editing on Mac is crucial for a smooth and frustration-free workflow. Think of it as giving your creative process a powerful upgrade. We’re going to walk through everything you need to know to make the right choice, so let’s get started on making sure your editing sessions are as seamless as possible!
1. Speed is King: Don’t Let Slow Drives Kill Your Vibe
Okay, so this is probably the most important thing to get right when you’re picking out a drive for video editing. Imagine trying to scrub through a 4K timeline, and every little movement causes the playback to stutter and freeze. That’s the pain of a slow drive, and trust me, it’ll make you want to throw your Mac out the window. We’re talking about the transfer speeds here – how quickly you can get your footage from your camera or memory card onto the drive, and, more importantly, how quickly your editing software can access and work with those files.
When you’re editing video, especially with multiple layers, effects, and high-resolution footage, you need a drive that can keep up. This usually means looking for drives that utilize fast connection interfaces like Thunderbolt 3 or USB 3.1 Gen 2. Solid State Drives (SSDs) are generally going to blow traditional Hard Disk Drives (HDDs) out of the water in terms of speed. While HDDs offer more storage for your buck, if your editing experience is laggy and frustrating, the extra capacity won’t be worth the headache. Think of it this way: an SSD is like a sports car, zipping through your files, while an HDD is more like a trusty minivan, carrying more but at a more leisurely pace.
2. Capacity: How Much Room Do You Really Need?
Let’s be real, video files are massive. Even a few minutes of 4K footage can eat up gigabytes faster than you can say “render.” So, you need to think about how much storage you’re going to need not just for your current projects, but also for future endeavors. It’s always better to err on the side of caution and get a bit more space than you think you might need. Running out of space mid-project is a nightmare scenario that we all want to avoid.
Consider the types of projects you’ll be working on. Are you editing short social media clips, or are you diving into feature-length documentaries with complex visual effects? If you’re shooting in RAW formats or working with very high frame rates, your storage needs will skyrocket. Many video editors find that a 1TB drive fills up surprisingly quickly, so starting with at least 2TB, and ideally 4TB or more, is a good bet. It’s also worth thinking about a tiered storage approach: maybe a super-fast SSD for your active projects and a larger, more affordable HDD for archiving older projects.
3. Connection Type: Thunderbolt vs. USB – The Great Debate
This is where things get a little technical, but it’s super important for Mac users. Your Mac’s ports dictate the fastest connection you can get. Most modern Macs come with Thunderbolt 3 (which uses the USB-C connector) and USB 3.1 Gen 2 ports. Thunderbolt 3 is king when it comes to speed and bandwidth. It’s designed specifically for demanding tasks like video editing, offering incredibly fast data transfer rates and the ability to daisy-chain multiple devices. If your Mac has Thunderbolt 3 ports and you’re serious about video editing, this is the connection type you’ll want to prioritize for the best performance.
However, Thunderbolt drives can often be more expensive. USB 3.1 Gen 2 (also using the USB-C connector) is still very fast and offers a great balance of speed and affordability. Many excellent external drives use USB 3.1 Gen 2, and for many editing workflows, it’s more than fast enough. It’s also more universally compatible with older Macs and other devices. When considering the best external hard drives for video editing on Mac, check your Mac’s specs and see which ports you have available. This will help you narrow down your options and ensure you’re getting the most out of your new drive.
4. Durability and Portability: Taking Your Edits On the Go
Are you someone who edits on the road, at coffee shops, or at a client’s location? Or do you mostly work from your home studio? Your answer to this question will heavily influence the type of drive that’s best for you. If you need to toss a drive into your backpack and head out, you’ll want something that can withstand a bit of jostling. Ruggedized drives with shock-resistant casings are designed for this kind of use and can offer peace of mind.
SSDs, by their nature, are much more robust than traditional HDDs because they have no moving parts. This makes them inherently more resistant to drops and vibrations. So, if portability and durability are high on your list, an SSD-based external drive is probably going to be your best friend. Even if you don’t plan on dropping it (and let’s hope you don’t!), the internal robustness of an SSD is still a bonus. Think about how and where you’ll be using your drive most often, and choose accordingly.
5. Drive Type: SSD vs. HDD – The Speed vs. Storage Showdown
We’ve touched on this a bit, but it’s worth reiterating the fundamental difference between Solid State Drives (SSDs) and Hard Disk Drives (HDDs). SSDs use flash memory, much like your iPhone or USB stick, to store data. This means they are incredibly fast, silent, and much more durable. They have no moving parts, so they’re less susceptible to damage from drops or vibrations. For video editing, this speed translates to snappier playback, faster loading times for your projects, and quicker import/export of footage.
HDDs, on the other hand, use spinning platters and a read/write head to access data. This technology is older and slower, but it’s also significantly cheaper per gigabyte. This means you can get a lot more storage for your money with an HDD. So, while an SSD is ideal for your active editing projects where speed is paramount, a larger capacity HDD can be a fantastic and cost-effective solution for storing your completed projects, raw footage backups, or media libraries. The best approach for many video editors is often a combination of both.
6. RAID Configurations: Boosting Speed and Redundancy
For those of you who are really pushing the boundaries with your video editing, you might want to consider drives that offer RAID (Redundant Array of Independent Disks) capabilities. RAID allows you to combine multiple drives into a single logical unit. There are different RAID levels, but for video editing, RAID 0 is often used to stripe data across multiple drives, significantly increasing read and write speeds. This can be a game-changer for working with very large files or demanding codecs.
However, RAID 0 has a downside: if one drive fails, all your data is lost. For a more robust solution, you might look into RAID 1 (mirroring), which writes the same data to two drives, providing redundancy in case one drive fails. Some external enclosures offer RAID 5 or RAID 6, which balance speed and redundancy. While these can be more expensive and complex, they offer excellent performance and data protection, which is invaluable when you’ve poured hours into a project. When looking at the best external hard drives for video editing on Mac, a drive with built-in RAID capabilities can offer a significant advantage.
7. Software and Features: Added Bonuses to Look For
Beyond the core specs, some external drives come with bundled software or special features that can be quite useful for video editors. These can include backup utilities, encryption software for securing your sensitive footage, or even specialized formatting tools for Mac compatibility. Some drives are pre-formatted for Mac, while others might require a quick format before you can use them with macOS.
It’s also worth checking for features like power management, which can be helpful if you’re running off a laptop battery. Some drives have indicator lights that show activity or status, which is a small but often appreciated detail. While these aren’t always deal-breakers, having useful software or thoughtful features can enhance your overall experience and streamline your workflow. Always check the product description for any included software or unique selling points that might make a particular drive the perfect fit for your video editing needs on your Mac.
FAQs
What’s the most important factor when choosing an external hard drive for video editing on a Mac?
When you’re diving into video editing on your Mac, the absolute game-changer is speed. Think of it like this: the faster your drive, the smoother your playback will be, the quicker your rendering times, and the less frustrating your workflow. You want to be able to scrub through footage without stuttering and export your masterpieces efficiently.
This is why looking at the interface and the type of drive is crucial. For video editing, you’ll want to prioritize drives that use Thunderbolt 3 or Thunderbolt 4, as these offer significantly faster transfer speeds than USB 3.0 or older connections. Similarly, Solid State Drives (SSDs) are generally much faster than traditional Hard Disk Drives (HDDs), making them the preferred choice for demanding editing tasks.
Are SSDs or HDDs better for video editing?
For most video editing workflows, especially if you’re working with high-resolution footage like 4K or 8K, SSDs are the clear winners. They use flash memory, which means there are no moving parts, leading to dramatically faster read and write speeds. This translates directly into smoother timeline scrubbing, faster importing and exporting of large files, and a much more responsive editing experience.
However, HDDs can still be a good option if you’re on a tighter budget or need a lot of storage for less frequently accessed footage, like archival projects. While they are slower, they offer a much better price per gigabyte. You might consider a hybrid approach: an SSD for your active project files and operating system, and an HDD for storing completed projects or raw footage you don’t need immediate access to.
How much storage space do I really need for video editing?
This is a question that often catches people out, as video files, especially at higher resolutions, can get massive very quickly. A good rule of thumb is to start with at least 1TB, but honestly, if you’re doing any serious 4K editing, you’ll probably want to aim for 2TB or more. Think about the raw footage you’ll be importing, the project files themselves, any proxy files you create, and the final exported versions.
It’s always better to err on the side of caution and get more storage than you think you’ll need. Running out of space mid-project is incredibly frustrating and can lead to lost work. Consider your typical project length, the codecs you’re using, and how many projects you usually juggle at once. Investing in a larger drive upfront will save you a lot of headaches down the line.
What’s the difference between Thunderbolt 3 and Thunderbolt 4, and do I need it?
Both Thunderbolt 3 and Thunderbolt 4 offer incredible speeds, allowing for lightning-fast data transfer, which is essential for video editing. Thunderbolt 4 is essentially an evolution of Thunderbolt 3, standardizing certain capabilities and offering some minor improvements, particularly in areas like minimum bandwidth requirements for PCIe data and support for more advanced display configurations.
For most video editing tasks, the difference between Thunderbolt 3 and Thunderbolt 4 on an external drive won’t be a dealbreaker. If your Mac supports Thunderbolt 3, you’ll likely find plenty of excellent drives that will serve you well. Thunderbolt 4 is certainly future-proof and offers a bit more robustness, but if you’re looking at a great Thunderbolt 3 drive that fits your budget and needs, it’s still a fantastic choice for a smooth editing experience.
Can I use a drive formatted for Windows on my Mac?
While it’s technically possible to read and write to NTFS-formatted drives (the default for Windows) on a Mac, it’s not the ideal or most reliable setup for video editing. Macs natively prefer the APFS or HFS+ formats. Using a Windows-formatted drive can sometimes lead to slower performance, potential data corruption issues, or even outright unreliability, especially with large video files.
To get the best performance and compatibility with your Mac, it’s highly recommended to reformat any external drive you plan to use for video editing into a Mac-compatible format like APFS. You can easily do this using Disk Utility on your Mac. Just be sure to back up any important data on the drive before you reformat it, as the process will erase everything.
What are the advantages of a portable external SSD over a desktop one?
Portable external SSDs are fantastic for video editors who need flexibility and the ability to take their projects on the go. They’re smaller, lighter, and often bus-powered (meaning they draw power directly from your Mac’s Thunderbolt or USB port), so you don’t need an extra power adapter. This makes them perfect for working from different locations, collaborating with others, or even just keeping your desk tidy.
The main trade-off for portability is that desktop external SSDs often offer higher capacities and can sometimes provide slightly better performance due to having their own dedicated power source, which can allow them to run at peak speeds more consistently. However, for many video editing tasks, a good portable SSD offers more than enough power and convenience.
How do I protect my video editing data on an external drive?
Protecting your valuable video editing data is absolutely paramount. The first and most important step is to implement a robust backup strategy. This means regularly backing up your project files and raw footage to at least one other location, ideally following the “3-2-1 backup rule” (three copies of your data, on two different media types, with one copy offsite).
Beyond backups, consider using drives with built-in hardware encryption if your footage contains sensitive information. Always handle your external drives with care, avoid unplugging them abruptly while data is being transferred, and make sure they are properly ejected from your Mac before disconnecting. Keeping your operating system and editing software up-to-date can also help prevent compatibility issues and data loss.
Verdict
So, you’ve navigated the world of storage, armed with insights into what makes an external drive truly sing with your Mac for video editing. Remember, the right drive isn’t just a piece of hardware; it’s the silent partner in your creative process, the dependable backbone that lets your ideas flow without frustrating hiccups. Choosing from the best external hard drives for video editing on Mac is a powerful step towards unlocking your full editing potential. Don’t let the technical specs intimidate you; think of it as choosing the right paintbrush for your masterpiece. With this knowledge, you’re more than ready to find that perfect drive and get back to what you love most – bringing your stories to life on screen.
Go forth and edit with confidence! The perfect external hard drive awaits, ready to power your passion and accelerate your workflow. Imagine the seamless scrubbing, the rapid file transfers, and the sheer joy of an editing session free from storage anxieties. You’ve got this! Now, go out there, pick the drive that speaks to your creative needs, and let your projects shine. The digital canvas is yours, and with the right tools, your imagination is the only limit.