Ever find yourself staring at your reflection, noticing those pesky little hairs around your eyebrows or upper lip that seem to multiply overnight? You’re not alone! Booking salon appointments can be a hassle, not to mention time-consuming and potentially expensive. That’s why many of us are turning to DIY solutions for smooth, hair-free skin. Finding the right product can be tricky, though, with so many options promising salon-quality results.
That’s where we come in! We’ve done the research and sifted through countless products to bring you the ultimate guide to finding the best home facial waxing kit for your specific needs. We’ll break down the different types of waxes, what to look for in a quality kit, and provide honest reviews of some top contenders so you can achieve flawless results from the comfort of your own home. Let’s get started on your journey to silky-smooth skin!
We will review the best home facial waxing kit later in this article. But before that, take a look at some relevant products on Amazon:


Last update on 2026-02-14 / Affiliate links / #CommissionsEarned / Images from Amazon Product Advertising API
The Allure of a Smooth Face: Your Journey to At-Home Waxing
Let’s be honest, who doesn’t crave that feeling of smooth, hair-free skin? We’ve all been there, staring in the mirror, noticing those pesky hairs around the eyebrows, upper lip, or chin and wondering if there’s a better way to deal with them than constant plucking or threading. Salons offer a solution, but let’s face it, those regular appointments can be time-consuming and expensive. That’s where the idea of waxing at home comes in, offering a convenient and potentially cost-effective alternative.
Now, the world of at-home waxing can seem a little intimidating at first. Visions of messy wax, painful ripping, and potential mishaps might flash through your mind! But fear not, because finding the right tools and understanding the process can make a world of difference. According to a 2023 study by Statista, the beauty and personal care market generated over $500 billion in revenue worldwide, and a significant portion of that is spent on hair removal products and services. This shows there is a huge and growing market for at-home hair removal.
The key to successful at-home waxing lies in finding the best home facial waxing kit for your skin type and needs. Think about what areas you want to target – eyebrows, upper lip, chin? Are you prone to sensitivity? Are you a beginner or do you have some experience? Answering these questions will help you narrow down your options and choose a kit that will set you up for success.
So, join us as we dive into the world of facial waxing kits and discover what to look for in the best home facial waxing kit. We’ll explore different types of wax, application techniques, and essential aftercare tips to ensure you achieve salon-worthy results from the comfort of your own bathroom. Get ready to say goodbye to unwanted facial hair and hello to a smoother, more confident you!
The Best Home Facial Waxing Kit
Nad’s Facial Wand Eyebrow Shaper
Looking for a precise and mess-free way to tackle those stray facial hairs? Nad’s Facial Wand Eyebrow Shaper might just be your new best friend. This kit features a unique applicator that allows for pinpoint accuracy, making it ideal for shaping eyebrows, removing upper lip fuzz, and tidying up the chin area. The included sugar-based wax is gentle on the skin, minimizing irritation and redness.
The application process is straightforward, and the wand makes it easy to target even the smallest hairs. Many appreciate the convenience and the fact that it heats up quickly in the microwave. However, some users may find that the sugar wax isn’t quite as effective on thicker, coarser hairs, so it’s best suited for fine to medium hair types.
Sally Hansen Hair Removal Wax Strip Kit for Face
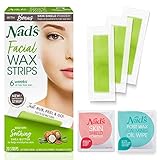
Sally Hansen is a household name for a reason, and their Hair Removal Wax Strip Kit for Face delivers on its promise of smooth, hair-free skin. These pre-coated wax strips are incredibly easy to use – simply peel, apply, and pull. They’re perfectly sized for the face, making them ideal for upper lip, chin, and brow areas. Plus, they’re infused with soothing ingredients to help minimize post-waxing discomfort.
This kit is a fantastic option for beginners, as it requires no heating or spreading, making it incredibly convenient and less messy than traditional wax. The results are typically long-lasting, and users rave about how effectively they remove even stubborn hairs. However, make sure to follow the instructions carefully and hold the skin taut when pulling the strip to avoid any potential irritation.
Gigi Mini Pro Kit
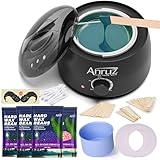
If you’re serious about waxing and want a salon-quality experience at home, the Gigi Mini Pro Kit is worth considering. This comprehensive kit includes a wax warmer, all-purpose honey wax, pre-wax cleanser, post-wax cooling gel, applicators, and muslin strips. The honey wax is known for its ability to grip even fine hairs, leaving your skin incredibly smooth.
This kit requires a bit more effort and expertise compared to pre-made strips, but the results are often worth it. The adjustable wax warmer allows you to maintain the perfect temperature for optimal hair removal. Keep in mind that proper technique is crucial to avoid irritation and ensure effective hair removal. With a little practice, you’ll be able to achieve professional-looking results in the comfort of your own home.
Bliss Poetic Waxing Face Kit
For those seeking a spa-like experience at home, the Bliss Poetic Waxing Face Kit offers a luxurious and effective solution. This kit includes Bliss’ signature blue wax, pre- and post-waxing oils, spatulas, and muslin strips. The wax is formulated to be gentle on the skin while still effectively removing unwanted facial hair.
The pre- and post-waxing oils are a standout feature, helping to prep the skin and soothe any irritation after waxing. Users appreciate the high-quality ingredients and the overall pampering experience. While it might be a bit pricier than some other options, the Bliss Poetic Waxing Face Kit is a great choice for those who want a premium waxing experience with minimal discomfort.
Nair Face Wax Strips
Looking for a budget-friendly and convenient option for facial hair removal? Nair Face Wax Strips are a solid choice. These pre-waxed strips are designed specifically for the delicate skin on the face, making them ideal for removing hair from the upper lip, chin, and eyebrows. The formula is designed to be gentle, minimizing irritation and redness.
The simplicity of Nair Face Wax Strips makes them a popular choice for those new to at-home waxing. The pre-coated strips eliminate the need for heating or spreading wax, making the process quick and easy. Some users may find that these strips aren’t as effective on thicker, coarser hairs, but for fine to medium hair, they offer a convenient and affordable solution.
Why You Need the Best Home Facial Waxing Kit
Tired of that pesky upper lip hair making you self-conscious in photos? Or maybe you’re spending a fortune at the salon every few weeks just to keep your eyebrows looking sharp? We’ve all been there! The struggle to maintain smooth, hair-free facial skin is real. Imagine this: you’re getting ready for a last-minute date, you glance in the mirror, and BAM! Unwanted facial hair is staring back at you. Do you scramble for tweezers, hoping to pluck them all in time? Or do you confidently reach for your trusty home facial waxing kit, knowing you’ll be ready in minutes?
The best home facial waxing kit empowers you to take control of your beauty routine, saving you both time and money. Think about all the salon appointments you can skip! No more scheduling headaches or rushed trips across town. Plus, waxing pulls hair from the root, resulting in smoother skin for longer compared to shaving. That means fewer touch-ups and more time to focus on the things you love. It’s like having a personal esthetician available 24/7, ready to banish unwanted hair whenever and wherever you need.
Our recommended kit is designed for easy use, even for beginners. It includes everything you need for a flawless, salon-quality finish: gentle wax strips, soothing after-wax wipes, and clear, step-by-step instructions. Formulated with skin-loving ingredients, it minimizes irritation and leaves your skin feeling soft and radiant. Say goodbye to redness, bumps, and ingrown hairs!
Investing in a high-quality home facial waxing kit is an investment in your confidence. Knowing you can easily and affordably maintain smooth, hair-free skin will make you feel more put-together and ready to take on the world. Ditch the expensive salon visits and embrace the convenience and empowering feeling of DIY beauty! It’s time to say hello to a more confident, radiant you, all from the comfort of your own home.
Preparing Your Skin for a Smooth Waxing Experience
So, you’ve decided to take the plunge and try facial waxing at home? Awesome! But before you even think about ripping that wax strip, it’s crucial to prep your skin. Imagine trying to paint a wall that’s covered in dust and grime – the paint won’t stick properly, and the finish will be uneven. The same principle applies to waxing. Dirty or oily skin prevents the wax from gripping the hair effectively, leading to missed hairs and potential irritation.
Think of your skin as a delicate canvas. To ensure a smooth and clean wax, start by gently cleansing your face with a mild cleanser. Avoid anything too harsh or abrasive, as you don’t want to irritate your skin before you even start. Pat your skin dry with a soft towel – don’t rub, as this can cause redness. The goal is to create a clean, non-irritated base for the wax to adhere to.
Next, consider exfoliating a day or two before waxing. This will remove any dead skin cells that might be clogging your pores and hindering the wax’s grip. A gentle scrub or a washcloth will do the trick. Just be careful not to over-exfoliate, as this can make your skin too sensitive. You want to prime the surface, not cause damage.
Finally, make sure your skin is completely dry before applying the wax. Moisture can interfere with the wax’s ability to adhere to the hair. You can even use a light dusting of powder, like cornstarch, to absorb any excess oil or moisture. Think of it as a primer for your waxing session – creating the perfect foundation for a flawless finish.
Understanding Different Types of Facial Wax and Their Suitability
Okay, so you’re browsing through waxing kits and feeling a bit overwhelmed by the options? Don’t worry, you’re not alone! There’s warm wax, cold wax strips, sugar wax, and more. Understanding the differences between them is key to choosing the best one for your skin and hair type. It’s like picking the right tool for the job – a screwdriver won’t work on a nail, and vice versa!
Let’s start with warm wax. This type is typically heated up in a wax warmer and applied with a spatula. It’s known for its effectiveness on thicker hair, making it a good option for areas like the upper lip or eyebrows. The heat helps to open up the pores, allowing for a smoother hair removal. However, it can be a bit messy and requires some practice to master the application technique.
Cold wax strips, on the other hand, are pre-coated with wax and ready to use straight from the box. They’re incredibly convenient and beginner-friendly, making them a popular choice for quick touch-ups or travel. However, they might not be as effective on thicker hair or shorter hairs, requiring multiple passes. This can lead to skin irritation, especially for sensitive skin.
Sugar wax is a more natural alternative, made from sugar, lemon juice, and water. It’s known for being gentler on the skin and less likely to cause irritation. Plus, it’s water-soluble, making cleanup a breeze! Sugar wax is a great option for those with sensitive skin or allergies to traditional waxes. Think of it as the eco-friendly choice that’s kind to both your skin and the environment.
Mastering the Waxing Technique for Optimal Results
Alright, you’ve prepped your skin, chosen your wax, now it’s time for the main event: the waxing itself! But before you start ripping away, let’s talk technique. Proper technique is the difference between a smooth, hair-free result and a patchy, irritated mess. It’s like learning to play an instrument – practice makes perfect, and a little knowledge goes a long way.
First, always test the wax on a small, inconspicuous area of your skin to check for any allergic reactions or sensitivities. This is especially important if you have sensitive skin or are trying a new wax formula. Think of it as a patch test for your skin – better safe than sorry! Apply a small amount of wax, remove it according to the instructions, and wait 24 hours to see if any redness or irritation develops.
When applying the wax, always follow the direction of hair growth. This ensures that the wax properly coats the hair and grips it firmly. Apply the wax in a thin, even layer, and press the strip firmly onto the wax. Remember, patience is key! Don’t rush the process, as this can lead to missed hairs and uneven results.
Now for the moment of truth: the removal! Hold your skin taut with one hand and quickly pull the strip off in the opposite direction of hair growth with the other hand. The key is to pull quickly and close to the skin, not upwards. Think of it as ripping off a bandage – the faster, the better. After each strip, apply gentle pressure to the waxed area to help soothe the skin.
Post-Waxing Care: Soothing and Protecting Your Skin
You’ve successfully waxed your face – congratulations! But the job isn’t quite done yet. Post-waxing care is crucial for preventing irritation, ingrown hairs, and breakouts. Think of it as the aftercare for a workout – your skin needs time to recover and rejuvenate. Ignoring post-waxing care is like skipping the cool-down after exercise – you’ll end up feeling sore and uncomfortable.
Immediately after waxing, apply a soothing lotion or cream to the waxed area. Look for products that contain ingredients like aloe vera, chamomile, or calendula, which have anti-inflammatory and calming properties. Avoid products with fragrances, alcohol, or other harsh chemicals, as these can irritate freshly waxed skin. Think of it as giving your skin a gentle hug after a potentially stressful experience.
For the next 24-48 hours, avoid activities that could irritate your skin, such as sun exposure, hot showers, and strenuous exercise. Heat and sweat can create a breeding ground for bacteria, increasing the risk of breakouts. Stick to gentle cleansers and moisturizers, and avoid wearing makeup or using harsh skincare products. Treat your skin like a delicate flower, giving it the time and space it needs to heal.
To prevent ingrown hairs, exfoliate the waxed area gently a few days after waxing. This will help to remove dead skin cells that can trap hairs beneath the surface. Use a gentle scrub or a washcloth, and be careful not to over-exfoliate. Regular exfoliation can also help to prevent future ingrown hairs, keeping your skin smooth and bump-free.
Finally, remember to moisturize your skin regularly. Hydrated skin is healthy skin, and it’s less likely to become irritated or develop ingrown hairs. Choose a moisturizer that’s appropriate for your skin type, and apply it morning and night. Think of it as giving your skin a daily dose of hydration – keeping it healthy, happy, and ready for anything.
Finding Your Perfect Glow: A Guide to the Best Home Facial Waxing Kit
Hey there, beautiful! Tired of expensive salon visits for facial waxing? Ready to take control and achieve smooth, radiant skin in the comfort of your own home? You’re in the right place! This guide is your friendly companion, walking you through everything you need to know to find the best home facial waxing kit for your unique needs. We’ll explore the essential factors to consider, so you can confidently choose a kit that delivers professional-quality results without the professional price tag. Let’s get started on your journey to effortlessly smooth skin!
Wax Type: Finding Your Match
Choosing the right type of wax is the foundation of a successful at-home facial waxing experience. There are a few main contenders: hard wax, soft wax, and sugar wax. Each has its own strengths and weaknesses, and the best option for you will depend on your skin type, pain tolerance, and the specific areas you want to target. Don’t just grab the first box you see; understanding the differences can save you from unnecessary irritation and frustration.
Hard wax, also known as stripless wax, is often considered a gentler option, especially for sensitive skin. It adheres directly to the hair and shrink-wraps it, allowing you to remove the wax without the need for strips. Many find it less painful because it’s less likely to stick to the skin itself. Soft wax, on the other hand, requires strips for removal. It’s generally considered more effective for removing fine hairs, but it can also be more irritating, especially if you have sensitive skin or are prone to redness. Sugar wax, a natural alternative made from sugar, lemon juice, and water, is known for its gentleness and biodegradability. It’s water-soluble, making cleanup easy, and it adheres primarily to the hair, minimizing skin irritation. Figuring out your personal skin needs is the first step toward picking the best home facial waxing kit.
Ingredients: What’s Really in the Pot?
Take a close look at the ingredients list! What you put on your skin matters, especially when dealing with a potentially irritating process like waxing. Some waxes contain harsh chemicals, artificial fragrances, or dyes that can trigger allergic reactions or exacerbate existing skin conditions. A natural, fragrance-free formula is usually a safe bet, especially if you have sensitive skin. Look for waxes enriched with soothing ingredients like aloe vera, chamomile, or essential oils known for their calming properties.
Pay attention to potential irritants like synthetic resins, parabens, and mineral oils. These can clog pores, leading to breakouts, or cause redness and inflammation. If you have allergies, carefully scan the ingredient list for any known allergens. The best home facial waxing kit will be formulated with skin-loving ingredients that minimize irritation and promote healing. Remember, healthy skin is happy skin! If you’re unsure about an ingredient, a quick internet search can provide you with more information and help you make an informed decision.
Ease of Use: A Smooth Experience from Start to Finish
Let’s be honest, nobody wants a complicated waxing process that leaves you covered in sticky residue and frustrated tears. The best home facial waxing kit should be easy to use, even for beginners. Look for kits that come with clear, step-by-step instructions, helpful diagrams, or even video tutorials. A user-friendly design is key to achieving professional-looking results without the professional hassle.
Consider the melting process. Is the wax easy to heat up and maintain at the correct temperature? Some kits come with wax warmers that automatically regulate the temperature, while others require you to use a microwave or stovetop. If you’re using a microwave, make sure the instructions clearly specify the heating time to avoid overheating and potential burns. Application is another important factor. Does the kit include applicators that are easy to handle and allow for precise application? The goal is a smooth, controlled process that minimizes mess and maximizes effectiveness.
Applicators and Tools: Precision is Key
The quality and design of the applicators and tools included in your kit can significantly impact your waxing experience. Look for applicators that are sturdy, easy to grip, and allow for precise application of the wax. The shape and size of the applicator should also be appropriate for the areas you plan to wax. For example, smaller applicators are ideal for the eyebrows and upper lip, while larger applicators can be used for the cheeks and chin.
Consider the material of the applicators. Wooden spatulas are a classic choice, but they can be difficult to clean and reuse. Metal applicators are more durable and hygienic, but they can also be more expensive. If the kit includes strips, make sure they are made of a high-quality, non-woven material that won’t tear or leave behind residue. Additional tools like tweezers for removing stray hairs and pre- and post-waxing lotions can also enhance your experience and contribute to achieving the best home facial waxing kit results.
Skin Sensitivity: Treating Your Skin with Respect
Before diving headfirst into waxing your entire face, it’s crucial to consider your skin’s sensitivity. If you have sensitive skin, a history of allergic reactions, or conditions like eczema or psoriasis, proceed with caution. Start with a patch test on a small, inconspicuous area of your skin, like the inside of your wrist, to check for any adverse reactions. Wait 24-48 hours to see if any redness, itching, or swelling occurs.
Even if you don’t have particularly sensitive skin, it’s always a good idea to err on the side of caution. Avoid waxing areas that are irritated, inflamed, or have sunburns. Also, refrain from waxing if you are using retinoids, exfoliating acids, or other medications that can thin the skin. The best home facial waxing kit for sensitive skin will be formulated with gentle ingredients and come with clear instructions on how to minimize irritation. Remember, patience and precaution are your best friends when it comes to at-home waxing.
Cost-Effectiveness: Bang for Your Buck
While the initial cost of a home facial waxing kit might seem appealing compared to salon visits, it’s important to consider the long-term value. Evaluate the quantity of wax included in the kit and how often you expect to use it. A larger kit might be a better investment if you plan to wax frequently or multiple areas of your face. Also, factor in the cost of replacement strips, applicators, and pre- and post-waxing lotions.
Consider the quality of the kit’s components. A cheap kit with flimsy applicators and low-quality wax might seem like a bargain at first, but it could end up costing you more in the long run if you have to replace it frequently or if it causes skin irritation. The best home facial waxing kit offers a balance of affordability and quality, providing you with the tools and ingredients you need for effective and comfortable waxing without breaking the bank. Don’t be afraid to read reviews and compare different kits before making a decision.
Reviews and Ratings: Listening to the Crowd
Before clicking “add to cart,” take a moment to browse through online reviews and ratings. Real customer experiences can provide valuable insights into the effectiveness, ease of use, and overall quality of a home facial waxing kit. Pay attention to both positive and negative reviews, and look for common themes or patterns. Do users consistently praise the kit’s gentleness on sensitive skin? Do they complain about difficulty melting the wax or removing it cleanly?
Don’t rely solely on star ratings. Read the actual reviews to get a more nuanced understanding of the product’s strengths and weaknesses. Consider the reviewer’s skin type and experience level. Someone with oily skin might have a different experience than someone with dry skin. And a seasoned waxer might have different expectations than a beginner. The best home facial waxing kit will have consistently positive reviews from a variety of users, indicating that it’s a reliable and effective option for most people. Take the time to do your research, and you’ll be more likely to find a kit that meets your needs and exceeds your expectations.
Frequently Asked Questions
Is home waxing really safe? I’m a bit nervous!
Totally understandable! It’s normal to feel a bit apprehensive before trying anything new, especially when it involves hot wax and your delicate skin. The good news is that home waxing, when done correctly, is generally safe. The key is to follow the instructions provided with your waxing kit meticulously. This usually involves patch testing to check for allergic reactions, making sure your skin is clean and dry, and using the correct application technique.
Think of it like following a recipe. As long as you’ve got the right ingredients (a good quality waxing kit) and follow the steps carefully, you should be able to achieve great results without any major mishaps. Don’t be afraid to start small, perhaps with a less sensitive area like your legs, to build confidence and get the hang of it. Remember, there are also a lot of pre and post-wax tips that you can find to ensure safety and avoid irritation, which we talk more about in the guide.
How do I choose the right waxing kit for my skin type?
Choosing the right kit is essential, especially if you have sensitive skin. Start by looking for kits that are specifically formulated for your skin type. Many kits will advertise as being good for sensitive skin and contain ingredients like aloe vera or chamomile to soothe irritation. Avoid kits with strong fragrances or dyes, as these can often trigger reactions.
Another thing to consider is the type of wax. Hard wax is generally gentler than soft wax because it adheres only to the hair, not the skin. This makes it a great option for delicate areas like the face and bikini line. Read the reviews to see what other users with similar skin types are saying about the kit’s effectiveness and gentleness. Patch testing is also crucial. Always test a small area before doing a full waxing session!
What’s the difference between hard wax and soft wax? Which one should I use?
That’s a great question, and understanding the difference can really impact your waxing experience! Soft wax needs to be applied with a cloth strip to remove the hair, while hard wax hardens on its own and can be peeled off directly. Soft wax is typically best for larger areas like legs and arms because it can cover more ground quickly. It’s effective at grabbing even fine hairs.
Hard wax, on the other hand, is often considered more gentle on sensitive skin. It adheres primarily to the hair, rather than the skin, reducing the risk of irritation. Hard wax is ideal for smaller, more delicate areas like the face, underarms, and bikini line. It’s also better at removing coarse, stubborn hairs. So, consider the area you’re waxing and your pain tolerance when choosing!
How long does my hair need to be for waxing to work?
For the best results, your hair should be about ¼ to ½ inch long. Think of it like the length of a grain of rice. If it’s too short, the wax won’t be able to grip the hair properly, and you’ll end up with frustratingly patchy results. If it’s too long, it can be more painful and difficult to remove.
If your hair is longer than ½ inch, trim it down a bit before waxing. This will not only make the process less painful but also more effective. You want the wax to grab the hair close to the root for a clean pull. Remember that consistent waxing can lead to finer and sparser hair growth over time, making future sessions even easier!
How can I minimize pain during home waxing?
Nobody likes the feeling of wax being ripped off, so minimizing pain is a top priority! Exfoliating your skin a day or two before waxing can help remove dead skin cells, allowing the wax to grip the hair more effectively and reducing ingrown hairs, which can cause irritation. Taking a warm bath or shower before waxing can also help open up your pores, making hair removal a little easier.
Applying a numbing cream specifically designed for waxing can also make a big difference, especially if you’re waxing sensitive areas. Make sure to follow the instructions on the numbing cream carefully. Also, pull the skin taut while you remove the wax strip or hardened wax. A quick, decisive pull is always better than a slow, hesitant one! Breathe and try to keep calm.
What should I do to care for my skin after waxing?
After waxing, your skin is more sensitive and prone to irritation, so proper aftercare is essential. Avoid touching or scratching the waxed area for at least 24 hours to prevent infection. Apply a soothing lotion or oil specifically designed for post-waxing care. These products often contain ingredients like aloe vera or chamomile to calm and hydrate the skin.
Avoid hot baths, saunas, and sun exposure for at least 24-48 hours after waxing. These can irritate the skin and cause redness or even burns. Exfoliating a few days after waxing can help prevent ingrown hairs. However, be gentle and avoid harsh scrubs. Keeping your skin clean and moisturized is key to a smooth and comfortable recovery.
What if I experience redness or irritation after waxing?
It’s normal to experience some redness or mild irritation after waxing, especially if it’s your first time. Don’t panic! Apply a cold compress to the affected area to help reduce inflammation. You can also use a soothing cream or gel containing aloe vera or hydrocortisone to calm the skin.
If the redness or irritation persists for more than a day or two, or if you notice any signs of infection (like pus or increased pain), it’s best to consult a doctor or dermatologist. Avoid picking at any bumps or ingrown hairs, as this can worsen the irritation and lead to scarring. In most cases, post-waxing redness and irritation will subside on its own with proper care.
Verdict
Ready to ditch the salon and embrace smooth, radiant skin on your own terms? Armed with this guide, you’re well-equipped to navigate the world of at-home facial waxing and find the best home facial waxing kit to perfectly suit your needs. Think of the time and money you’ll save, and the confidence boost you’ll get from taking control of your beauty routine. It’s time to say goodbye to unwanted facial hair and hello to a flawless, glowing you!
Don’t be intimidated! Waxing at home is a learning curve, but with a little patience and the right tools, you’ll become a pro in no time. Read the instructions carefully, practice on a small area first, and remember to treat your skin with kindness afterward. Now, go forth and unveil your most radiant self – your journey to smooth, confident skin starts today!