Remember that time you were setting up your new sound system, everything looked connected, but still… silence? Or perhaps your car’s tail light went out and after changing the bulb, it remained stubbornly dark? We’ve all been there, scratching our heads, wondering what’s gone wrong. More often than not, the culprit is a simple wiring issue or a blown fuse. That’s where a reliable ohmmeter comes to the rescue, quickly pinpointing breaks in circuits and saving you from electrical frustration.
Choosing the right tool for the job, however, can be a bit of a minefield. With so many options available, how do you know which one will accurately diagnose your electrical problems without breaking the bank? That’s why we’ve put together this comprehensive guide, featuring our top picks for the best ohmmeters on the market. We’ll walk you through the key features, explain the different types, and help you find the perfect ohmmeter to suit your needs, whether you’re a seasoned electrician or a DIY enthusiast.
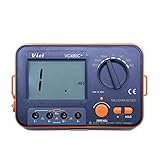
We will review the best ohmmeters later in this article. But before that, take a look at some relevant products on Amazon:


Last update on 2026-01-25 / Affiliate links / #CommissionsEarned / Images from Amazon Product Advertising API
So, You Need to Measure Resistance? Let’s Talk Ohmmeters!
Ever wondered how much “resistance” something puts up to the flow of electricity? That’s where an ohmmeter comes in! Think of it like this: electricity is a crowd trying to get through a doorway. A wide-open door has low resistance, and everyone breezes through. A tiny, blocked doorway has high resistance, making it tough for the crowd to get past. An ohmmeter helps you measure how “blocked” that doorway is, giving you a reading in ohms (Ω). Whether you’re troubleshooting a faulty circuit, testing the integrity of a fuse, or even checking the internal resistance of a battery, an ohmmeter is your trusty companion.
Now, before you get lost in a sea of wires and unfamiliar symbols, let’s demystify things a bit. You might be surprised to learn that ohmmeters are often built right into multimeters. In fact, studies show that over 80% of multimeters sold today include ohmmeter functionality! So, you might already own one! We’ll explore the different types of ohmmeters available, from simple analog meters to sophisticated digital models, and help you understand their strengths and weaknesses.
The truth is, finding the right ohmmeter depends entirely on what you need it for. Are you a seasoned electrician working with complex industrial systems? Or a hobbyist tinkering with DIY electronics projects at home? Maybe you just need to quickly check the continuity of a wire. Each scenario calls for a different kind of ohmmeter, and knowing your needs is half the battle.
That’s where this guide comes in. We’re going to explore the features that separate good ohmmeters from the truly best ohmmeters. We’ll delve into accuracy, resolution, safety features, and user-friendliness, all with the aim of helping you choose the perfect tool for your specific tasks. So, let’s get started and find the best way for you to measure resistance!
5 Best Ohmmeters
Fluke 117 Electrician’s Multimeter
The Fluke 117 is a fantastic all-around multimeter that truly shines when it comes to resistance measurements. Its AutoVolt feature detects AC or DC voltage automatically, which is super handy. The large white LED backlight makes the display crystal clear, even in dimly lit environments. It accurately measures resistance across a wide range, making it suitable for everything from checking simple circuits to diagnosing more complex electrical issues.
Beyond just resistance, this multimeter boasts True-RMS readings for AC voltage and current, meaning you get accurate measurements on non-linear signals. It’s built tough, as you’d expect from Fluke, and can withstand drops and abuse. While it’s on the pricier side, the reliability, accuracy, and versatility make it a solid investment for any serious electrician or electronics enthusiast.
Klein Tools MM400 Multimeter
The Klein Tools MM400 is a great value pick, providing a robust set of features at a price point that won’t break the bank. The rugged design is built to withstand job site conditions, and the easy-to-read LCD screen clearly displays measurements, including resistance values. It’s straightforward to use, even for beginners, with a simple rotary dial and clearly labeled functions.
This multimeter measures AC/DC voltage, current, and resistance, along with continuity and diode testing. It also has a temperature measurement function, which can be surprisingly useful. While it might not have all the bells and whistles of some higher-end models, the MM400 delivers dependable performance and accuracy for everyday electrical tasks, making it an excellent choice for homeowners and DIYers.
Etekcity MSR-C600 Digital Multimeter
If you’re just starting out or need a backup meter, the Etekcity MSR-C600 is an incredibly affordable option that still offers decent performance. Despite its low price, it measures voltage, current, resistance, continuity, and even tests batteries. It’s surprisingly feature-rich for the cost, making it a great way to get acquainted with electronics testing without a huge investment.
While it’s not as rugged or accurate as professional-grade meters, the Etekcity MSR-C600 gets the job done for basic tasks around the house. The large LCD display is easy to read, and the overload protection helps prevent damage. It’s perfect for checking simple circuits, testing fuses, and troubleshooting basic electrical problems. Just remember to treat it with care, as it’s not designed for heavy-duty use.
AstroAI Digital Multimeter TRMS 6000 Counts
The AstroAI Digital Multimeter gives you a lot of bang for your buck. With a large color LCD screen and 6000 counts, it’s easy to read detailed measurements. It’s not just pretty; it includes True RMS for accurate AC readings and a wide range of tests, including capacitance, frequency, and temperature.
Safety is also a priority here; it has overload protection on all ranges. Auto-ranging simplifies use and makes it suitable for both beginners and more experienced users. While it might not have the brand recognition of some of the bigger names, it’s a solid performer with a great feature set that makes it a really strong contender at its price point.
Hioki 3244-60 Digital Multimeter
The Hioki 3244-60 stands out for its slim and lightweight design, making it incredibly portable and easy to handle. Don’t let its size fool you, though; this multimeter is surprisingly accurate and reliable. It’s perfect for technicians who need to carry their tools around and don’t want to be weighed down.
Its focus is on essential measurements like voltage, resistance, and continuity, with a fast response time for quick and efficient troubleshooting. The auto-power-off feature helps extend battery life. While it lacks some of the advanced functions of more expensive models, the Hioki 3244-60 excels at providing accurate and dependable measurements in a compact and user-friendly package.
Why You Need an Ohmmeter in Your Toolkit
Think of all the electrical circuits you interact with daily: your car’s lighting system, the wiring in your home, even the electronics you tinker with as a hobby. Now, imagine something goes wrong – a lightbulb fails, an appliance stops working, or your homemade robot sputters and dies. Diagnosing these problems often boils down to checking the resistance of components to identify faulty wiring, burned-out fuses, or malfunctioning parts. An ohmmeter provides that crucial insight, allowing you to quickly and safely pinpoint the issue and avoid potentially dangerous or costly situations.
Ignoring resistance problems can lead to bigger headaches than just a malfunctioning device. A short circuit caused by low resistance can overheat wires, posing a fire hazard. Overly high resistance in a connection can cause voltage drops, leading to inefficient performance or complete failure. With an ohmmeter, you can proactively inspect circuits, troubleshoot issues before they escalate, and ensure the safety of your home and devices. It’s a small investment that offers immense peace of mind.
The best ohmmeters aren’t just tools; they’re problem-solving companions. Modern digital multimeters often include an ohmmeter function, offering ease of use with clear displays and automatic ranging. Some even boast features like continuity testing (a beep indicates a closed circuit), which is incredibly helpful for tracing wires and identifying breaks. Whether you’re a seasoned electrician or a DIY enthusiast, having a reliable ohmmeter at your disposal empowers you to tackle electrical issues with confidence and efficiency.
Ultimately, owning an ohmmeter isn’t just about fixing things; it’s about understanding how things work and taking control of your environment. It’s about saving money by avoiding costly repairs, ensuring your safety by preventing electrical hazards, and gaining the satisfaction of solving problems yourself. Consider the possibilities: fixing a faulty extension cord, diagnosing a broken appliance, or even learning about electronics and building your own projects. With the right ohmmeter in hand, you’ll be equipped to handle a wide range of electrical challenges and unlock a world of possibilities.
Understanding Resistance Measurement Principles
Ever wondered how an ohmmeter actually works? It’s all about Ohm’s Law: Voltage equals current times resistance (V=IR). An ohmmeter applies a small voltage to a circuit or component and then measures the resulting current. Knowing the voltage and the current allows it to calculate the resistance. Think of it like this: if a tiny voltage pushes a big current, the resistance is low; if the same voltage only pushes a tiny current, the resistance is high.
Different types of ohmmeters use slightly different techniques. Analog ohmmeters, the classic ones with a needle, use an internal battery to supply the voltage. Digital ohmmeters, the more common type today, also use a battery but utilize electronic circuits to perform the calculations and display the reading digitally. Some advanced ohmmeters even use alternating current (AC) signals, which are particularly useful for measuring the impedance of complex circuits at specific frequencies.
The range of resistance an ohmmeter can measure varies depending on the model. Some can measure very low resistances, like the resistance of a wire connection, while others are designed for high resistances, such as those found in insulators. It’s crucial to select an ohmmeter with the appropriate range for the components or circuits you’ll be testing. For example, you wouldn’t use an ohmmeter designed for measuring megaohms to check the resistance of a short wire.
Understanding these principles helps you troubleshoot electrical problems more effectively. Imagine your car’s headlights are dim. By using an ohmmeter, you can check the resistance in the wiring and connectors. A higher-than-expected resistance suggests a corroded connection or damaged wire, which could be the culprit behind the dim lights. Knowledge is power (or rather, knowledge leads to accurate measurements!).
Choosing the Right Ohmmeter for Your Needs
The world of ohmmeters can seem overwhelming, but breaking it down by application makes it much easier. Are you a hobbyist tinkering with electronics on the weekends? A basic digital multimeter (DMM) with ohmmeter functionality will likely suffice. DMMs are versatile and can measure voltage, current, and resistance, making them an excellent all-around tool.
On the other hand, if you’re an electrician working on residential or commercial wiring, you might need a dedicated ohmmeter with features like continuity testing and overload protection. Continuity testing is a quick way to check if a circuit is complete – ideal for tracing wires and identifying breaks. Overload protection is crucial to prevent damage to the ohmmeter if you accidentally connect it to a live circuit.
For specialized applications like measuring the resistance of soil or liquids, you’ll need specialized ohmmeters. Soil resistance meters, for instance, are used in agriculture to assess soil conductivity and determine the effectiveness of grounding systems. Liquid resistance meters are used in various industrial processes to monitor the purity and concentration of liquids.
Think about the specific measurements you’ll be taking most often and prioritize those features. Don’t pay for features you won’t use. If you primarily work with small electronic components, accuracy at low resistance values is crucial. If you frequently work outdoors, consider a ruggedized ohmmeter that can withstand harsh conditions. Taking the time to consider your specific needs will save you money and frustration in the long run.
Safety Precautions When Using an Ohmmeter
Safety always comes first when working with electricity, and using an ohmmeter is no exception. The most important rule is to ensure the circuit or component you’re testing is completely de-energized. This means disconnecting it from the power source before connecting the ohmmeter. Attempting to measure resistance in a live circuit can damage the ohmmeter and pose a significant electrical shock hazard.
Double-check that the ohmmeter is set to the correct range before making a measurement. Starting with the highest range and gradually decreasing it until you get a clear reading is a good practice. This prevents overranging, which can damage the ohmmeter or provide inaccurate results. It’s also essential to ensure the test leads are in good condition and properly connected to the ohmmeter.
Be mindful of parasitic resistances. These are unintended resistances that can affect your measurements. For example, holding the test leads directly on a resistor can introduce your body resistance into the measurement, resulting in an inaccurate reading. To minimize parasitic resistances, use alligator clips or other appropriate connectors to make a secure and consistent connection.
Finally, always consult the ohmmeter’s user manual for specific safety instructions and warnings. Each ohmmeter model may have unique features and limitations, and understanding these will help you use the instrument safely and effectively. Remember, electrical safety is not about luck; it’s about following established procedures and being aware of the potential hazards.
Maintaining and Calibrating Your Ohmmeter
Like any precision instrument, an ohmmeter requires proper maintenance to ensure accurate readings and a long lifespan. Start by storing the ohmmeter in a clean, dry environment, away from extreme temperatures and humidity. These conditions can damage the internal components and affect the calibration. Also, protect the ohmmeter from physical shocks and impacts, as these can misalign the delicate circuitry.
Regularly inspect the test leads for any signs of damage, such as cracks, cuts, or frayed wires. Damaged test leads can introduce resistance and lead to inaccurate measurements. If you find any damage, replace the test leads immediately. Clean the test leads with a soft cloth to remove any dirt or debris that might affect the connection.
Calibration is crucial for maintaining the accuracy of your ohmmeter. Over time, the internal components can drift, causing the readings to become inaccurate. The frequency of calibration depends on the ohmmeter’s usage and accuracy requirements. If you use the ohmmeter frequently or require highly accurate measurements, consider calibrating it annually.
You can calibrate some ohmmeters yourself using known resistance standards. These standards are precision resistors with highly accurate resistance values. However, for more advanced ohmmeters or for critical applications, it’s best to send the ohmmeter to a professional calibration laboratory. These labs have specialized equipment and expertise to calibrate ohmmeters to traceable standards, ensuring the highest level of accuracy and reliability.
Choosing the Best Ohmmeters: A Buyer’s Guide
Hey there! So, you’re in the market for an ohmmeter, huh? Whether you’re a seasoned electrician, a DIY enthusiast tackling home projects, or just someone who likes to tinker, finding the right ohmmeter is crucial. But with so many options out there, it can feel a little overwhelming. Don’t worry, I’m here to help! This guide will walk you through the key things you should consider before making your purchase. Let’s dive in and find the best ohmmeters for your needs!
1. Accuracy is King (and Queen!)
First things first, how accurate does your ohmmeter need to be? This isn’t just about bragging rights; it directly impacts the reliability of your measurements. Think about it: if you’re troubleshooting a sensitive electronic circuit, a small error in resistance readings could lead you down the wrong path, wasting time and potentially damaging components. Look for ohmmeters with a specified accuracy percentage, usually expressed as something like “±0.5%”. The lower the percentage, the more accurate the meter.
Now, I know accuracy can sound like a complex term, but it’s pretty straightforward. An ohmmeter with high accuracy will consistently provide readings that are very close to the actual resistance value. This is especially important when you’re working with low-resistance circuits or need to verify the quality of components. Skimping on accuracy to save a few bucks might seem tempting, but it could cost you more in the long run through misdiagnosis and wasted effort. Choosing one of the best ohmmeters includes finding one that matches the accuracy you require.
2. Range Rover: The Wider, the Better
Next up, think about the range of resistance values you’ll be measuring. Some ohmmeters are designed for low-resistance circuits, while others are better suited for high-resistance applications. If you’re working with a variety of circuits, it’s best to choose an ohmmeter with a wide measurement range. This will give you the flexibility to handle different projects without needing multiple meters. Look for ohmmeters that can measure from fractions of an ohm to megaohms.
Imagine trying to measure the resistance of a heating element with an ohmmeter that only goes up to a few thousand ohms. You’d be completely out of luck! A wider range allows you to measure resistors, wires, coils, and even things like the resistance of your skin (carefully, of course!). A versatile ohmmeter with a broad range will prove to be a valuable tool in your arsenal, allowing you to tackle a wider variety of electrical challenges and ensure you are using the best ohmmeters for a number of different tests.
3. Digital vs. Analog: The Old Guard vs. the New School
This is a classic debate! Digital ohmmeters display readings numerically on a screen, while analog ohmmeters use a needle that moves along a scale. Digital ohmmeters are generally more accurate and easier to read, especially for beginners. They also often include features like auto-ranging and data hold. Analog ohmmeters, on the other hand, can provide a more intuitive sense of how the resistance is changing over time. Some people also prefer the responsiveness of the needle movement.
Personally, I lean towards digital ohmmeters for their accuracy and ease of use. However, analog ohmmeters still have their place, especially for applications where you need to monitor fluctuating resistance values. It really comes down to personal preference and the specific tasks you’ll be performing. Some old-school electricians still swear by their analog meters, while others have fully embraced the digital revolution. If you are testing continuity, the needle movement on an analog can be beneficial. The best ohmmeters can be either analog or digital depending on the user.
4. Safety First, Always!
Electricity can be dangerous, so safety should always be your top priority. Look for ohmmeters that are CAT rated (Category rated) to indicate their ability to withstand voltage surges. A higher CAT rating means the ohmmeter is designed to handle higher voltage environments. Also, make sure the ohmmeter has overload protection to prevent damage if you accidentally measure a circuit with voltage present.
Think of it this way: a CAT rating is like a shield for your ohmmeter (and yourself!). It’s a certification that the meter has been tested to withstand specific voltage levels without posing a safety hazard. Overload protection is like a built-in fuse that prevents the meter from frying if you make a mistake. Don’t skimp on safety features; it’s not worth the risk. Always disconnect power before measuring resistance to prevent damage to the ohmmeter and yourself. Finding the best ohmmeters includes considering their safety rating.
5. Build Quality: Built to Last (or Bust)
Nobody wants to buy an ohmmeter that falls apart after a few uses. Check the build quality of the meter before you buy it. Look for durable materials, solid construction, and a comfortable grip. A rugged ohmmeter will be able to withstand the bumps and bruises of everyday use, especially if you’re working in a demanding environment.
Imagine dropping your ohmmeter from a ladder – will it survive? A well-built ohmmeter will be able to take a beating and keep on ticking. Look for features like a rubberized casing, reinforced corners, and a sturdy display. Investing in a quality ohmmeter will save you money in the long run because you won’t have to replace it as often. The best ohmmeters often have great build quality and a long lifespan.
6. Features, Features, Features!
Ohmmeters come with a variety of features that can make your life easier. Some common features include auto-ranging (automatically selects the appropriate resistance range), data hold (freezes the reading on the screen), backlight (for working in dimly lit areas), and continuity testing (beeps when a circuit is complete). Consider which features are most important for your needs and choose an ohmmeter that offers them.
Think about how you’ll be using your ohmmeter. Will you be working in dark corners? A backlight is a must-have. Do you need to take readings quickly and accurately? Auto-ranging will save you time and effort. Are you troubleshooting circuits and need to keep track of readings? Data hold will come in handy. Some ohmmeters even have Bluetooth connectivity, allowing you to log data on your smartphone or computer. Choose the best ohmmeters that include features that will benefit your projects.
7. Price Point: Finding the Sweet Spot
Finally, let’s talk about price. Ohmmeters range in price from budget-friendly to professional-grade. It’s important to find an ohmmeter that fits your budget without sacrificing quality or features. Don’t automatically assume that the most expensive ohmmeter is the best. Do your research and compare different models to find the best value for your money.
Think about how often you’ll be using your ohmmeter. If you’re only using it occasionally for simple tasks, a basic model might be sufficient. However, if you’re a professional electrician who relies on your ohmmeter every day, it’s worth investing in a higher-quality model with more features. Remember, the best ohmmeters aren’t always the most expensive, but they will be the ones that suit your individual needs and budget. Balancing features and affordability will help you pick one of the best ohmmeters available.
FAQs
What exactly *is* an ohmmeter, and why would I need one?
Think of an ohmmeter as a special kind of multimeter, but its primary focus is measuring electrical resistance. Resistance is basically how much a material opposes the flow of electric current. It’s measured in ohms (Ω), hence the name “ohmmeter.” You might also hear it referred to as a resistance meter, but they’re the same thing!
You’d need an ohmmeter for all sorts of electrical troubleshooting and DIY projects. Checking if a fuse is blown, testing the continuity of a wire, verifying the resistance of a resistor in a circuit – these are just a few examples. Even diagnosing car troubles (like checking sensors) can involve using an ohmmeter! It’s a handy tool for anyone working with electronics or electrical systems, giving you a way to confirm components are functioning correctly.
How do I choose the right ohmmeter for my needs?
Choosing the right ohmmeter really depends on what you’ll be using it for most. Think about the range of resistance values you’ll need to measure. Some ohmmeters are better suited for very low resistance measurements (like checking connections), while others are designed for higher resistance components. Also, consider whether you need any additional features like auto-ranging (which simplifies the measurement process) or the ability to measure other electrical parameters like voltage and current.
For basic DIY projects and simple electrical troubleshooting, a basic digital multimeter with an ohmmeter function is usually sufficient and quite affordable. However, if you’re working with sensitive electronics or require high accuracy, investing in a more specialized ohmmeter might be a worthwhile investment. Read reviews and compare specifications to find one that fits your specific requirements and budget.
What’s the difference between an analog and a digital ohmmeter?
Analog ohmmeters have a needle that moves across a scale to indicate the resistance value. They can be a bit tricky to read accurately, especially if you’re not familiar with interpreting the scale. On the other hand, digital ohmmeters display the resistance value as a numerical reading on a screen. This makes them much easier to read and generally more accurate.
Digital ohmmeters are generally preferred because they’re easier to use, more accurate, and often come with additional features like auto-ranging and overload protection. While analog ohmmeters can be less expensive, the ease of use and accuracy of digital ohmmeters often make them the better choice for most users. Unless you have a specific reason to prefer an analog meter, a digital model is probably the way to go.
Is it safe to use an ohmmeter on a live circuit?
Absolutely not! You should never use an ohmmeter on a live circuit. An ohmmeter works by sending a small current through the component being tested. If the circuit is already powered, the ohmmeter’s current could interfere with the existing current, potentially damaging the ohmmeter, the circuit, or even causing a safety hazard like an electric shock.
Always disconnect the circuit from any power source before taking resistance measurements. This is a crucial safety precaution. Double-check that the circuit is de-energized using a voltage meter before proceeding. When in doubt, consult a qualified electrician. Safety should always be your top priority when working with electricity.
How do I calibrate my ohmmeter for accurate readings?
Many digital ohmmeters are self-calibrating, meaning they automatically adjust for internal variations to maintain accuracy. However, it’s still a good idea to periodically check the accuracy of your ohmmeter, especially if you use it frequently or suspect it might be giving incorrect readings. The best way to check calibration is by testing known resistors.
Purchase a few precision resistors with known values (e.g., 100 ohms, 1k ohms, 10k ohms) and compare the readings on your ohmmeter to their specified values. If the readings are significantly different, consult the ohmmeter’s manual for calibration instructions. Some models have calibration settings, while others may need to be professionally calibrated. Consistent inaccurate readings can indicate a faulty meter that requires repair or replacement.
What does “continuity” mean, and how does an ohmmeter help with that?
“Continuity” simply means that there’s an uninterrupted electrical path between two points. In other words, electricity can flow freely from one point to the other. An ohmmeter helps you check for continuity by measuring the resistance between those points. A low resistance (close to zero ohms) indicates good continuity, while a high resistance (or infinite resistance) indicates a break in the circuit, meaning no continuity.
Think of it like checking if a wire is broken inside its insulation. If the wire is intact, the ohmmeter will show a very low resistance. If the wire is broken, it will show a very high or infinite resistance, indicating a lack of continuity. This is incredibly useful for troubleshooting faulty wiring, blown fuses, or malfunctioning switches.
What are some common mistakes to avoid when using an ohmmeter?
One common mistake is not disconnecting the circuit from the power source before taking a resistance measurement. As mentioned before, this is a major safety hazard and can damage your equipment. Another mistake is not properly zeroing the ohmmeter before taking a measurement. This is more relevant for analog ohmmeters, which require you to adjust a knob to set the needle to zero when the test leads are shorted together.
Also, make sure your test leads are making good contact with the component you’re testing. Dirty or corroded leads can give you inaccurate readings. Finally, be aware of the ohmmeter’s range settings. If you’re trying to measure a very high resistance with the ohmmeter set to a low range, you might get an inaccurate or incomplete reading. Choose the appropriate range for the resistance you’re measuring.
Final Words
So, there you have it! You’re now armed with the knowledge to find the best ohmmeters for your specific needs. Whether you’re troubleshooting a complex electrical circuit, testing simple components, or diving into a new DIY project, having the right tool makes all the difference. Don’t let resistance stand in your way – empower yourself with a quality ohmmeter and conquer those electrical challenges!
Now, go forth and measure with confidence! We’ve given you the insights, reviews, and buying guide; the next step is all yours. Choose the ohmmeter that resonates with you, and get ready to unlock a world of electrical understanding. The power to diagnose, repair, and create is in your hands – embrace it!