Just last weekend, I was wrestling with a woodworking project, trying to glue together a panel for a new bookshelf. Frustration mounted as the pieces stubbornly refused to align perfectly. I was short on hands, and the clamps I had were either too small or just plain uncooperative. Sound familiar? We’ve all been there, haven’t we? That’s when I realized the importance of having the right tools for the job, especially when it comes to clamps. A simple set of spreader clamps could have saved me a whole lot of time and headache.
Choosing the right clamping equipment can be overwhelming. There are endless options available, each promising to be the best solution for your needs. That’s why we’ve put together this comprehensive guide, diving deep into the world of spreader clamps. We’ll explore different types, key features, and essential buying considerations, helping you find the best spreader clamps to tackle any project with confidence and ease. Get ready to say goodbye to wobbly panels and hello to flawlessly joined creations!
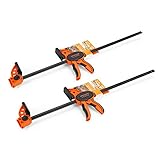
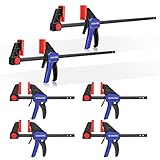
We will review the best spreader clamps later in this article. But before that, take a look at some relevant products on Amazon:


Last update on 2025-12-14 / Affiliate links / #CommissionsEarned / Images from Amazon Product Advertising API
When Space is Tight: A Friendly Guide to Spreader Clamps
Ever felt like you needed an extra pair of hands in your workshop? I know I have, especially when dealing with delicate or awkwardly shaped projects. That’s where spreader clamps come in handy! These unsung heroes of woodworking (and beyond!) are designed to push things apart, rather than squeeze them together like their more common cousin, the bar clamp. Think of them as the gentle giants of the clamping world, providing controlled outward pressure when you need it most.
So, what exactly makes a good spreader clamp, and how do you know which ones are right for your needs? Well, it really depends on the kind of work you’re doing. Are you restoring antique furniture, building custom cabinets, or maybe even doing some automotive bodywork? The force needed and the size of the area you’re spreading can vary greatly. Did you know that according to a recent survey conducted by Woodworking Magazine, over 60% of woodworkers own at least one type of spreader clamp? That alone suggests how valuable they are.
Finding the best spreader clamps is a lot like finding the right tool for any job: you need to consider the material, the maximum spread, and the clamping force. Some spreader clamps are made from durable steel for heavy-duty applications, while others feature lighter materials like reinforced nylon for more delicate tasks. Understanding the clamping force, usually measured in pounds, is crucial to avoid damaging your project.
In the following sections, we’ll dive deeper into the world of spreader clamps. We’ll explore different types, compare features, and, ultimately, help you choose the best spreader clamps to add to your arsenal. Get ready to unlock a new level of precision and control in your projects!
Top 5 Best Spreader Clamps
Bessey GSCC2.524 2.5-Inch Capacity Clutch Style Spreader
Looking for a spreader clamp that can handle the pressure? The Bessey GSCC2.524 is a solid choice. This clamp boasts a clutch-style mechanism, making adjustments and securing your work piece quick and easy. The 2.5-inch capacity is perfect for a range of smaller projects, from cabinet making to furniture repair. The build quality is what you’d expect from Bessey: durable and reliable.
While it may not be the cheapest option, the Bessey GSCC2.524 offers excellent value for its price. The clutch mechanism provides a good grip, reducing slippage and ensuring consistent pressure. If you need a compact and powerful spreader clamp that can withstand regular use, this is a worthy investment that won’t let you down.
Pony 52 1/2-Inch Light Duty Spring Clamp
Need a quick and easy clamping solution for light-duty tasks? The Pony 52 spring clamp is a classic for a reason. Its simple design makes it incredibly user-friendly. Just squeeze the handles, position the clamp, and release. The spring action provides instant pressure, making it ideal for holding materials together while glue dries or for temporarily securing items in place. Its small size makes it very portable.
The Pony 52 is a super affordable clamp. Its simplicity is both its strength and weakness. Don’t expect it to replace a heavy-duty bar clamp for large projects but for small crafts, hobbies, or holding things temporarily, these simple spring clamps are an excellent addition to any toolbox.
IRWIN QUICK-GRIP Bar Clamp/Spreader, 12-Inch, One-Handed
If convenience and versatility are at the top of your list, the IRWIN QUICK-GRIP bar clamp/spreader is a strong contender. This clamp can easily switch between clamping and spreading functions with a simple adjustment. The one-handed operation allows you to position your work piece with one hand while applying pressure with the other, making it ideal for those awkward or solo jobs. The 12-inch length provides decent reach for a variety of projects.
The QUICK-GRIP design lives up to its name, providing quick and easy adjustments. However, keep in mind that the clamping force may not be as strong as some heavier-duty options. It’s best suited for projects where speed and ease of use are more important than maximum clamping pressure. It’s a great general-purpose tool for hobbyists and DIYers.
Rockler Sure-Foot Spreader Clamp – 24″
The Rockler Sure-Foot Spreader Clamp is designed with stability in mind. The wide, flat “feet” on this clamp provide excellent support, preventing tipping and ensuring even pressure distribution across a larger surface area. This is especially useful when working with delicate materials or projects that require precise alignment. The 24-inch length is a great size for many projects.
While the Sure-Foot design makes it slightly bulkier than some other spreader clamps, the added stability is well worth the trade-off. The smooth, easy-to-adjust mechanism allows for precise control, and the overall build quality is excellent. If you prioritize stability and accuracy in your clamping tasks, the Rockler Sure-Foot Spreader Clamp is an excellent choice.
DEWALT 12-Inch Trigger Clamp/Spreader, DWHT83185
The DeWalt DWHT83185 12-inch trigger clamp/spreader combines the convenience of a trigger-style mechanism with DeWalt’s reputation for durability. The one-handed trigger allows for quick and easy adjustments, making it ideal for those moments when you need to apply pressure quickly and efficiently. The durable resin construction ensures that it can withstand the rigors of a job site.
The DeWalt trigger clamp/spreader offers a good balance of performance and value. While it may not have the same clamping force as some professional-grade clamps, it provides ample pressure for most DIY and light-duty applications. The trigger mechanism is smooth and reliable, and the overall build quality is what you’d expect from DeWalt. If you’re looking for a versatile and dependable trigger clamp that won’t break the bank, this is a solid option.
Why You Need Spreader Clamps in Your Workshop
Imagine you’re working on a project, say, installing a new cabinet. You’ve got everything lined up perfectly, but the cabinet sides are bowing inwards ever so slightly, making it impossible to get a flush, secure fit. You’re frustrated, spending extra time wrestling with the piece, and the final result is less than perfect. This is where spreader clamps become invaluable. Instead of applying force inwards to hold something together, these clever tools exert outward pressure, forcing apart surfaces that are too close or warped.
Spreader clamps are your secret weapon for tackling tasks beyond just cabinet assembly. Think about repairing a cracked chair leg, bending metal for a custom project, or even installing door jambs. The best spreader clamps offer precise control, allowing you to apply just the right amount of pressure to avoid over-stressing materials. They distribute force evenly, preventing damage and ensuring a professional-looking outcome. No more makeshift solutions involving wedges and shims that slip and slide!
Investing in a set of high-quality spreader clamps means investing in efficiency and quality. They save you time by making challenging tasks easier and more predictable. They reduce the risk of mistakes and material waste. You’ll find yourself reaching for them more often than you expect, discovering new uses and applications as you become more familiar with their capabilities. They quickly become essential tools in your arsenal, transforming frustrating jobs into manageable and enjoyable projects.
Ultimately, owning spreader clamps isn’t just about buying a tool; it’s about empowering yourself to tackle a wider range of projects with confidence and achieve superior results. The best spreader clamps will be a durable investment, providing years of reliable service and helping you bring your creative visions to life. They are the unsung heroes of the workshop, silently ensuring your projects are structurally sound, visually appealing, and built to last.
Spreader Clamp Alternatives
Okay, let’s say you’re halfway through gluing up a massive tabletop and realize you’re a couple of spreader clamps short. Don’t panic! There are a few clever alternatives you can use in a pinch. Think about repurposing items you already have in your workshop. Maybe some sturdy lengths of wood and a couple of bar clamps can get the job done. It might not be as elegant, but it’s better than letting your project dry unevenly!
Another option is to get creative with shims and wedges. By strategically placing these between your workpieces and a stable surface, you can exert outward pressure to achieve a similar effect as a spreader clamp. This works particularly well for smaller projects or situations where you need very localized pressure. Just be careful not to overdrive the shims and damage your materials.
For situations needing gentle outward pressure, try using ratchet straps. Be sure to pad the corners well to prevent damage.
Finally, consider building a makeshift spreader clamp using scrap wood and threaded rods. This is a great option if you have the time and enjoy a bit of DIY engineering. You can customize the size and shape to perfectly fit your project needs. Plus, it’s a chance to use up those leftover bits of lumber that are cluttering your shop!
Essential Spreader Clamp Accessories
Let’s talk about making your spreader clamps even more versatile. Think about the accessories that can take them from good to indispensable. One key item is clamp pads. These soft, non-marring pads slip over the clamp jaws and protect delicate surfaces from dents and scratches. If you’re working with expensive hardwoods or veneer, clamp pads are a must-have to ensure a flawless finish. Imagine building a custom guitar and ruining the finish because you didn’t use pads. Ouch!
Another useful accessory is extension rods. These screw into the end of the clamp, allowing you to reach deeper into tight spaces or work with larger projects. This is especially helpful when assembling cabinets or furniture with complex joinery. Think of extending the reach to push out a misaligned portion of a cabinet.
Swivel feet are another great addition, as they allow the clamp to adjust to different angles and surfaces. This is particularly useful when working with irregularly shaped objects or when clamping on an uneven surface. The swivel lets the clamp feet sit flush on uneven surfaces while you’re gluing up a tricky project.
Finally, consider getting a clamp rack or storage system to keep your spreader clamps organized and easily accessible. Nothing is more frustrating than rummaging through a pile of clamps when you need one in a hurry. A well-organized workshop is a productive workshop!
Maintaining Your Spreader Clamps
Like any tool, your spreader clamps will last longer and perform better if you take good care of them. Basic maintenance is essential. Think of it like taking care of your car; a little preventative work saves big headaches down the road. Start by regularly cleaning your clamps to remove glue, sawdust, and other debris. A wire brush and a solvent like mineral spirits can work wonders.
Lubrication is also key, especially for the threaded rods and moving parts. Apply a light coat of oil or grease to keep everything moving smoothly and prevent rust. Imagine trying to crank down a clamp with a rusty, squeaky thread – not fun! A good lubricant will keep your clamps working like new for years.
Inspect your clamps regularly for signs of wear and tear. Look for cracks, bends, or broken parts. If you spot any damage, don’t hesitate to repair or replace the clamp. A broken clamp can be dangerous and could potentially ruin your project. A tiny crack could weaken the whole thing and put pressure on the wrong point of your project.
Finally, store your clamps properly when you’re not using them. A clamp rack or storage system will help keep them organized and protected from damage. Avoid leaving them lying around on the floor or exposed to the elements. Taking good care of your spreader clamps will ensure they’re always ready when you need them.
Troubleshooting Common Spreader Clamp Issues
Even with the best spreader clamps and proper maintenance, you might encounter some issues from time to time. Let’s talk about some common problems and how to fix them. One frequent issue is slippage. If your clamp is slipping on the workpiece, it could be due to a few factors. Make sure the clamp jaws are clean and free of debris. Also, consider using clamp pads to provide a better grip. Picture your clamp sliding off right as the glue is setting!
Another common problem is uneven pressure. If the pressure isn’t distributed evenly across the workpiece, it can cause warping or distortion. Make sure the clamp jaws are parallel and that the clamp is positioned correctly. You might also need to use multiple clamps to distribute the pressure more evenly. It is important to have the clamp sitting squarely so one side doesn’t end up being pulled out more than the other.
Sometimes, the threaded rod can become difficult to turn. This is usually due to rust or debris buildup. Clean and lubricate the rod to restore smooth operation. If the problem persists, you might need to replace the rod. Applying a little bit of oil goes a long way.
Finally, if your clamp breaks or malfunctions, don’t attempt to use it. A broken clamp can be dangerous and could potentially damage your project. Instead, repair or replace the clamp as needed. Safety always comes first!
Best Spreader Clamps: Your Ultimate Buying Guide
Hey there, fellow woodworkers and DIY enthusiasts! Getting ready to tackle a project that requires some serious spreading power? Then you’re likely in the market for spreader clamps, and you’ve come to the right place. Choosing the best spreader clamps can be a bit overwhelming with all the options out there, but don’t worry, I’m here to break it down for you. This guide will walk you through the key factors to consider so you can confidently select the perfect tools for your needs.
We’ll explore everything from clamp force to throat depth, ensuring you get the right balance of power, reach, and durability. By the end of this guide, you’ll be equipped with the knowledge to choose the best spreader clamps for your woodworking, metalworking, or any other project that demands precise and reliable spreading. Let’s get started!
Clamp Force: How Much Power Do You Need?
Let’s talk muscle! When selecting the best spreader clamps, understanding the clamp force required for your projects is crucial. This is essentially how much pressure the clamp can exert when spreading. If you’re working with delicate materials like thin plywood, you’ll want a clamp with adjustable force to avoid crushing or damaging the wood. On the other hand, if you’re dealing with stubborn joints or thicker materials, you’ll need a clamp that can deliver some serious spreading power.
Think about the types of projects you typically undertake. Are you mostly doing fine woodworking with softer woods, or are you frequently working with hardwoods or metal? Consider the resistance you’ll encounter when spreading the materials apart. Overestimating the necessary clamp force is generally better than underestimating, as you can always reduce the pressure, but you can’t magically add more force if your clamp isn’t up to the task. Remember, the best spreader clamps are the ones that provide the appropriate amount of force for your specific needs.
Throat Depth: Reaching the Right Spots
Throat depth refers to the distance from the clamp’s bar to the center of the clamping pad. It dictates how far into a workpiece the clamp can reach. This is a particularly important consideration if you’re working on large assemblies or need to apply pressure deep within a structure. Imagine trying to spread a wide frame, but your clamp can only reach an inch or two from the edge. You’d be out of luck!
Before you buy, measure the depth you’ll need for your common projects. Think about the largest pieces you’re likely to work with and the areas where you’ll need to apply spreading force. A clamp with a longer throat depth provides more versatility, allowing you to tackle a wider range of tasks. However, be mindful that longer throat depths can sometimes come at the expense of rigidity, so look for clamps designed to maintain strength even with extended reach. Ultimately, the best spreader clamps offer a throat depth that suits the dimensions of your typical projects.
Clamp Material: Durability and Longevity
The material of your spreader clamp plays a huge role in its durability and overall lifespan. You’ll find clamps made from various materials, including steel, cast iron, and aluminum. Steel clamps are generally known for their strength and resistance to bending or breaking, making them a solid choice for heavy-duty applications. Cast iron clamps offer excellent rigidity and vibration dampening, which can be beneficial for precision work. Aluminum clamps are lighter weight, making them easier to handle for extended periods, but they may not be as strong as their steel counterparts.
Consider the environment where you’ll be using your clamps. If you’re working in a humid or corrosive environment, look for clamps with a protective coating or made from materials that are resistant to rust and corrosion. Regular maintenance, such as cleaning and lubricating the clamp’s threads, can also significantly extend its lifespan. Investing in high-quality materials upfront can save you money in the long run by reducing the need for frequent replacements. The best spreader clamps are crafted from durable materials that can withstand the rigors of regular use and provide reliable performance for years to come.
Jaw Pads: Protecting Your Workpiece
The jaw pads on a spreader clamp are the points of contact between the clamp and your workpiece. They play a crucial role in protecting the material from damage and ensuring even pressure distribution. Ideally, you want jaw pads that are made from a non-marring material, such as rubber or soft plastic. These materials prevent scratches, dents, and other imperfections on the surface of your project.
Think about the types of materials you’ll be working with. If you’re dealing with delicate or easily scratched surfaces, soft jaw pads are essential. Some clamps come with removable or replaceable jaw pads, allowing you to customize them for different applications. You can even create your own custom jaw pads using materials like cork or felt for added protection. The best spreader clamps feature well-designed jaw pads that safeguard your workpiece while providing a secure and reliable grip.
Handle Design: Comfort and Ease of Use
Let’s face it, you’ll likely be spending a fair amount of time gripping and adjusting your spreader clamps. That’s why the handle design is a critical factor to consider. Ergonomic handles, made from materials like rubber or contoured plastic, can significantly reduce hand fatigue and improve comfort, especially during extended use. Look for handles that provide a secure grip, even when your hands are sweaty or oily.
Consider the type of grip you prefer. Some clamps have pistol-grip handles, while others have traditional screw-type handles. Pistol-grip handles allow for quick, one-handed adjustments, while screw-type handles typically offer finer control over the clamping force. The best spreader clamps feature a handle design that is comfortable, easy to grip, and allows for precise adjustments, making your work more efficient and enjoyable.
Spreading Distance: How Wide Can It Go?
The spreading distance of a clamp dictates the maximum gap it can create between its jaws. This is a crucial consideration if you’re working on projects that require significant spreading, such as installing cabinets or aligning large panels. Before purchasing, measure the maximum spreading distance you’ll need for your typical projects. It’s always better to have a clamp with a slightly larger spreading capacity than you think you’ll need, just in case.
Keep in mind that the spreading distance can sometimes affect the clamp’s overall strength and stability. Clamps with very large spreading distances may be more prone to flexing or bending under heavy loads. Look for clamps that are designed to maintain their rigidity even when fully extended. The best spreader clamps offer a spreading distance that suits your project requirements while maintaining strength and stability.
Release Mechanism: Quick and Easy Disassembly
The release mechanism is what allows you to quickly and easily disengage the clamp from your workpiece. This is particularly important when you’re working on projects that require frequent adjustments or when you need to remove the clamp quickly to avoid damaging the material. Look for clamps with a smooth and reliable release mechanism that can be operated with one hand.
Consider the type of release mechanism. Some clamps have a quick-release lever, while others have a simple screw-type release. Quick-release levers are typically faster and more convenient, while screw-type releases may offer more precise control over the release speed. The best spreader clamps feature a release mechanism that is easy to use, reliable, and allows for quick and controlled disassembly, saving you time and effort.
FAQ
What exactly *are* spreader clamps, and why would I need them?
Spreader clamps are essentially the reverse of regular clamps. Instead of squeezing things together, they push them apart. Think of situations where you need to separate two pieces of wood for inserting a shelf, or maybe you’re aligning a frame that’s slightly askew. That’s where these handy tools shine! They provide controlled, even pressure to push objects apart gently but firmly.
They’re super helpful in woodworking, furniture repair, and even some automotive tasks. Imagine trying to force something apart with a hammer and chisel – risky, right? Spreader clamps give you much more precision and control, minimizing the chance of damage and making your projects look much more professional. Plus, they save you a whole lot of frustration!
What size spreader clamp should I buy?
The best size depends on the types of projects you typically tackle. Think about the maximum distance you’ll need to spread apart. If you mostly work with small boxes, a smaller clamp with a 6-inch to 12-inch spread will likely be sufficient. But if you’re dealing with larger furniture pieces or framing, you’ll definitely want to opt for longer clamps, maybe even 24 inches or more.
It’s always a good idea to err on the side of caution and choose a clamp that’s slightly larger than you think you’ll need. You can always use a larger clamp on a smaller project, but a clamp that’s too small is, well, useless! Consider buying a variety pack with different sizes to cover all your bases – that’s what many pros do.
Are spreader clamps only for woodworking, or can I use them for other things?
While spreader clamps are a staple in woodworking shops, their versatility extends beyond just wood. You can absolutely use them in various other applications! Think about automotive repair, like spreading brake calipers to install new pads. They can also be useful for general home repairs, such as separating stuck drawers or cabinets.
They’re also handy for crafts and hobbies. For example, if you’re working on a stained glass project or need to separate components in a model kit, a spreader clamp can be a lifesaver. Just be mindful of the material you’re working with and adjust the pressure accordingly. You wouldn’t want to accidentally damage anything delicate!
How much pressure should I apply with a spreader clamp?
That’s a great question, and the answer really depends on the material you’re working with. The general rule of thumb is to start with light pressure and gradually increase it until you achieve the desired separation. Always be mindful of the material’s resistance. You don’t want to apply so much force that you damage or break the object you’re spreading.
If you’re working with wood, especially softer woods, be extra cautious. Overtightening can leave unsightly marks or even crack the wood. With metal, you can generally apply a bit more pressure, but always inspect for signs of bending or stress. It’s all about finding that sweet spot where you get the job done without causing any harm.
Are more expensive spreader clamps really worth the extra cost?
Well, it’s like with most tools, you often get what you pay for. More expensive spreader clamps tend to be made with higher-quality materials, offering better durability and a longer lifespan. They might also have smoother mechanisms and more precise adjustment capabilities, which can make a big difference in the quality of your work.
However, that doesn’t necessarily mean you have to spend a fortune. If you’re just starting out or only use spreader clamps occasionally for light-duty tasks, a more affordable option might be perfectly adequate. But if you’re a professional or serious hobbyist who relies on these tools frequently, investing in a higher-end model can definitely pay off in the long run by providing better performance, reliability, and ultimately, a superior finish on your projects.
How do I maintain my spreader clamps to keep them in good working condition?
Maintaining your spreader clamps is pretty straightforward and will significantly extend their lifespan. First, always wipe them down after each use to remove any sawdust, glue, or other debris. This prevents the build-up of grime that can cause the mechanism to stick or become stiff.
Then, periodically lubricate the moving parts with a light machine oil or silicone spray. This keeps everything running smoothly and prevents rust. Also, inspect the clamp pads or feet for wear and tear, and replace them if needed. Finally, store your clamps in a dry place to prevent corrosion. With a little bit of care, your spreader clamps will serve you well for years to come!
What are some common mistakes to avoid when using spreader clamps?
One of the most common mistakes is using too much force. Remember, it’s always best to start with light pressure and gradually increase it. Applying excessive force can damage the material you’re working with or even break the clamp itself. Another mistake is not ensuring that the clamp pads are properly aligned. Misalignment can cause uneven pressure and lead to skewed results.
Also, don’t forget to use appropriate protective padding, especially when working with delicate materials. This will prevent unsightly marks and scratches. Finally, always make sure the clamps are securely positioned before applying pressure. A slipping clamp can be dangerous and potentially ruin your project. Taking a little extra time to double-check everything can save you a lot of headaches in the long run!
Final Words
So, there you have it – a comprehensive look at some of the best spreader clamps on the market. We’ve walked through the features, pros, and cons, giving you the knowledge you need to confidently choose the right tools for your projects. Remember, the “best” spreader clamp ultimately depends on your specific needs and budget, but armed with this information, you’re well-equipped to make a smart decision.
Now it’s time to take that knowledge and turn it into action! Stop putting off that project, and grab the perfect clamp to bring your vision to life. Think of the satisfaction of seeing your hard work come together, knowing you had the right tools to get the job done flawlessly. Go forth and create something amazing – we can’t wait to see what you build!