So, you’re admiring your trusty Saturn under the sun, and BAM! A tiny chip in the paint catches your eye. It’s the kind of blemish that seems to shout from the hood, isn’t it? Don’t fret – we’ve all been there! Those little imperfections can happen anywhere, from rogue gravel on the highway to a runaway shopping cart. Luckily, there’s a simple fix that doesn’t require a full repaint.
Finding the best touchup paint for Saturn to seamlessly blend with your car’s original color can be a bit of a quest, but it’s definitely achievable. That’s why we’ve put together this guide, filled with reviews and helpful tips, to make the process easier than ever. We’ll help you navigate the world of automotive paints so you can restore your Saturn’s showroom shine in no time!
We will review the best touchup paint for saturn later in this article. But before that, take a look at some relevant products on Amazon:


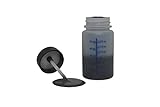
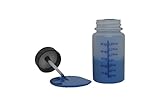
Last update on 2026-01-29 / Affiliate links / #CommissionsEarned / Images from Amazon Product Advertising API
Reviving Your Saturn’s Shine: A Touchup Paint Journey
Let’s face it, life happens. And sometimes, life happens to our cars in the form of unsightly scratches, dings, and chips. If you’re a proud Saturn owner, you understand the blend of innovation and practicality that these vehicles offered. But even the most well-maintained Saturn is susceptible to the wear and tear of daily driving. That’s where touchup paint comes in, acting as your secret weapon against those imperfections.
Think of it this way: a small scratch on your car’s paint is like a tiny open wound. Left untreated, it can lead to rust, further paint damage, and a decrease in your Saturn’s overall value. Did you know that even minor cosmetic damage can reduce a car’s resale value by an average of 5-10%? Choosing the best touchup paint for Saturn isn’t just about aesthetics; it’s about preserving your investment and preventing future problems.
Finding the right match can feel a little overwhelming with all the options out there. Different brands, different types of paint, and that all-important color code – it can all be a bit confusing. But don’t worry, we’re here to guide you through the process. We’ll help you understand the nuances of touchup paint, how to find your Saturn’s specific color code (usually located on a sticker on the driver’s side door jamb or in the glove compartment), and what to look for in a quality product.
Ultimately, the best touchup paint for Saturn is the one that provides a perfect color match, is easy to apply, and offers lasting protection. We’re going to explore the top contenders on the market, breaking down their pros and cons, and giving you the information you need to restore your Saturn’s showroom shine, one touchup at a time. So, buckle up and let’s get started!
Top 5 Best Touchup Paint For Saturn
ERA Paints Exact Match Touch Up Paint
Looking to banish those pesky scratches and dings on your beloved Saturn? ERA Paints offers a compelling solution with their exact match touch up paint. This product boasts a high degree of color accuracy, formulated to seamlessly blend with your vehicle’s original factory finish. The application process is relatively straightforward, especially with their available tutorials, making it a viable option even for those less experienced in auto body work. Just remember, proper preparation is key for optimal results.
While the price point might be slightly higher compared to some other brands, the superior color match and durable finish often justify the investment. Many users rave about the near-invisible repair and the peace of mind knowing they’ve restored their Saturn to its former glory. However, patience is required, as multiple thin coats are generally recommended for the best possible outcome.
Automotivetouchup Paint
For a touch-up solution that balances quality and affordability, Automotivetouchup paint deserves a look. They pride themselves on providing a wide range of colors tailored specifically for Saturn vehicles, making it easier to find the perfect match for your particular year and model. The user-friendly application, whether using a brush or spray can, also makes it a good choice for DIY enthusiasts.
The overall finish is respectable, offering good protection against the elements and preventing further damage to the exposed metal. While some users might find the color match isn’t perfect in all lighting conditions, the difference is often negligible, especially after proper blending and clear coating. Just be sure to thoroughly clean and prep the affected area before applying the paint for a more seamless and professional-looking repair.
Dupli-Color Exact-Match Automotive Paint
Dupli-Color is a name many recognize in the automotive paint world, and their Exact-Match line aims to simplify the touch-up process. It’s readily available at most auto parts stores, making it a convenient choice for those needing a quick fix. The aerosol can application is generally easy to manage, and the paint dries relatively quickly, minimizing downtime.
While it might not be the absolute best color match on the market, Dupli-Color’s Exact-Match does a decent job of concealing minor scratches and chips. It is important to remember that this is designed for smaller imperfections, so larger damaged areas might require more professional attention. But for everyday dings and scratches, this is a very budget-friendly choice.
Paint2o OEM Exact Match Touch Up Paint
Paint2o sets itself apart with a focus on OEM-level color accuracy, promising an exact match to your Saturn’s factory paint. This can be a game-changer for those meticulous about maintaining their vehicle’s original appearance. The formula is designed to provide a durable and long-lasting finish, protecting the repaired area from rust and further deterioration.
The application process is relatively simple, especially with the included applicator tools, making it accessible for both beginners and experienced users. While some may find the paint to be a bit thicker than other brands, this often contributes to better coverage and fewer coats needed. Just make sure to shake the bottle well and apply in thin, even layers to avoid runs or drips.
ScratchesHappen Exact Match Touch Up Paint
ScratchesHappen is a brand that lives up to its name, offering a solution specifically targeted at addressing those annoying scratches that inevitably plague our vehicles. Their touch-up paint is formulated for easy application and a reasonable color match, making it a solid contender in the market. The kits often include various applicators and tools to tackle different types of scratches and chips, which is a nice bonus.
While it may not be a perfect, invisible repair in all cases, the overall result is usually quite satisfactory, particularly when following the provided instructions carefully. ScratchesHappen’s products often come at a more affordable price point than some premium options, making them a good value for those looking to touch up their Saturn without breaking the bank. Just remember, preparation is essential for a seamless finish.
“`html
Why You Need Touchup Paint for Your Saturn
“`
Let’s face it, life happens. Whether it’s a rogue shopping cart in the parking lot, a stray pebble kicked up on the highway, or even just the gradual wear and tear of daily driving, your beloved Saturn’s paint job is bound to pick up a few nicks and scratches over time. These imperfections, though seemingly small, can detract from your car’s overall appearance and even lead to rust if left unattended. Imagine preparing for a weekend getaway, only to notice a glaring scratch marring your Saturn’s sleek lines – not the best way to start your adventure!
Investing in a quality touchup paint specifically formulated for your Saturn is a smart move. Not only does it help maintain your car’s resale value by keeping it looking its best, but it also offers a cost-effective way to address minor blemishes before they become bigger, more expensive problems. Think of it as a little bit of preventative medicine for your Saturn’s exterior. You wouldn’t ignore a small cough, would you? Similarly, addressing minor paint imperfections early can save you a trip to the body shop down the road.
The “best touchup paint for Saturn” is more than just a cosmetic fix. It’s a protective shield against the elements. By sealing those chips and scratches, you’re preventing moisture and other corrosive substances from reaching the bare metal, which can lead to rust and further paint damage. Plus, with advancements in paint technology, matching your Saturn’s original color is easier than ever. You can achieve a seamless, professional-looking repair right in your own driveway, saving you time and money.
Ultimately, owning touchup paint for your Saturn is about taking pride in your vehicle and protecting your investment. It’s a simple, proactive step that can keep your Saturn looking its best for years to come. So, ditch the worries about those minor imperfections and embrace the peace of mind that comes with knowing you have the “best touchup paint for Saturn” ready to go whenever life throws a little scratch your way.
Choosing the Right Type of Touchup Paint
So, you’ve decided to tackle that pesky scratch on your Saturn – fantastic! But before you rush out and grab any old bottle of touchup paint, let’s talk types. There are a few main contenders: touchup paint pens, bottles with brush applicators, and spray cans. Each has its pros and cons, and the best choice depends on the size and location of the damage. Think about it like this: a tiny rock chip on the hood might be perfectly handled with a precision pen, while a larger scrape on the bumper might require the broader coverage of a brush or spray can.
Touchup paint pens are your go-to for pinpoint accuracy. They’re like fine-tipped markers filled with paint, allowing you to precisely fill in small chips and scratches. Imagine you’re touching up a tiny scratch near your door handle – a pen lets you apply the paint exactly where it’s needed, minimizing the risk of making a bigger mess. The ease of use is a major selling point, especially for beginners.
Brush applicators, often found in small bottles, offer a bit more coverage than pens. They’re great for slightly larger scratches or areas where the damage is a bit more spread out. Picture this: you have a scratch about the size of a dime on your fender. A brush applicator allows you to apply a thicker layer of paint, blending it in more effectively with the surrounding area. However, they can sometimes leave brush strokes, so practice makes perfect.
Spray cans are ideal for larger areas or when you want a super smooth, even finish. Think about a long scratch along your door panel – a spray can will give you the best coverage and blend the touchup paint seamlessly. However, using a spray can requires more preparation, including masking off the surrounding area to avoid overspray and practicing your technique to prevent runs or drips. You’ll also need proper ventilation.
Decoding Your Saturn’s Paint Code
Finding the right color of touchup paint is crucial for a seamless repair. You wouldn’t want to end up with a mismatched spot on your beloved Saturn, would you? That’s where your Saturn’s paint code comes into play. This code is essentially a secret identifier that tells you exactly what shade of paint your car was originally sprayed with. It’s like the DNA of your car’s color!
The paint code is usually located on a sticker inside your car. Common places to look include the driver’s side door jamb, under the hood (especially near the radiator support), or even inside the glove compartment. Once you find the sticker, the paint code will be a combination of letters and numbers. For example, it might look something like “WA8554” or “41U”. Don’t confuse it with other codes on the sticker, though; it will usually be labeled “Paint Code” or something similar.
Once you’ve located the paint code, you can use it to find the exact matching touchup paint. Most online retailers and auto parts stores will have a paint code lookup tool. Simply enter your Saturn’s year and paint code, and the system will identify the correct color for you. This is the safest way to ensure a perfect match.
If you’re having trouble finding the paint code, don’t despair! You can also contact your local Saturn dealership (or a GM dealership, since Saturn is no longer around) and provide them with your vehicle identification number (VIN). They should be able to look up the paint code for you. A professional auto paint shop can also help you identify the color.
Preparing Your Saturn For Touchup Paint
Before you even think about applying touchup paint, proper preparation is key. Think of it like preparing a canvas before painting – a smooth, clean surface will give you the best results. Rushing this step can lead to a messy, uneven finish that’s even more noticeable than the original scratch. So, let’s roll up our sleeves and get your Saturn ready for its makeover.
First things first, give the area around the scratch a good cleaning. Use a mild soap and water solution to remove any dirt, grime, or wax. A clean surface ensures that the touchup paint will adhere properly. Imagine trying to paint over a layer of mud – the paint wouldn’t stick, and it would look terrible. Pay special attention to getting all the debris out of the scratch itself.
Next, use a rubbing compound to smooth out any rough edges or imperfections around the scratch. This step is crucial for blending the touchup paint seamlessly with the surrounding paint. Apply a small amount of rubbing compound to a soft cloth and gently rub it over the affected area in a circular motion. Don’t apply too much pressure, and be sure to follow the instructions on the rubbing compound label. Think of it as gently sanding down the edges of the scratch to create a smoother transition.
Finally, use a wax and grease remover to ensure that the surface is completely free of any contaminants. This step will further improve the adhesion of the touchup paint. Apply the wax and grease remover to a clean cloth and wipe down the area around the scratch. Let it dry completely before moving on to the next step. This step is like making sure your canvas is perfectly clean and ready to receive the paint.
Mastering Touchup Paint Application Techniques
Okay, your Saturn is clean, prepped, and ready for some TLC. Now comes the moment of truth: applying the touchup paint. But don’t just slather it on! Mastering a few simple techniques can make all the difference between a professional-looking repair and a noticeable patch job. Let’s break down the best practices for each type of touchup paint.
For touchup paint pens, the key is to apply thin, even coats. Gently shake the pen to mix the paint and then carefully dab the tip onto the scratch. Avoid applying too much pressure, as this can cause the paint to run or drip. Instead, use light, feathered strokes to fill in the scratch. Let each coat dry completely before applying the next. Imagine you are using a very fine paintbrush, delicately filling in the lines. Multiple thin coats are better than one thick coat.
When using a brush applicator, dip the brush into the paint and then wipe off any excess. You want to avoid applying too much paint at once, as this can lead to runs or drips. Use the brush to carefully apply the paint to the scratch, using short, even strokes. Again, multiple thin coats are better than one thick coat. If you notice any brush strokes, you can gently sand them down with fine-grit sandpaper after the paint has dried completely. Picture yourself meticulously painting a miniature.
For spray cans, proper technique is even more crucial. Shake the can thoroughly for several minutes before use. Then, hold the can about 8-12 inches away from the surface and apply the paint in short, even bursts. Overlap each pass slightly to ensure even coverage. Avoid holding the can in one place for too long, as this can cause the paint to run. Remember to mask off the surrounding area to prevent overspray. This is akin to spray painting a piece of furniture, moving consistently and evenly.
Finding the Best Touchup Paint for Your Saturn: A Buyer’s Guide
Hey Saturn owner! Rock chips and minor scratches – we’ve all been there. They’re like tiny little dings to your pride, aren’t they? But don’t worry, you don’t have to live with them. The good news is, with the right touchup paint, you can make those imperfections disappear and keep your Saturn looking its best. Choosing the right touchup paint can feel overwhelming, with so many options and terms to understand. That’s why I’ve put together this guide – to help you find the best touchup paint for your Saturn and make the process as smooth as possible. Let’s dive in and get your Saturn looking showroom-ready again!
1. Color Matching is Key, My Friend
Seriously, nailing the color match is the most important part of this whole operation. Imagine applying touchup paint only to find it’s a shade off – you’ve just traded a small scratch for a noticeable blob of mismatched color! It’s a frustrating experience, trust me. You want it to blend seamlessly with the existing paint so that nobody even notices it was ever there. So how do you ensure a perfect match?
First, locate your Saturn’s paint code. This is usually found on a sticker inside the driver’s side door jamb, in the glove compartment, or even under the hood. Once you have that code, you can confidently search for the best touchup paint for Saturn that’s a guaranteed match. Many online retailers offer tools where you can input your paint code and they’ll provide you with the exact color match. Don’t skip this step – it’s the foundation of a successful touchup!
2. Type of Touchup Paint: Pen, Bottle, or Aerosol?
Okay, so you’ve got your color code, but now you need to decide what type of applicator to use. Each has its pros and cons, depending on the size and location of the damage, as well as your comfort level. Let’s break them down, starting with the touchup paint pen. It’s great for those super tiny chips and scratches, almost like using a fine-point marker to delicately fill in the damage.
Then there’s the bottle with a brush applicator, which is a good all-around option for slightly larger areas. You can control the amount of paint you apply, and it’s relatively easy to use. And finally, aerosol spray cans are your best bet for larger areas that need more coverage. However, they require a bit more skill to use properly to avoid runs and overspray. Consider the size and location of the scratch and how comfortable you are with each application method when selecting the best touchup paint for Saturn.
3. Quality Matters: Don’t Skimp on the Good Stuff
We all love a good deal, but when it comes to touchup paint, cheaping out can actually cost you more in the long run. Low-quality paint might not adhere properly, fade quickly, or even damage the original paint. Think of it like this: you’re making an investment in your Saturn’s appearance and protecting it from rust.
A higher-quality touchup paint will typically offer better color accuracy, durability, and resistance to fading and chipping. It will also likely have better adhesion to the existing paint, creating a stronger and longer-lasting repair. Do a little research, read reviews, and choose a reputable brand known for producing high-quality automotive touchup paint. It’s worth the extra few dollars to get the best touchup paint for Saturn and ensure a professional-looking repair that lasts.
4. Consider the Finish: Matching the Sheen
It’s not just about the color, it’s also about the finish! Most automotive paints have either a clear coat, metallic, or matte finish. The best touchup paint for Saturn should not only match the color code, but also the finish. If you have a metallic paint job, you’ll need to use a touchup paint specifically formulated for metallic finishes.
Applying the wrong finish can result in a noticeable difference in shine and texture, making the repair stand out like a sore thumb. Check your Saturn’s paint code or consult with an automotive paint specialist to determine the correct finish for your vehicle. Some touchup paint kits even come with a separate clear coat application to mimic the factory finish and provide added protection.
5. Prep Work is Non-Negotiable
This is a step many people skip, but trust me, proper preparation is crucial for a flawless finish. Think of it like painting a wall – you wouldn’t just slap paint on without sanding and priming, would you? The same applies to your car. Neglecting the prep work can result in poor adhesion, uneven coverage, and a less-than-desirable final result.
Before you even open your touchup paint, thoroughly clean the area around the scratch or chip. Use a degreaser to remove any dirt, wax, or grease. Then, lightly sand the area with fine-grit sandpaper to create a smooth surface for the paint to adhere to. Finally, wipe away any sanding dust with a tack cloth. Taking the time to properly prepare the area will significantly improve the appearance and longevity of your repair.
6. Clear Coat: Protecting Your Work
If your Saturn has a clear coat finish (and most modern cars do), applying a clear coat after the touchup paint has dried is essential. The clear coat provides an additional layer of protection against the elements, such as UV rays, acid rain, and road salt. It also enhances the shine and gloss of the repair, making it blend seamlessly with the surrounding paint.
Make sure to choose a clear coat that’s compatible with your touchup paint and follow the manufacturer’s instructions carefully. Apply thin, even coats and allow each coat to dry completely before applying the next. Remember, patience is key! Applying the clear coat properly will protect your hard work and ensure a long-lasting and professional-looking repair.
7. Practice Makes Perfect, So Start Small
Don’t jump right into tackling the most noticeable scratch on your car without a little practice first! Find an inconspicuous area, like the inside of a doorjamb or a small spot on the bumper, to test your touchup paint and technique. This will give you a chance to get a feel for the paint’s consistency, drying time, and how well it matches the surrounding paint.
Practicing will also help you refine your application technique and avoid common mistakes, such as applying too much paint or creating runs. Remember, you can always add more paint, but it’s much harder to remove excess paint without damaging the surrounding area. So take your time, practice on a hidden spot, and you’ll be much more confident when you tackle the real repair. That way, you are guaranteed to get the best touchup paint for Saturn applied flawlessly.
Frequently Asked Questions
What if I can’t find my Saturn’s exact paint code?
Don’t worry, it happens! Finding your exact paint code can sometimes feel like a treasure hunt. Start by checking common locations like the driver’s side door jamb, the glove compartment, or even under the hood. Your owner’s manual might also hold the key! If you’re still striking out, try contacting a Saturn dealership (if one’s still around), or a local auto body shop. They often have databases that can help you pinpoint the code based on your car’s year, make, and model.
If all else fails, don’t fret! Many online paint suppliers have tools that can help. They might ask for pictures of your car or specific details about its color. These tools can narrow down your options and suggest the closest match. While it might not be 100% perfect, it’s usually a significant improvement over a mismatched paint. And remember, a small imperfection is often better than letting rust or scratches worsen over time.
How do I prepare my car’s surface before applying touch-up paint?
Preparing the surface is super important for a smooth, lasting repair. Think of it like prepping a canvas before painting a masterpiece! First, give the area a good cleaning with soap and water to remove any dirt, grime, or wax. Then, gently sand down any rough edges or rust with fine-grit sandpaper. This will help the new paint adhere properly and prevent further corrosion.
Once you’ve sanded, wipe the area clean with a tack cloth or a lint-free cloth dampened with rubbing alcohol. This removes any sanding dust and oils that could interfere with the paint’s adhesion. If there are any deep scratches or chips, you might consider using a filler or primer before applying the touch-up paint. A little extra prep work now can make a big difference in the final result!
How many coats of touch-up paint should I apply?
Generally, it’s best to apply several thin coats rather than one thick coat. Think of it like building layers of color gradually. A thick coat is more likely to drip, sag, or take a really long time to dry, plus it might not bond as well. Multiple thin coats allow each layer to dry properly and create a more even, durable finish.
Start with a very thin coat, almost like a “dusting” of paint. Let it dry completely according to the paint manufacturer’s instructions (usually 10-20 minutes). Then, apply another thin coat, focusing on building up the color gradually. Repeat this process until the scratch or chip is filled and the paint is level with the surrounding surface. Remember, patience is key!
What kind of clear coat should I use with my touch-up paint?
Choosing the right clear coat can be tricky, but it’s important for protecting your touch-up work! First, make sure the clear coat you choose is compatible with the type of touch-up paint you used (acrylic lacquer, enamel, etc.). Most touch-up paint kits will recommend a specific clear coat, which is usually your safest bet.
Generally, an acrylic clear coat is a good all-around choice for most automotive touch-up applications. It provides a durable, glossy finish that protects the paint from UV rays and the elements. Look for a clear coat specifically designed for automotive use, as these are formulated to withstand the harsh conditions your car endures. Just like with the touch-up paint, apply the clear coat in thin, even layers for the best results.
How do I blend the touch-up paint with the existing car paint?
Blending touch-up paint is an art, and it takes practice! The goal is to make the repair as seamless as possible. After applying the touch-up paint and clear coat, you’ll likely notice a slight edge or difference in texture between the new paint and the original finish. That’s where blending comes in.
One common technique is to use rubbing compound and polishing compound. Start with rubbing compound, applying it gently with a soft cloth to the edges of the repair. This will help to smooth out any imperfections and blend the touch-up paint with the surrounding area. Follow up with polishing compound to restore the shine and remove any swirl marks left by the rubbing compound. Remember to work in small, circular motions and be patient. It might take a few passes to achieve the desired result!
What if the touch-up paint color doesn’t exactly match my car?
It’s definitely frustrating when the touch-up paint isn’t a perfect match! Color variations can happen due to paint fading over time, different production batches, or even slight differences in application. If the color is slightly off, don’t panic! There are a few things you can try.
First, make sure you’re applying the paint in thin, even coats. Sometimes, the color will appear different depending on the thickness of the application. If that doesn’t work, you can try lightly sanding the repaired area with extremely fine-grit sandpaper (2000 grit or higher) after the paint is completely dry. This can help to blend the edges and reduce the visibility of the color difference. As a last resort, consider consulting with a professional auto body shop. They have the expertise and equipment to precisely match the color and blend the repair seamlessly.
How long will touch-up paint typically last on my car?
The longevity of touch-up paint depends on several factors, including the quality of the paint, the preparation of the surface, and the environmental conditions your car is exposed to. With proper application and care, touch-up paint can last for several years, providing protection against rust and preventing further damage to your car’s finish.
However, touch-up paint is not a permanent solution. Over time, it may fade, chip, or peel due to exposure to sunlight, weather, and road debris. Regular washing and waxing can help to protect the touch-up paint and extend its lifespan. It’s also a good idea to inspect the repaired areas periodically and reapply touch-up paint as needed to maintain the appearance and protect your car’s body from corrosion. Think of it as ongoing maintenance to keep your Saturn looking its best!
Conclusion
Alright, future Saturn restorer, you’re now armed with the knowledge to conquer those pesky imperfections and bring back the showroom shine! We’ve explored the world of touchup paint, dissected the options, and hopefully, steered you toward the perfect match for your beloved Saturn. Remember, finding the best touchup paint for Saturn isn’t just about aesthetics; it’s about protecting your investment and showing your car some love.
Go forth, brave painter! Grab that touchup paint, channel your inner artist, and erase those blemishes from your Saturn’s past. With a little patience and the right product, you’ll be amazed at the transformation. This isn’t just about covering scratches; it’s about breathing new life into a classic. We’re excited to see your Saturn looking its absolute best!