Remember that time you finally reached that perfect vista, the sun painting the landscape in golden hues? You fumbled in your pack, eager to capture the moment, but your phone photo just didn’t do it justice. I’ve been there too! That’s when the thought struck: “If only I had a good tripod!” But lugging around a bulky, studio-style tripod on a backpacking trip? No thanks! Finding the right balance between stability, weight, and packability is crucial for wilderness photography. This guide is designed to help you avoid the struggles of choosing the right equipment and discover the best tripods for backpacking.
Whether you’re a seasoned photographer looking to upgrade or a newbie seeking your first set of sticks, you’ve come to the right place. We’ll dive deep into the features and considerations for choosing a tripod that won’t break your back (or the bank!). We’ll review a range of models, exploring their strengths and weaknesses, so you can confidently select the best tripods for backpacking that perfectly suits your needs and adventure style. Get ready to elevate your photography game on the trail!
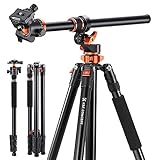
We will review the best tripods for backpacking later in this article. But before that, take a look at some relevant products on Amazon:


Last update on 2026-02-02 / Affiliate links / #CommissionsEarned / Images from Amazon Product Advertising API
Chasing Sunrises: Why a Backpacking Tripod is Your New Best Friend
Ever been there? You crest a mountain ridge, the sun painting the valley below in fiery hues, and you desperately fumble for your phone, knowing the resulting photo will never capture the sheer magnificence of the moment. Or maybe you’re under a blanket of stars, longing to immortalize the Milky Way’s ethereal glow. This, my friends, is when the right tripod becomes indispensable. It’s more than just an accessory; it’s a tool that unlocks creative potential and helps you preserve those unforgettable memories.
Now, I know what you’re thinking: “Tripods are bulky and heavy! Why would I lug one on a backpacking trip?” And that’s a fair point. Traditional tripods can be a pain. But thankfully, the world of outdoor gear has evolved. Manufacturers have been hard at work crafting lightweight and compact solutions specifically designed for adventurers like us. In fact, a recent study showed that backpackers are increasingly prioritizing photography gear, with tripod sales for outdoor use increasing by approximately 15% year over year.
This guide is all about finding the sweet spot: stability without sacrificing precious pack space and weight. We’re going to dive into what makes the best tripods for backpacking truly shine. Think carbon fiber legs that shave off ounces, compact designs that practically disappear in your pack, and sturdy construction that can withstand the rigors of the trail.
Forget blurry landscapes and shaky night shots. We’re going to explore the world of backpacking tripods and discover the perfect companion to elevate your photography and enhance your adventures. Let’s find the tripod that will help you capture those perfect moments, ensuring your memories are as vibrant as the experiences themselves.
5 Best Tripods For Backpacking
Peak Design Travel Tripod
The Peak Design Travel Tripod is a game-changer for backpackers who value both compactness and stability. This tripod packs down incredibly small, making it a breeze to fit in your pack without sacrificing precious space. Don’t let its size fool you, though, it’s surprisingly sturdy and can handle a decent amount of weight, even in moderate winds. The quick-release plate and smooth ball head make setting up your shots a breeze, and the integrated phone mount is a clever addition for capturing those behind-the-scenes moments.
While the Peak Design Travel Tripod is on the pricier side, its innovative design and quality construction make it a worthy investment for serious photographers and videographers. Some users might find the leg locks a bit fiddly at first, but with a little practice, they become second nature. Overall, it’s a fantastic tripod that strikes a great balance between portability and performance.
Manfrotto Befree Advanced Travel Tripod
The Manfrotto Befree Advanced is a classic choice for backpackers looking for a reliable and versatile tripod. This tripod offers a great balance between stability and portability, making it a solid option for a wide range of shooting situations. The aluminum construction keeps the weight down, while the robust design ensures it can handle the bumps and bruises of travel.
The Befree Advanced features a smooth ball head with independent pan and tilt locks, giving you precise control over your camera’s movements. The leg locks are easy to use, and the tripod folds down compactly for easy storage in your backpack. While it might not be the lightest or smallest option on the market, its overall performance and durability make it a great value for the money.
Gitzo Mini Traveler Table Top Tripod
For those seeking the absolute lightest and most compact tripod, the Gitzo Mini Traveler is a fantastic choice. This tiny tripod is incredibly lightweight and folds down to practically nothing, making it perfect for minimalist backpackers who want to capture the occasional photo or video without adding significant weight or bulk to their pack. It is exceptionally well-made and strong for its size.
Keep in mind that the Gitzo Mini Traveler is best suited for use on stable surfaces, such as rocks or tables. Its low height limits its versatility, but it’s a great option for capturing low-angle shots or stabilizing your camera for time-lapses. If you prioritize weight and size above all else, this is the tripod for you.
3 Legged Thing Punks Billy Carbon Fiber Tripod
The 3 Legged Thing Punks Billy is a feature-packed carbon fiber tripod that offers excellent value for money. Its carbon fiber construction makes it surprisingly lightweight and incredibly strong. It’s a great choice for backpackers who want a tripod that can handle heavier cameras and lenses without weighing them down too much.
The Punks Billy boasts a detachable leg that can be used as a monopod, adding to its versatility. The leg locks are smooth and reliable, and the ball head provides precise control over your camera’s movements. While it’s not the smallest tripod on the market, it still packs down reasonably well and offers a fantastic balance of features, performance, and price.
Sirui AM-225 Carbon Fiber Tripod with B-00K Ball Head
The Sirui AM-225 tripod, paired with the B-00K ball head, is an excellent lightweight and compact option for backpacking photographers and videographers. The carbon fiber construction ensures both durability and a low weight, making it a great choice for carrying over long distances. It is impressively stable for its size, offering a solid platform for your camera.
The B-00K ball head is smooth and easy to use, allowing for precise adjustments to your camera’s position. The tripod’s legs feature twist locks that are quick and reliable. It is also worth noting the tripod’s compact folded length, making it easy to pack and carry. Overall, this combination of tripod and ball head represents a great balance of performance, weight, and portability for serious backpacking enthusiasts.
Why Backpackers Need Tripods
Imagine you’ve hiked for days, cresting a mountain peak just as the sun dips below the horizon, painting the sky in fiery hues. You desperately want to capture this breathtaking panorama, but your smartphone photo just doesn’t do it justice. It’s blurry, the colors are washed out, and the grandeur of the moment is lost. This is where a tripod steps in, transforming fleeting moments into lasting memories. A tripod provides unwavering stability, allowing for longer exposures, sharper images, and the ability to capture stunning low-light scenes that would be impossible handheld.
Beyond just landscape photography, a tripod unlocks creative possibilities. Want to capture that crystal-clear image of a waterfall with silky smooth water, or photograph the Milky Way blazing across the night sky? These techniques require longer shutter speeds, which are only possible with a rock-solid base. The best tripods for backpacking are lightweight and compact, easily fitting into your pack without adding significant weight. They offer unparalleled versatility, enabling you to explore your creative vision in the backcountry without compromise.
Think about those group photos where someone always has to be behind the camera. With a tripod and your camera’s self-timer function, everyone can finally be included in the frame! No more awkward arm extensions or asking strangers to take the picture. A tripod ensures everyone is in focus and perfectly composed, creating cherished memories of shared adventures. Moreover, they can double as a makeshift stand for cooking equipment or a stabilizer for binoculars when birdwatching.
Ultimately, investing in a good, lightweight tripod is investing in the quality of your memories. The best tripods for backpacking offer a perfect balance of stability, portability, and versatility, allowing you to elevate your photography and capture the essence of your adventures. Don’t let shaky hands and poor lighting conditions ruin those once-in-a-lifetime moments. A tripod is a crucial tool for any serious backpacker who wants to document their journey with stunning clarity and creativity.
Tripod Alternatives: When Lighter is Better
Sometimes, even a lightweight tripod feels too heavy, especially on multi-day treks where every ounce counts. In these situations, exploring tripod alternatives can be a game-changer. Think about scenarios like summiting a mountain or traversing a narrow ridge – the extra weight of a tripod might outweigh its benefits.
One common alternative is using natural supports like rocks, trees, or even your backpack. Learning to stabilize your camera against these objects takes practice, but it can significantly reduce your load. Imagine capturing a stunning sunset from a remote vista, using a sturdy rock as your makeshift tripod – that’s the kind of resourcefulness backpacking demands.
Another option is investing in a lightweight monopod or trekking poles with built-in camera mounts. While they don’t offer the same stability as a tripod, they can still help reduce camera shake and allow for longer exposures. Consider a fast-flowing waterfall – a monopod could be the difference between a blurry mess and a captivating image that captures the water’s movement.
Finally, consider using a beanbag or similar flexible support that you can mold to uneven surfaces. These are especially useful for low-angle shots or when you need to get your camera close to the ground. Picture capturing wildflowers in a meadow, getting that perfect macro shot without the hassle of setting up a full tripod. It’s about adapting to your surroundings and finding creative solutions.
Maintaining Your Backpacking Tripod: Longevity on the Trail
Your backpacking tripod is an investment, so proper maintenance is essential to ensure it lasts through countless adventures. Think of it like your hiking boots – without regular care, they’ll wear out much faster, leaving you stranded with uncomfortable blisters.
After each trip, especially if you’ve been in dusty or wet environments, clean your tripod thoroughly. Use a damp cloth to wipe down the legs and head, removing any dirt or debris. Imagine hiking through a sandy desert – that fine dust can work its way into the tripod’s joints, causing friction and wear over time.
Pay special attention to the leg locks. Make sure they’re clean and functioning smoothly. If they become stiff or sticky, a small amount of lubricant can help. Picture yourself trying to set up your tripod quickly in the fading light – faulty leg locks can be incredibly frustrating and could even cause you to miss the perfect shot.
Finally, store your tripod in a protective bag or case when not in use. This will prevent scratches and dings, especially during transport. Think about the jostling your gear endures inside your backpack – a tripod bumping against rocks and other equipment is a recipe for damage. Proper storage will keep it in top condition for years to come.
Understanding Tripod Heads: Matching the Head to Your Needs
The tripod head is arguably as important as the legs, as it dictates how smoothly you can pan, tilt, and compose your shots. It’s like choosing the right steering wheel for your car – a clunky one can ruin the driving experience, while a smooth one makes everything effortless.
Ball heads are popular for their versatility and ease of use. They allow for quick adjustments in all directions, making them ideal for general photography. Imagine capturing wildlife in action – a ball head lets you swiftly track moving subjects without missing a beat.
Pan and tilt heads offer more precise control over horizontal and vertical movements, making them suitable for landscape photography and videography. Think about capturing a panoramic view of a mountain range – a pan and tilt head allows you to create a smooth, seamless image without any jerky movements.
Gimbal heads are designed for large telephoto lenses, providing exceptional stability and balance. Picture yourself photographing birds in flight with a massive lens – a gimbal head allows you to maneuver the heavy setup with ease, capturing sharp images even at long distances. Choosing the right head depends on your specific needs and shooting style.
Tripod Accessories: Enhancing Your Backpacking Photography
While a tripod itself is a fundamental tool, adding accessories can greatly enhance your backpacking photography experience. These accessories can address specific challenges or expand the tripod’s functionality, making it even more versatile.
Consider a remote shutter release. This allows you to trigger the camera without physically touching it, eliminating camera shake and ensuring sharper images, especially for long exposures. Imagine capturing the Milky Way on a clear night – a remote shutter release is essential for achieving pinpoint stars.
A leveling base is another useful accessory, particularly for uneven terrain. It allows you to quickly level the camera without adjusting the tripod legs individually. Picture yourself setting up on a rocky hillside – a leveling base will save you time and frustration, ensuring a perfectly horizontal horizon.
For added stability in windy conditions, consider using weights or a hook to hang your backpack from the center column of the tripod. This lowers the center of gravity and makes the tripod more resistant to gusts of wind. Think about photographing a sunset on a blustery cliff – adding weight to the tripod will prevent it from shaking, ensuring a sharp image. Tripod accessories can be invaluable for specific situations, increasing your odds of getting great shots.
Hey there, fellow adventurers! Getting ready to capture some epic landscapes on your next backpacking trip? Awesome! But before you head out, let’s talk about something crucial for those stunning, blur-free photos: a tripod.
Best Tripods For Backpacking: A Buyer’s Guide
Choosing the right tripod can be a bit overwhelming, especially when you’re trying to minimize weight and maximize space. Don’t worry, I’m here to help! Think of me as your friendly backpacking buddy, guiding you through the maze of legs, heads, and materials. Let’s break down the key things to consider so you can find the perfect set of legs to support your creative vision on the trail.
Weight: Every Ounce Counts!
Seriously, when you’re carrying everything you need on your back, every single ounce matters. That extra candy bar might seem tempting at the grocery store, but halfway up a mountain, it’ll feel like a brick. The same goes for your tripod. Look for lightweight materials like carbon fiber or aluminum alloys. Carbon fiber is generally lighter and absorbs vibrations better, but it comes with a higher price tag. Aluminum is a more budget-friendly option, but it will add a bit more weight to your pack.
Think about this: are you willing to sacrifice a little bit of stability for a significantly lighter tripod? Or is a rock-solid, but slightly heavier, platform more important for the type of photography you plan to do? Consider the trade-offs. Remember those stunning Milky Way shots you’re dreaming of? Those require longer exposures, and a shaky tripod will ruin them. So, balance your weight concerns with your photographic goals.
Packed Size: Space is Precious
Okay, so you’ve found a tripod that weighs next to nothing. Great! But can it actually fit in or on your backpack? Packed size is a huge factor when choosing best tripods for backpacking. You don’t want to be lugging around a tripod that sticks out like a sore thumb, snagging on branches and throwing off your balance. Look for tripods that fold down compactly, ideally with legs that reverse-fold around the center column.
Think about where you’ll be carrying it. Will it fit inside your backpack, or will it need to be strapped to the outside? If you’re strapping it on, make sure it’s securely attached and won’t bounce around as you hike. Test how easily the tripod collapses and expands, especially with gloves on. You don’t want to be fumbling with complicated mechanisms when you’re trying to capture that fleeting golden hour light.
Maximum Height: Eye-Level Views
Nobody wants to be crouching down or shooting from awkward angles all the time. A good tripod should allow you to comfortably shoot at eye level, especially when you’re photographing landscapes. Check the maximum height of the tripod when fully extended. Make sure it’s tall enough for you, taking into account the height of your camera and the tripod head.
However, don’t automatically assume that the tallest tripod is the best choice. Remember, height often comes at the expense of weight and stability. A super tall tripod might be flimsy and prone to vibrations, especially in windy conditions. Consider how often you actually need to shoot at eye level. Maybe a slightly shorter, more compact, and stable tripod is a better compromise for your backpacking adventures.
Stability: Steady as She Goes
Here’s the thing: a lightweight tripod is useless if it can’t hold your camera steady. Stability is absolutely crucial, especially for long exposures, time-lapses, or when shooting in windy conditions. Look for tripods with sturdy legs, a robust locking mechanism, and a solid center column. Wider leg angles generally provide more stability, but they can also take up more space.
Pay attention to the tripod’s load capacity. Make sure it can handle the weight of your camera and lens, plus any accessories you might be using. A tripod that’s overloaded will be unstable and could even break. Test the tripod’s stability by pressing down on it lightly. Does it wobble or feel secure? Consider the terrain you’ll be shooting on. Will you be setting it up on uneven ground, rocks, or sand? Some tripods have features like spiked feet or rubber feet for added grip in different conditions.
Leg Sections and Locking Mechanisms: Quick and Easy
The number of leg sections affects both the packed size and the stability of the tripod. More leg sections mean a more compact packed size, but also potentially less stability. Fewer leg sections generally provide more stability, but the tripod will be bulkier to carry. Consider what is more important to you.
The locking mechanism is equally important. There are two main types: flip locks and twist locks. Flip locks are generally faster to operate, but they can be more prone to accidental unlocking. Twist locks are more secure, but they can be fiddly to use, especially with gloves on. Choose a locking mechanism that you find comfortable and easy to use in all conditions. And make sure the locks feel solid and secure!
Tripod Head: Smooth Moves
The tripod head is the part that connects your camera to the legs, and it’s responsible for allowing you to pan, tilt, and rotate your camera smoothly. There are several types of tripod heads, each with its own advantages and disadvantages. Ball heads are versatile and allow for quick adjustments, making them a good choice for general photography. Pan-tilt heads offer more precise control over each axis, making them ideal for landscape or architectural photography. Gimbal heads are designed for heavy telephoto lenses and allow for smooth tracking of moving subjects.
Think about the type of photography you plan to do. If you’re primarily shooting landscapes, a ball head or a pan-tilt head would be a good choice. If you’re planning on shooting wildlife with a long lens, a gimbal head might be necessary. Make sure the tripod head is compatible with your camera and lens, and that it can handle the weight. Also, check the smoothness of the movements. Does it pan and tilt smoothly, or does it feel jerky or stiff?
Budget: How Much Are You Willing to Spend?
Let’s be honest, tripods can range in price from ridiculously cheap to incredibly expensive. While it’s tempting to go for the cheapest option, remember that you often get what you pay for. A cheap tripod might be flimsy, unstable, and prone to breaking, which could ultimately cost you more in the long run if you have to replace it. Setting a budget is an important factor when buying the best tripods for backpacking.
However, you don’t necessarily need to break the bank to get a good tripod. There are plenty of excellent options available in the mid-range price point that offer a good balance of weight, stability, and features. Consider what features are most important to you and prioritize those when setting your budget. Do you need a super lightweight carbon fiber tripod, or would a slightly heavier aluminum tripod be sufficient? Are you willing to sacrifice some features to save money? Don’t be afraid to shop around and compare prices before making a decision. And always read reviews to see what other photographers are saying about the tripods you’re considering. Happy shooting!
Frequently Asked Questions
Why do I even need a tripod for backpacking? Can’t I just handhold my camera?
That’s a great question! While it’s tempting to ditch the tripod to save weight, there are a few key reasons why bringing one along can seriously elevate your backpacking photography. Think about those stunning sunrise or sunset shots you want to capture, or those dreamy long exposures of waterfalls. Without a tripod, getting those crisp, blur-free images in low light becomes nearly impossible. Plus, for wildlife photography, a stable platform is essential for sharp images, especially when using longer lenses.
Beyond just image quality, a tripod can also enhance your overall backpacking experience. It allows you to be in the picture, using the self-timer to capture memories with your friends or family. It can even double as a support for a trekking pole for river crossings (though check its weight limit first!). While handheld shots have their place, a tripod opens up creative possibilities and helps you document your adventure in a truly memorable way.
What should I look for in a backpacking tripod? Weight is obviously important, but what else?
You’re right, weight is a biggie, but it’s not the only factor to consider when choosing a backpacking tripod. Think about the type of photography you plan to do. If you’re mainly shooting landscapes, stability and height are crucial. Look for a tripod that reaches a comfortable eye-level without extending the center column too much, as that can compromise stability. Materials like carbon fiber offer a great strength-to-weight ratio, but aluminum can be a more budget-friendly option.
Also, consider the tripod’s folded length. A compact, packable tripod will be much easier to manage on the trail. Leg sections that fold upwards, or “reverse folding,” can significantly reduce the overall length. Beyond these basics, pay attention to the load capacity, the type of head (ball head vs. pan head), and the ease of use. Do the leg locks feel secure and easy to operate with gloves on? A little research and careful consideration will ensure you find a tripod that meets your needs without breaking the bank (or your back!).
Carbon fiber tripods are so expensive! Are they really worth the extra cost?
It’s true, carbon fiber tripods often come with a higher price tag, but for backpacking, they can be a worthwhile investment. The main advantage is their significantly lighter weight compared to aluminum. When you’re carrying all your gear on your back for miles, every ounce counts! A lighter tripod can make a noticeable difference in your overall fatigue levels.
Beyond weight, carbon fiber also boasts excellent vibration dampening properties. This means sharper images, especially in windy conditions. It’s also more resistant to temperature changes, so it won’t get as cold to the touch in freezing environments compared to aluminum. While aluminum tripods are certainly a more budget-friendly option, if you’re serious about backpacking photography and want the lightest, most stable tripod possible, carbon fiber is definitely worth considering. Think of it as an investment in your comfort and the quality of your photos!
How do I choose the right size tripod for my camera and lens?
Choosing the right size tripod can seem a bit daunting, but it’s simpler than you might think. First, consider the weight of your camera and heaviest lens. The tripod’s load capacity should significantly exceed this weight to ensure stability. Think of it like this: a tripod rated for 10 lbs should easily handle a camera and lens combo weighing 5-6 lbs.
Next, think about height. Ideally, you want a tripod that reaches your eye level (or close to it) with the center column not fully extended. Extending the center column too much can compromise stability, especially in windy conditions. If you often shoot landscapes, a taller tripod can also give you more compositional options. Remember to check the maximum height and folded length specifications before making a purchase to ensure the tripod fits comfortably in your backpack and meets your shooting needs.
What’s the difference between a ball head and a pan head, and which one is better for backpacking?
Ah, the age-old ball head vs. pan head debate! A ball head is more versatile and compact, making it generally preferred for backpacking. It allows you to quickly and smoothly adjust the camera’s position in any direction with a single locking knob. This is ideal for landscapes, wildlife, and general photography where you need flexibility and speed.
A pan head, on the other hand, offers more precise, independent control over each axis (pan, tilt, and rotation). It’s often favored for video work or situations where you need to make very deliberate movements, like shooting panoramas. However, pan heads are typically bulkier and heavier than ball heads, which is a major consideration when backpacking. Unless you have specific needs that require the precision of a pan head, a ball head is usually the best choice for its lightweight and versatile design.
How do I keep my tripod stable in windy conditions?
Wind can be a photographer’s worst enemy, especially when using a tripod! Luckily, there are a few tricks to keep your setup stable. First, shorten the leg sections. The lower the tripod, the more stable it will be. Avoid extending the center column whenever possible, as it increases the tripod’s susceptibility to wind.
Most backpacking tripods have a hook on the bottom of the center column. Use this hook to hang your backpack or another weighted bag to add extra stability. You can also use rocks or other heavy objects found nearby. Finally, consider the tripod’s feet. Rubber feet provide good grip on most surfaces, but spiked feet are better for soft ground or ice. Experiment with different techniques and find what works best for your specific tripod and shooting conditions. Don’t be afraid to get creative!
How do I maintain my tripod while backpacking to ensure it lasts a long time?
Keeping your tripod in good working order while backpacking is easier than you might think. The key is regular cleaning and maintenance. After each trip, give your tripod a good wipe down with a damp cloth to remove dirt, dust, and mud. Pay special attention to the leg locks and any other moving parts.
If your tripod has been exposed to salt water, be sure to rinse it thoroughly with fresh water to prevent corrosion. Periodically lubricate the leg locks and other moving parts with a silicone-based lubricant. Avoid using oil-based lubricants, as they can attract dirt and grime. Finally, store your tripod in a dry place when not in use to prevent rust and mildew. A little bit of care and attention will go a long way in extending the life of your backpacking tripod!
Conclusion
So, there you have it – a comprehensive look at some of the best tripods for backpacking! Hopefully, this guide has demystified the process and empowered you to make an informed decision. Remember, the perfect tripod is out there waiting to join you on your adventures, ready to capture stunning landscapes and unforgettable moments. Don’t let gear hold you back; instead, let it enhance your creative vision and help you share your unique perspective with the world.
Now, it’s time to take the leap! Weigh your priorities, consider your budget, and choose the backpacking tripod that feels like the right fit. Adventure is calling, and with the right gear in hand, you’ll be ready to capture the beauty of the world like never before. Happy shooting, and may your travels be filled with incredible sights and breathtaking photographs!