Remember that time you tried to build a smart home security system with your Raspberry Pi, only to be utterly defeated by a blurry, pixelated webcam that couldn’t even tell the difference between your cat and a burglar? Yeah, we’ve all been there. Frustration mounts, dreams of DIY genius fade, and you’re left wondering if that Raspberry Pi is destined to gather dust. The culprit? Often, it’s the webcam. Finding the right one that plays nicely with your Pi and delivers clear, reliable video can feel like searching for a needle in a haystack.
But fear not, fellow makers! This guide is your lifeline. We’ve sifted through the overwhelming sea of options to bring you the best USB webcams for Raspberry Pi, taking into account compatibility, video quality, price, and specific use cases. Whether you’re building a time-lapse rig, a video conferencing setup, or that smart security system you’ve always dreamed of, we’ll help you find the perfect camera to unleash the full potential of your Raspberry Pi projects. Let’s dive in and find the ideal webcam to bring your ideas to life!
We will review the best usb webcams for raspberry pi later in this article. But before that, take a look at some relevant products on Amazon:


Last update on 2026-02-06 / Affiliate links / #CommissionsEarned / Images from Amazon Product Advertising API
Lights, Camera, Raspberry Pi! Finding the Perfect Webcam
Ever thought about giving your Raspberry Pi a pair of eyes? It opens up a world of possibilities, from home security and time-lapses to robot vision and even streaming yourself coding (because, why not?). The journey begins with finding the right webcam. But with so many options out there, where do you even start? Think of this as your friendly guide to navigating the webcam wilderness. We’re here to help you find the best usb webcams for raspberry pi that fits your specific project and budget.
One of the cool things about the Raspberry Pi community is its resourcefulness. You don’t need to break the bank to get started. In fact, many users have found success with webcams costing under $30. However, understanding the compatibility nuances is key. Not every webcam will play nicely with your Pi straight out of the box. Factors like resolution, frame rate, and driver support are crucial considerations that we’ll explore.
So, what makes a webcam truly “best” for a Raspberry Pi? It’s not just about the price or the flashiest features. It’s about finding the sweet spot between performance, compatibility, and your project requirements. Are you building a complex object recognition system that demands high resolution? Or are you simply trying to create a basic surveillance system with motion detection? Knowing your needs is half the battle.
In the following sections, we’ll dive into some of the top contenders in the market, weighing their pros and cons, and offering practical tips on how to get them up and running with your Raspberry Pi. We’ll cover a range of models, from budget-friendly options to higher-end cameras that pack a punch. Get ready to unlock the visual potential of your Pi!
Best Usb Webcams For Raspberry Pi – Reviewed
Logitech C920S HD Pro Webcam
The Logitech C920S is a workhorse, a reliable and easy-to-use webcam that consistently delivers great results with a Raspberry Pi. It boasts excellent 1080p video quality at 30fps, making it ideal for everything from video conferencing to time-lapse photography. The autofocus is snappy and accurate, ensuring your image stays sharp, and the built-in dual microphones provide clear audio for voice communication. Setting it up with a Raspberry Pi is a breeze; simply plug it in, and it’s generally recognized immediately.
Beyond its core performance, the C920S includes a built-in lens cover for added privacy, a feature that’s surprisingly useful for peace of mind. It also works well with various Raspberry Pi operating systems and software, so you shouldn’t run into compatibility issues. While it might be a slightly pricier option, the Logitech C920S’s reliability, performance, and user-friendly nature make it a worthwhile investment for any Raspberry Pi enthusiast.
Arducam 8MP USB Camera Module
For those looking to tinker and get the most out of their Raspberry Pi camera setup, the Arducam 8MP USB Camera Module is an excellent choice. This camera shines when it comes to flexibility and customization, offering manual focus and a wide range of lens options. The 8MP sensor delivers impressive image quality, especially when you dial in the focus perfectly, opening up possibilities for detailed photography and video projects. This camera really empowers you to tweak and optimize for your specific needs.
However, this camera demands a bit more technical expertise. It’s not a plug-and-play solution, meaning you might need to install drivers or configure settings depending on your Raspberry Pi setup. But if you’re comfortable diving into the details and fine-tuning your camera settings, the Arducam’s superior image quality and customization options make it a fantastic tool for advanced Raspberry Pi projects.
Raspberry Pi Camera Module V2
Who can forget the official offering from Raspberry Pi itself? The Raspberry Pi Camera Module V2 is a fantastic, affordable choice that’s tailor-made for use with, well, a Raspberry Pi! It natively integrates with the Raspberry Pi ecosystem, which means simple setup and excellent compatibility. It’s lightweight, compact, and delivers good image quality for its price point, perfect for learning about image processing, computer vision, or simply capturing photos and videos.
Being designed by the same people as the Raspberry Pi means you’re guaranteed seamless integration. However, it’s worth noting that the Raspberry Pi Camera Module V2 typically requires a ribbon cable connection to the CSI port instead of a USB connection. While straightforward, it is something to keep in mind. This camera is the perfect starting point for Raspberry Pi camera projects, especially for beginners.
Microsoft LifeCam HD-3000
The Microsoft LifeCam HD-3000 is a budget-friendly option that delivers surprisingly good performance for its price. It’s a simple, no-frills webcam that gets the job done, offering smooth 720p video and decent image quality. It’s small and lightweight, making it easy to mount and position, and it works seamlessly with most Raspberry Pi setups. Just plug it in, and you’re usually good to go.
While it might not have all the bells and whistles of more expensive webcams, the LifeCam HD-3000 is an excellent choice for basic video conferencing, streaming, or simple monitoring tasks. Its affordability and ease of use make it a great option for budget-conscious Raspberry Pi users who need a reliable and hassle-free webcam.
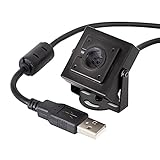
ELP 1080P USB Camera Module
The ELP 1080P USB Camera Module offers a wide-angle lens in a small and versatile package, which sets it apart. This makes it ideal for projects where capturing a broader field of view is important, such as security monitoring or group video calls. The 1080p resolution delivers crisp and clear video, and the USB connectivity ensures easy integration with your Raspberry Pi. The build quality is solid, and it’s designed to withstand various operating conditions.
The ELP Camera often comes with options for different lenses and enclosures, allowing you to tailor it to your specific project needs. While it might require some configuration to get the best performance, especially when adjusting the wide-angle distortion, the ELP camera offers a unique combination of wide-angle view, 1080p resolution, and customizability, making it a strong contender for Raspberry Pi enthusiasts seeking a flexible camera solution.
Why You Need a USB Webcam for Your Raspberry Pi
Your Raspberry Pi is a tiny computer bursting with potential, capable of powering incredible projects. But let’s face it, without a camera, it’s like a superhero without their eyesight. Many exciting Raspberry Pi projects, from home security systems and AI-powered image recognition to time-lapses and even live streaming, rely heavily on visual input. Think about being able to monitor your 3D printer remotely, ensuring prints are going smoothly, or creating a smart bird feeder that automatically identifies and records different species. A USB webcam unlocks these possibilities and transforms your Pi from a hobbyist board into a powerful visual tool.
The good news is, you don’t need expensive, complicated equipment to get started. USB webcams are readily available and surprisingly affordable. Choosing one of the best USB webcams for Raspberry Pi means you’ll get a reliable, easy-to-integrate device that works seamlessly with your Pi’s operating system. Imagine setting up a simple motion-activated security camera that sends you alerts and snapshots when someone approaches your front door. Or creating a playful pet monitor that lets you check in on your furry friends while you’re at work. With a good webcam, these projects become accessible and achievable.
Choosing the right webcam is key. Look for models known for their compatibility with Raspberry Pi, offering good image quality even in low-light conditions, and perhaps even boasting features like autofocus for sharper images. The best USB webcams for Raspberry Pi don’t just provide an image; they offer crisp, clear visual data that your Pi can interpret accurately, leading to more reliable and effective projects. Plus, many of these webcams are small and discreet, making them easy to position and integrate into your projects without being intrusive.
Ultimately, adding a USB webcam to your Raspberry Pi setup is an investment in expanding its capabilities and unlocking a whole new world of creative possibilities. It’s the missing piece that allows you to interact with the world visually, opening doors to innovation, automation, and fun. So, ditch the limitations and embrace the visual power of a good USB webcam – your Raspberry Pi projects will thank you for it!
Setting Up Your Webcam with Raspberry Pi: A Step-by-Step Guide
So, you’ve snagged a shiny new USB webcam for your Raspberry Pi. Awesome! But now what? Don’t worry, getting it up and running is simpler than you might think. First, physically connect the webcam to one of the Raspberry Pi’s USB ports. This is usually a no-brainer, just plug it in! Sometimes, for older or less common webcams, you might need to use a powered USB hub to provide enough power.
Next, you’ll want to make sure your Raspberry Pi recognizes the camera. Open the terminal and type lsusb. This command lists all the USB devices connected to your Pi. Look for the name of your webcam in the list. If it’s there, congratulations! Your Pi sees the camera. If not, double-check the connection and consider that powered USB hub.
Now, let’s install the software needed to actually use the camera. A popular choice is “fswebcam,” a lightweight program that lets you take pictures and videos. To install it, type sudo apt-get update followed by sudo apt-get install fswebcam. The first command updates the package list, and the second installs fswebcam.
Finally, time for a test run! In the terminal, type fswebcam image.jpg. This command tells fswebcam to take a picture and save it as “image.jpg” in your current directory. Open the image to see if everything is working. If you see yourself, you’re golden! If not, double check all the connections, try running the command with sudo privileges and double check you entered the command properly.
Troubleshooting Common Webcam Issues on Raspberry Pi
Okay, let’s say you’ve followed all the instructions, but your webcam still isn’t cooperating. Don’t panic! Most webcam problems on Raspberry Pi are easily solvable. A common issue is insufficient power. Raspberry Pi’s USB ports can sometimes struggle to provide enough juice, especially with power-hungry webcams.
To diagnose this, try using a powered USB hub. This provides an external power source for your webcam, bypassing the Raspberry Pi’s limitations. If this fixes the problem, you know power was the issue. It’s like giving your webcam a shot of espresso!
Another potential culprit is outdated software. Make sure your Raspberry Pi’s operating system and software packages are up to date. Run sudo apt-get update followed by sudo apt-get upgrade. This ensures you have the latest drivers and libraries, which can often resolve compatibility issues.
Sometimes, the problem isn’t the hardware or software, but the configuration. Check the webcam’s settings using a program like “guvcview.” This allows you to adjust things like brightness, contrast, and resolution. Experiment with different settings to see if you can improve the image quality or resolve any glitches. It may be that certain settings are causing conflicts on your device.
Creative Projects You Can Build with a Raspberry Pi Webcam
Alright, you’ve got your webcam up and running, now what? The possibilities are truly endless! One popular project is a DIY home security system. You can use motion detection software like Motion to trigger recordings or send alerts when someone (or something!) enters the camera’s field of view. Imagine getting a notification on your phone when your cat decides to explore the kitchen counter!
Another fun project is creating a time-lapse camera. Set up your webcam to take a picture every few minutes, hours, or even days, then stitch them together to create a time-lapse video. This is perfect for documenting anything from a garden growing to a construction project unfolding. You can watch a flower bloom over a few hours, condensed into a few seconds.
Want to get even more creative? Build a remote surveillance system for wildlife. Position your Raspberry Pi and webcam near a bird feeder or other natural habitat, and use it to capture footage of animals in their natural environment. It’s like having your own personal nature documentary crew!
For those with a coding background, you can explore computer vision projects. Use libraries like OpenCV to perform tasks like object recognition, face detection, or even gesture control. Imagine using your webcam to control your Raspberry Pi with hand gestures! It’s like turning your Pi into a mini-Minority Report computer.
Optimizing Webcam Performance on Your Raspberry Pi
So, you’ve built a cool webcam project, but the video quality is a bit…meh. Don’t worry, there are several ways to squeeze more performance out of your setup. First, consider the resolution of your webcam. Higher resolution means more detail, but it also requires more processing power. If your Raspberry Pi is struggling, try lowering the resolution to see if it improves the frame rate and smoothness. It’s all about finding that sweet spot between detail and performance.
Another factor is the video format. Different formats require different amounts of processing. MJPEG is generally a good choice for Raspberry Pi, as it’s relatively lightweight and widely supported. However, experiment with other formats like H.264 to see if they offer better performance on your specific hardware.
Next, think about the software you’re using. Some programs are more efficient than others. Try different webcam software packages to see which one performs best on your Raspberry Pi. “fswebcam” is usually quite quick but there are others available.
Finally, consider overclocking your Raspberry Pi. This increases the clock speed of the processor, giving it a bit of a boost. However, be careful when overclocking, as it can generate more heat and potentially damage your Pi if not done correctly. Always monitor the temperature and avoid pushing it too far. It’s like giving your Pi a turbo boost, but proceed with caution!
Best USB Webcams for Raspberry Pi: Your Ultimate Buying Guide
Hey there, fellow Raspberry Pi enthusiast! Thinking about adding a webcam to your Pi project? That’s a fantastic idea! Webcams open up a whole new world of possibilities, from creating a DIY security system to building a fun time-lapse photography rig. But with so many options out there, choosing the right webcam can feel a bit overwhelming. Don’t worry, I’m here to help! This guide is designed to break down the key things you need to consider when shopping for the best usb webcams for raspberry pi, ensuring you pick the perfect one for your specific project. We’ll explore everything from resolution and frame rate to compatibility and power consumption. Let’s dive in and find the ideal webcam to bring your Raspberry Pi projects to life!
Resolution: How Sharp Do You Need It?
The resolution of a webcam determines the clarity and detail of the images and videos it captures. Higher resolution means sharper images and better video quality. For simple projects like basic surveillance or video conferencing, a 720p (1280×720 pixels) webcam might be sufficient. However, if you plan on doing any image processing, object recognition, or want to zoom in on details, you’ll definitely want to consider a 1080p (1920×1080 pixels) webcam or even a 4K option. Think about how much detail you’ll need to see in your images or videos and choose accordingly.
Choosing a webcam with excessive resolution can also put unnecessary strain on your Raspberry Pi. If you’re running resource-intensive applications alongside your webcam, a lower resolution might actually provide a smoother overall experience. Consider the processing power of your Raspberry Pi model. Older models might struggle with high-resolution video streams, while newer models like the Raspberry Pi 4 or 5 can handle them more comfortably. So, balance your desire for sharp images with the capabilities of your Pi. The goal is to find the best usb webcams for raspberry pi which can deliver optimal performance without overwhelming your system.
Frame Rate: Smoothness Matters!
Frame rate, measured in frames per second (fps), determines the smoothness of the video you capture. A higher frame rate results in smoother, more fluid video, while a lower frame rate can make the video appear choppy and jerky. For basic video streaming or time-lapse photography, a frame rate of 30 fps is generally acceptable. However, if you plan on recording fast-moving objects or performing real-time video analysis, you’ll want to aim for a webcam that can capture video at 60 fps or higher.
Keep in mind that achieving higher frame rates can also be demanding on your Raspberry Pi’s resources. Just like resolution, higher frame rates require more processing power and bandwidth. If your Pi is already struggling to keep up, trying to record at 60 fps might result in dropped frames and a poor video experience. Experiment with different frame rate settings to find the sweet spot between smoothness and performance. For many applications, 30fps will be sufficient, and choosing a webcam known for its consistent performance at this framerate might be better than one that claims to reach 60fps but struggles to maintain it on your Raspberry Pi. This is important to know when choosing the best usb webcams for raspberry pi.
Compatibility: Plays Nicely with Your Pi
One of the most crucial factors to consider is compatibility. Not all webcams are created equal when it comes to working with the Raspberry Pi. While most standard UVC (USB Video Class) compliant webcams should work without any issues, it’s always a good idea to double-check compatibility before making a purchase. Look for webcams that are explicitly listed as being compatible with the Raspberry Pi or that have been successfully used by other Raspberry Pi users.
You can often find compatibility information on the manufacturer’s website, in online forums, or in product reviews. If you’re unsure, it’s always a good idea to search online for “[webcam model] Raspberry Pi compatibility” to see if anyone else has had success (or failures!) with that particular webcam. Saving yourself the frustration of wrestling with driver issues and compatibility problems is always a smart move. Getting this right is critical when selecting the best usb webcams for raspberry pi.
Power Consumption: Don’t Drain Your Battery!
Power consumption is another important factor to consider, especially if you’re running your Raspberry Pi on battery power. Some webcams can draw a significant amount of power, which can quickly drain your battery and reduce the overall runtime of your project. Look for webcams that are designed to be energy-efficient or that have a low power consumption rating.
If you’re planning on using multiple peripherals with your Raspberry Pi, you might also want to consider using a powered USB hub. A powered USB hub provides its own power source, so it doesn’t draw power from the Raspberry Pi. This can help to reduce the overall power consumption of your Pi and extend the battery life. Checking the power consumption rating is a small step that can make a big difference in the long run, especially when you’re aiming for a truly portable and sustainable project utilizing the best usb webcams for raspberry pi.
Field of View: Capturing the Right Scene
The field of view (FOV) of a webcam refers to the extent of the scene that it can capture. A wider FOV allows you to capture more of the surrounding area, while a narrower FOV focuses on a smaller area. The ideal FOV for your project will depend on your specific needs. For example, if you’re building a security system, you might want a webcam with a wide FOV to cover a larger area. On the other hand, if you’re building a facial recognition system, you might want a webcam with a narrower FOV to focus on the subject’s face.
Consider the environment where you’ll be using the webcam. If you need to monitor a large room or outdoor area, a wider FOV is essential. However, if you’re working in a small, confined space, a narrower FOV might be more appropriate. Some webcams also offer adjustable FOV settings, which allow you to customize the field of view to your liking. Having flexibility here can be surprisingly useful, especially if your project might evolve over time. Finding the right balance is key when choosing the best usb webcams for raspberry pi.
Low-Light Performance: Seeing in the Dark
If you plan on using your webcam in low-light conditions, low-light performance is a crucial factor to consider. Some webcams struggle to capture clear images or videos in dimly lit environments, resulting in grainy or blurry footage. Look for webcams that are specifically designed for low-light performance or that have features like automatic low-light correction or infrared (IR) illumination.
Reading reviews and checking sample footage in low-light conditions can give you a good idea of a webcam’s performance in challenging lighting situations. Some manufacturers also provide specifications like minimum illumination requirements. Think about the typical lighting conditions where you’ll be using your webcam and choose one that can perform well in those conditions. The best usb webcams for raspberry pi for security applications are definitely ones that excel in low-light scenarios.
Budget: Finding the Sweet Spot
Finally, and perhaps most practically, consider your budget. Webcams come in a wide range of prices, from inexpensive models to high-end options with advanced features. Determine your budget beforehand and stick to it. It’s tempting to splurge on the most expensive webcam with all the bells and whistles, but you might not need all those features for your specific project.
Often, you can find a great webcam that offers excellent performance and features for a reasonable price. Read reviews, compare prices, and look for deals and discounts. Remember that the most expensive webcam isn’t always the best choice. Focus on finding a webcam that meets your specific needs and fits within your budget. The key is to find the best usb webcams for raspberry pi that offers the best value for your money, balancing features and performance with your financial constraints.
Frequently Asked Questions
What are the key features to consider when choosing a USB webcam for my Raspberry Pi?
Well, there are a few really important things to keep in mind! First off, resolution is key. You’ll want to consider what you’ll be using the webcam for. If it’s just for basic video conferencing, 720p might be perfectly fine. But if you’re planning on capturing high-quality images or video, or doing any sort of detailed object recognition, you’ll definitely want to aim for 1080p or even higher. Frame rate is also important if you need smooth video, especially if you’re recording motion or streaming live content.
Secondly, think about compatibility. Most USB webcams are plug-and-play with Raspberry Pi OS, but it’s always a good idea to double-check reviews or the manufacturer’s website to be absolutely sure. Field of view (how wide the camera’s view is) can also be a factor, depending on your setup and what you want to capture. Finally, consider features like autofocus, built-in microphone, and low-light performance if those are important for your specific project!
Will any USB webcam work with my Raspberry Pi?
The vast majority of USB webcams should work with your Raspberry Pi without too much fuss. The Raspberry Pi OS is built on Linux, and it has pretty good support for USB devices. However, like with any tech, there can be exceptions!
While most webcams will be plug-and-play, meaning you just plug them in and they work, some may require a little bit of extra configuration or driver installation. This is especially true with some of the higher-end or more obscure webcams. So, before you buy, take a quick look at online reviews or the manufacturer’s website to see if anyone has reported any compatibility issues with Raspberry Pi. Better to be safe than sorry!
How do I install a USB webcam on my Raspberry Pi?
Luckily, installing a USB webcam on your Raspberry Pi is usually super simple! Most of the time, it’s literally just plugging it in. Seriously! The Raspberry Pi OS often recognizes the webcam automatically.
After plugging it in, you can test it using a program like Cheese (which you might need to install with sudo apt-get install cheese first) or by using a Python library like OpenCV. If it doesn’t work immediately, you might need to adjust some settings. You can usually find these settings in the Raspberry Pi configuration menu or in the software you’re using to access the webcam. In rare cases, you might need to install drivers, but that’s usually only necessary for more specialized webcams.
What is the optimal resolution for a Raspberry Pi webcam?
There’s no single “optimal” resolution; it really depends on what you’re planning to do with your webcam! For basic applications like video conferencing or casual observation, a 720p webcam (1280×720 pixels) will often be perfectly adequate. It provides a decent image quality without putting too much strain on the Raspberry Pi’s resources.
However, if you’re planning on capturing high-quality images or video, or if you need to be able to see fine details (for example, in object recognition or surveillance applications), then you’ll definitely want to go for a 1080p webcam (1920×1080 pixels) or even higher. Keep in mind that higher resolutions will require more processing power from your Raspberry Pi and will also take up more storage space if you’re recording video.
Will using a webcam slow down my Raspberry Pi?
Yes, using a webcam can affect the performance of your Raspberry Pi, but the extent of the slowdown really depends on a few things. The resolution and frame rate of the webcam are major factors. Higher resolution and frame rates require more processing power to handle the video stream.
Also, the specific Raspberry Pi model you’re using makes a big difference. A Raspberry Pi 4 will be much better equipped to handle a webcam than an older Raspberry Pi Zero. If you’re experiencing performance issues, try lowering the resolution or frame rate of the webcam. You can also try optimizing your code if you’re using a programming language like Python to access the webcam. Lastly, make sure you have enough free memory (RAM) on your Raspberry Pi!
What software can I use with my USB webcam on a Raspberry Pi?
There’s a whole world of software out there you can use with your USB webcam and Raspberry Pi! For simple tasks like viewing the webcam feed, Cheese is a popular and easy-to-use option. It’s like a basic photo booth app, and it’s a great way to quickly test if your webcam is working.
If you’re looking for something more powerful, OpenCV is a fantastic open-source library that lets you do all sorts of cool things with images and videos, like object recognition, motion detection, and facial recognition. For streaming video, you can use software like OBS Studio. And of course, you can also write your own custom applications using languages like Python and libraries like Pygame or Picamera2 to create exactly the functionality you need.
How can I improve the video quality from my Raspberry Pi webcam?
Getting the best video quality from your Raspberry Pi webcam can involve a few different tricks! First off, good lighting is essential. Make sure your subject is well-lit, and try to avoid having bright lights directly behind your subject, as this can cause them to appear dark.
Beyond lighting, experiment with your webcam’s settings. Many webcams have adjustable settings for brightness, contrast, and saturation. Play around with these to see what gives you the best image. If you’re using a specific software, check its settings as well, as it may have its own image enhancement options. Also, make sure your lens is clean! A little bit of dust or smudges can have a surprising impact on image quality.
Final Thoughts
So, there you have it! We’ve journeyed through a landscape of pixels and frame rates, uncovering the best USB webcams for Raspberry Pi projects, perfectly suited for everything from home security to adorable critter cams. Hopefully, you’re now armed with the knowledge to choose the perfect visual companion for your tiny, but mighty, computer. Don’t overthink it too much – the best webcam is the one that gets you creating!
Now, go forth and experiment! The world of Raspberry Pi is all about exploration and learning. Pick a webcam that sparks your interest, plug it in, and start building something amazing. Whether it’s monitoring your 3D printer or creating a live-streaming bird feeder, the possibilities are endless. We can’t wait to see what incredible projects you bring to life with your Raspberry Pi and its new visual superpowers!