Remember that old, scratched-up dining table inherited from Grandma? It probably holds a thousand memories, from holiday feasts to late-night homework sessions. But lately, it’s been looking a little… tired. Maybe the finish is worn, or perhaps the color just doesn’t fit your current style anymore. Trust me, I get it! I spent weeks researching how to give my own table a facelift, feeling overwhelmed by the sheer number of products available. That’s why I’ve put together this guide, to share what I learned and make choosing the best wood stains for dining tables a much easier and more enjoyable process for you.
This article dives deep into the world of wood stains, covering everything from the different types of stains to the key factors you need to consider before making a purchase. We’ll take a look at some top-rated products, offering honest reviews and highlighting their pros and cons. Whether you’re aiming for a rustic farmhouse vibe, a sleek modern look, or simply want to restore your table to its former glory, we’ll help you find the perfect stain to achieve your desired results and give your dining space a fresh, inviting atmosphere.
We will review the best wood stains for dining tables later in this article. But before that, take a look at some relevant products on Amazon:


Last update on 2025-12-12 / Affiliate links / #CommissionsEarned / Images from Amazon Product Advertising API
Transforming Your Dining Table: A Stain Story
Think about your dining table. It’s more than just a surface; it’s where stories unfold, meals are shared, and memories are made. Maybe it’s a hand-me-down antique, a recent thrift store find, or a brand-new piece just waiting to be personalized. Whatever its origin, a fresh stain can completely transform its character, breathing new life into this central gathering place. The right color and finish can dramatically impact the overall feel of your dining room, turning a simple table into a statement piece.
Choosing the right stain, however, can feel a bit overwhelming. There are so many options out there! Glossy, matte, oil-based, water-based… the choices seem endless. Did you know that, according to a recent survey, over 60% of homeowners prefer natural wood tones in their dining rooms? But that doesn’t mean you’re limited! Whether you’re aiming for a rustic farmhouse vibe, a sleek modern look, or something entirely unique, finding the best wood stains for dining tables is key to achieving your desired aesthetic.
This guide is here to help you navigate the wonderful world of wood stains. We’ll walk you through the different types of stains available, discuss factors like wood type and desired finish, and offer practical tips to ensure a smooth and beautiful staining process. We’ll also delve into some popular color trends and explore how to choose a stain that complements your existing décor.
So, grab a cup of coffee, settle in, and let’s embark on this staining adventure together. By the end of this guide, you’ll be well-equipped to select the perfect stain for your dining table and create a space where delicious food and lasting memories are made. Get ready to witness the incredible transformation a little stain can bring!
Best Wood Stains For Dining Tables – Reviews
Minwax Gel Stain
Looking to achieve a rich, even color on your dining table, especially if it’s made of tricky wood like pine or has existing finishes? Minwax Gel Stain is a fantastic choice! This stain sits on the surface rather than penetrating deeply, making it ideal for non-porous surfaces or vertical applications. It’s known for its controlled application, which means less dripping and streaking, resulting in a professional-looking finish. Plus, the gel consistency is easy to work with, making it a favorite among DIYers of all skill levels.
The downside? Because it doesn’t penetrate the wood as deeply, it might not showcase the natural grain as prominently as some other stains. However, the rich color payoff and ease of application often outweigh this concern. It’s perfect for giving an old table a new lease on life or achieving a consistent color across different wood types used in your dining set. Just remember to apply a topcoat for protection and durability after the stain has fully dried!
General Finishes Arm-R-Seal Oil Based Topcoat
Okay, so technically it’s a topcoat, not a stain, but General Finishes Arm-R-Seal is the secret weapon for bringing out the natural beauty of your dining table wood and providing serious protection! This oil-based finish offers a stunning amber glow that enhances the grain and warms up the overall tone of your table. It’s incredibly durable, standing up to the daily wear and tear of family meals and spills.
What sets Arm-R-Seal apart is its ease of application. It can be wiped on, brushed on, or even sprayed on, giving you plenty of options. It’s also self-leveling, meaning it smooths out any brushstrokes for a flawless finish. While it’s an oil-based product and requires proper ventilation, the exceptional protection and gorgeous finish make it well worth the effort. This is a fantastic choice for sealing and enhancing a freshly stained or bare wood dining table.
Old Masters Wiping Stain
If you’re looking for intense color and exceptional control over your stain, Old Masters Wiping Stain is a top contender. This oil-based stain is richly pigmented, delivering deep, vibrant hues that can transform your dining table. The wiping application allows you to build up the color gradually, ensuring you achieve the exact shade you desire. It’s perfect for highlighting the grain and adding character to your wood.
Because it’s a wiping stain, it requires a bit more elbow grease, but the results are worth it. You’ll need to apply, let it sit for a short time, and then wipe off the excess. This process ensures that the stain penetrates evenly and avoids blotchiness, particularly on softer woods. Remember to allow ample drying time and apply a protective topcoat to seal in the color and protect your beautiful new dining table finish.
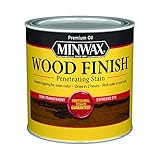
Watco Danish Oil
Want to achieve a natural, hand-rubbed finish that highlights the inherent beauty of your wood? Watco Danish Oil is a fantastic option. This oil penetrates deep into the wood fibers, hardening and providing protection from within. It enhances the wood’s natural grain and gives it a warm, lustrous sheen, creating a truly elegant look for your dining table.
One of the best things about Danish Oil is its ease of application. Simply flood the surface, let it soak in, and then wipe off the excess. This process is repeated over a few coats, building up the protection and depth of color. It’s a great choice for those who want a low-maintenance finish that’s easy to repair and refresh over time. Be patient with the drying time between coats, and you’ll be rewarded with a stunning, durable finish that will last for years to come.
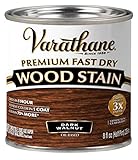
Varathane Premium Fast Dry Wood Stain
Short on time but still want a beautiful stained dining table? Varathane Premium Fast Dry Wood Stain is your go-to. As the name suggests, this stain dries incredibly quickly, allowing you to complete your project in a fraction of the time compared to traditional oil-based stains. It offers excellent color penetration and even coverage, resulting in a consistent and attractive finish.
The fast-drying formula does require a bit of extra care during application. You’ll need to work quickly to avoid lap marks or unevenness. However, the speed and convenience of this stain are hard to beat. It’s a great option for busy DIYers who want to transform their dining table without spending days on the project. Don’t forget to apply a topcoat to protect your newly stained table from spills and scratches.
Why Staining Your Dining Table is More Important Than You Think
Imagine your dining table. It’s the heart of your home, where families gather for meals, friends share laughter, and memories are made. But over time, that beautiful surface can become marred by scratches, water rings, and the general wear and tear of daily life. Investing in the best wood stains for dining tables isn’t just about aesthetics; it’s about preserving the life of a cherished piece of furniture. Think of it as giving your table a protective shield against the inevitable bumps and spills of family dinners.
The right wood stain does more than just add color. It penetrates the wood, providing a durable barrier against moisture, which is crucial for preventing warping and cracking. This is especially important if you have a solid wood table, as it’s a natural material that reacts to humidity. By applying a high-quality stain, you’re essentially locking in the wood’s integrity and ensuring it remains strong and stable for years to come. No more worrying about spilled drinks or accidental splashes ruining your table’s finish.
Beyond preservation, wood stain offers an opportunity to personalize your dining space. Whether you prefer a rich, dark mahogany to create a sophisticated atmosphere, a light, airy oak for a more casual feel, or a vibrant pop of color to brighten up the room, the best wood stains for dining tables allow you to tailor your table to your unique style. It’s a simple and cost-effective way to completely transform the look of your dining area and reflect your personal taste.
Ultimately, buying wood stain for your dining table is an investment in its longevity, protection, and aesthetic appeal. It’s about preserving those cherished memories made around the table and creating a beautiful space where future ones can flourish. So, consider giving your dining table the care it deserves with a quality wood stain. You’ll be amazed at the difference it makes.
Understanding Different Types of Wood Stains
Ever wondered why some dining tables have that deep, rich color while others look more transparent and natural? It often boils down to the type of wood stain used. There’s a whole world beyond just “stain,” including oil-based, water-based, gel stains, and even stain-and-polyurethane combinations. Each type offers a distinct look and requires a slightly different application technique.
Oil-based stains are known for their rich color penetration and durable finish. Think of that antique mahogany table your grandmother owned – chances are, it was treated with an oil-based stain. These stains are great for highlighting wood grain but require proper ventilation due to their strong fumes. Plus, cleanup requires mineral spirits, so it’s a bit more involved.
Water-based stains are a fantastic eco-friendly alternative. They’re low in VOCs (volatile organic compounds), meaning less harmful fumes. Imagine staining your kitchen table inside without having to open every window in the house! Water-based stains also tend to dry faster, which can be a blessing or a curse depending on your project speed. The color tends to be less vibrant than oil-based, but they are super easy to clean up with just soap and water.
Gel stains are thicker than liquid stains and are perfect for vertical surfaces or woods that don’t readily absorb stain, like pine or plywood. Consider that IKEA dining table makeover you’ve been planning. Gel stains won’t run or drip, making them ideal for those tricky projects. They also work well on non-wood surfaces, opening up possibilities for mixing and matching your dining area style.
Preparing Your Dining Table for Staining: A Crucial Step
Imagine spending hours meticulously staining your dining table, only to find blotchy spots or uneven color. Proper preparation is the key to avoiding this woodworking nightmare. Before you even crack open that can of stain, you need to get your table surface ready. This involves cleaning, sanding, and potentially using a wood conditioner.
Cleaning is the first step, regardless of whether you’re refinishing an old table or staining a new one. Remove any dirt, grease, or old finishes. Think of it like prepping a canvas before painting; you need a clean surface for the stain to adhere properly. A simple wipe down with a damp cloth and a mild detergent usually does the trick.
Sanding is essential for creating a smooth, even surface that will readily accept the stain. Start with a coarser grit sandpaper to remove imperfections and old finishes, then gradually move to finer grits for a smoother finish. Think about how sanding smooths out a rough surface, allowing the stain to penetrate evenly. Always sand in the direction of the wood grain to avoid scratches.
Wood conditioners help prevent blotchy staining, especially on softer woods like pine. Imagine trying to dye a tie-dye shirt evenly – it’s nearly impossible! Wood conditioners create a more uniform surface, ensuring the stain is absorbed evenly. Apply the conditioner as directed, let it sit for the recommended time, and then wipe off any excess before staining.
Applying Wood Stain Like a Pro: Techniques and Tips
So, you’ve chosen your stain, prepped your table, and are ready to apply! But hold on a second – the application technique can significantly impact the final result. Whether you use a brush, rag, or spray, there are a few tricks of the trade to achieve a professional-looking finish. Think of it like frosting a cake; the technique makes all the difference.
Using a brush is a classic method for applying wood stain. Choose a high-quality brush with natural bristles for oil-based stains and synthetic bristles for water-based stains. Imagine stroking the brush along the wood grain, applying the stain in even, consistent strokes. Overlap your strokes slightly to avoid streaks and always brush in the direction of the wood grain.
Wiping on the stain with a rag is a great way to control the color intensity. Pour a small amount of stain onto a lint-free rag and rub it into the wood, working in small sections. Think of it like gently massaging the stain into the wood, allowing it to penetrate the pores. Wipe off any excess stain after a few minutes to prevent a sticky or uneven finish.
Spraying stain can be a fast and efficient way to cover large surfaces, but it requires some practice and proper equipment. Imagine achieving a flawless, even coat of stain without brushstrokes or rag marks. Make sure to use a sprayer specifically designed for stains and follow the manufacturer’s instructions carefully. Apply thin, even coats and allow each coat to dry completely before applying the next.
Always test your stain and application technique on a scrap piece of wood before tackling your dining table. This allows you to see how the stain will look on the specific wood you’re working with and to adjust your technique as needed. Think of it like a dress rehearsal before the big show. A little practice can save you from making costly mistakes on your prized dining table.
Sealing and Protecting Your Stained Dining Table
You’ve successfully stained your dining table, and it looks fantastic! But the job isn’t quite finished. To protect your beautiful new finish from scratches, spills, and everyday wear and tear, you need to apply a sealant. Think of it as armor for your table, keeping it looking great for years to come.
Polyurethane is a popular choice for sealing dining tables due to its durability and resistance to water and chemicals. Imagine a spilled glass of wine; polyurethane protects your stained wood from unsightly stains. It’s available in oil-based and water-based formulas, each with its own pros and cons. Oil-based polyurethane provides a durable finish but can yellow over time, while water-based is clearer and dries faster.
Varnish is another option that provides a hard, protective finish. Varnish is often favored for its clarity and ability to enhance the natural beauty of the wood. Think of it as a magnifying glass for the wood grain, making it more pronounced and vibrant. Varnish is less resistant to chemicals than polyurethane but offers excellent scratch resistance.
Wax is a more traditional sealant that provides a soft, matte finish. Imagine the warm, inviting glow of a well-waxed table. Wax is easy to apply and maintain but offers less protection against water and chemicals than polyurethane or varnish. It’s a great choice for tables that see light use and are primarily for decorative purposes.
Regardless of the sealant you choose, apply it in thin, even coats, allowing each coat to dry completely before applying the next. Sand lightly between coats with fine-grit sandpaper to create a smooth surface for the next coat to adhere to. Think of it like building layers of protection, each contributing to the overall durability and beauty of your finished dining table.
Best Wood Stains For Dining Tables: A Buying Guide
Hey there! Planning to give your dining table a fresh, new look? Maybe you’re refinishing an old family heirloom, or perhaps you just want to personalize a recent purchase. Whatever your reason, choosing the right wood stain is crucial. With so many options available, finding the best wood stains for dining tables can feel overwhelming. But don’t worry, I’m here to help you navigate the world of wood stains and make sure you pick the perfect one for your project. Let’s dive into the key things you should consider before making your purchase.
Wood Type: Knowing Your Table’s DNA
First things first, what kind of wood is your dining table made of? Different woods react differently to stains. A dense hardwood like maple won’t absorb stain as readily as a softwood like pine. If you’re not sure, try to find the original product information or consult with a woodworking expert. Knowing your wood is the foundation for a successful staining project.
Imagine applying a beautiful dark walnut stain to a maple table, only to find it barely changes color. Frustrating, right? Or picture a pine table soaking up too much stain, resulting in a blotchy, uneven finish. To avoid these nightmares, research the specific type of wood you’re working with and how it typically responds to different stains. Some woods may require a pre-stain wood conditioner to ensure even stain absorption.
Stain Type: Oil-Based, Water-Based, Gel Stain…Oh My!
There are several types of wood stains to choose from, each with its own pros and cons. Oil-based stains are known for their rich color and durability, but they require mineral spirits for cleanup and have a stronger odor. Water-based stains are eco-friendlier, easier to clean up (just use water!), and dry faster, but they might not offer the same depth of color as oil-based stains. Gel stains are thicker and ideal for vertical surfaces or woods that tend to blotch.
Think about your priorities. Are you looking for maximum durability, even if it means dealing with fumes and mineral spirits? Or is quick drying time and easy cleanup more important to you? Maybe your table has intricate details, making a gel stain the perfect choice for controlled application. Choosing the right type of stain is vital for achieving your desired look and ensuring a smooth staining process. The best wood stains for dining tables will often come down to personal preference within these types.
Color & Tone: Matching Your Vision
This is where the fun begins! What color are you envisioning for your dining table? Do you want a warm, inviting honey oak, a classic cherry, a modern gray, or a bold ebony? Consider your existing décor and the overall style of your dining room. Think about the undertones of the stain – warm, cool, or neutral – and how they’ll complement your other furniture and accessories.
Don’t be afraid to experiment! Before committing to a stain color, always test it on a scrap piece of wood that’s the same type as your table. Remember that the color will look different depending on the wood and the number of coats you apply. Lighting also plays a huge role; a stain that looks great in the store might appear different in your dining room. Samples and patience are key to achieving the perfect color. Searching for images of dining tables stained with different colors can also provide inspiration.
Durability & Protection: Standing the Test of Time (and Spills!)
Your dining table is going to endure a lot – spilled drinks, hot plates, sticky fingers, and everything in between! The stain you choose needs to be durable enough to withstand everyday wear and tear. Consider a stain with built-in sealant or be prepared to apply a separate topcoat to protect the stained surface.
Look for stains that are resistant to scratches, water damage, and fading. A good topcoat will add an extra layer of protection and enhance the stain’s durability. Polyurethane is a popular choice for dining tables because it’s tough and provides a water-resistant finish. Remember, investing in a durable stain and topcoat will save you time and effort in the long run by protecting your table from damage and extending its lifespan. Finding the best wood stains for dining tables means prioritizing those that can withstand daily use.
Application Method: Brush, Rag, or Spray?
How you apply the stain can significantly impact the final result. Brushes are great for detailed work and applying even coats, but they can leave brush marks if you’re not careful. Rags are ideal for wiping stains on and off, allowing you to control the color intensity and create a more rustic look. Sprayers offer a fast and efficient way to apply stain, but they require proper ventilation and masking to prevent overspray.
Consider your experience level and the complexity of your table’s design. If you’re a beginner, a rag application might be the easiest and most forgiving method. If you have a lot of intricate details, a brush might be your best bet. If you’re comfortable with spraying and have the necessary equipment, it can save you a lot of time and effort. Research different application techniques and choose the one that best suits your skills and your project.
VOC Content & Safety: Breathing Easy
Volatile Organic Compounds (VOCs) are chemicals that evaporate from stains and can contribute to air pollution and health problems. Consider choosing low-VOC or zero-VOC stains, especially if you’re working in a poorly ventilated area or have sensitivities to chemicals.
Always wear appropriate safety gear, such as gloves and a respirator, when working with wood stains. Read the product label carefully and follow the manufacturer’s instructions for application, ventilation, and disposal. Prioritizing your health and safety is crucial when working with any type of wood finishing product. The best wood stains for dining tables are effective and relatively safe to use.
Cost & Value: Finding the Sweet Spot
Wood stains vary widely in price, depending on the brand, type, and quantity. While it’s tempting to go for the cheapest option, remember that you often get what you pay for. A higher-quality stain might cost more upfront, but it can provide better coverage, durability, and color payoff, ultimately saving you money in the long run.
Consider the size of your dining table and how much stain you’ll need to complete the project. Compare prices per ounce or quart to determine the best value. Read reviews and ask for recommendations to find a stain that offers a good balance of quality and affordability. Don’t be afraid to invest a little more in a stain that will provide a beautiful and long-lasting finish for your dining table.
FAQs
What kind of wood stain is best for a dining table that gets a lot of use?
That’s a great question! For a high-use dining table, you’ll want to focus on durability above all else. Oil-based stains tend to penetrate the wood deeply, offering excellent protection against scratches, spills, and general wear and tear. They also have a naturally rich, warm appearance that can beautifully highlight the wood’s grain.
However, oil-based stains can take longer to dry and require mineral spirits for cleanup. If you’re looking for something faster-drying and easier to clean up, consider a water-based polyurethane stain. These are also very durable and come in a wide range of colors, but you’ll want to make sure you apply a good sealant or topcoat to provide extra protection against water rings and other damage.
How do I prepare my dining table for staining?
Prepping your dining table correctly is honestly the most important step for achieving a flawless finish! Start by thoroughly cleaning the surface to remove any dirt, grease, or old finishes. You can use a mild soap and water solution for this, but be sure to let the table dry completely afterwards.
Next, you’ll want to sand the table down. The level of sanding will depend on the existing finish – a light scuff-sanding is usually sufficient if you’re just refreshing an old stain, while you’ll need to sand down to bare wood if you’re removing an existing finish. Make sure to use progressively finer grits of sandpaper and always sand in the direction of the wood grain. Wipe away all sanding dust before applying your stain!
What if I want a really dark stain, but my table is made of light-colored wood?
You’re in luck! Achieving a dark stain on light-colored wood is definitely possible, but it might require a little extra effort. The key is to use a stain conditioner or wood pre-stain before applying the actual stain. This helps to even out the wood’s porosity, preventing the stain from being absorbed unevenly and resulting in blotchiness.
Another trick is to apply multiple thin coats of stain instead of one thick coat. This allows you to build up the color gradually and achieve the desired darkness without obscuring the wood grain completely. Just remember to let each coat dry thoroughly before applying the next.
Can I use a stain with a built-in sealant or topcoat?
Absolutely! Products that combine stain and sealant can be a real time-saver, and many of them provide excellent results. These products are designed to both color and protect your wood in a single step, which can be really convenient, especially for smaller projects.
However, keep in mind that the level of protection offered by these all-in-one products might not be as robust as applying a separate sealant or topcoat. If your dining table is going to be heavily used or exposed to a lot of moisture, you might still want to consider adding an extra layer of protection with a clear topcoat after the stain/sealant has fully dried.
How do I test the stain color before applying it to the entire table?
Testing the stain color is so important! You definitely don’t want to commit to a color only to realize it looks totally different than you expected. Find an inconspicuous spot on the table, like the underside of the leaf or a small area under the table’s edge.
Apply the stain to this test area and let it dry completely according to the manufacturer’s instructions. This will give you a true representation of the final color and allow you to adjust your application technique if needed. If you’re not happy with the color, you can try a different stain or experiment with layering different stains to achieve the perfect shade.
What’s the best way to apply stain for a smooth, even finish?
A smooth, even finish is all about technique and patience! Whether you’re using a brush, rag, or foam applicator, make sure to apply the stain in thin, even coats, following the direction of the wood grain. Avoid applying too much stain at once, as this can lead to drips and uneven coverage.
After applying the stain, let it sit for the amount of time specified in the manufacturer’s instructions. Then, use a clean rag to wipe off any excess stain. This helps to prevent the finish from becoming sticky or glossy. Don’t be afraid to experiment with different application methods to find what works best for you and the type of stain you’re using!
How do I clean up after staining my dining table?
Cleaning up after staining can be a breeze, depending on the type of stain you used! For oil-based stains, you’ll need to use mineral spirits or paint thinner to clean your brushes, rags, and any spills. Always work in a well-ventilated area and dispose of used rags properly to prevent fire hazards.
For water-based stains, cleanup is much easier. Simply wash your brushes and rags with soap and water. Be sure to thoroughly rinse everything to remove any lingering stain residue. Once everything is clean and dry, you’ll be able to relax and enjoy your beautifully stained dining table!
Verdict
So, there you have it! Armed with our reviews and buying guide, you’re well on your way to selecting the best wood stains for dining tables and transforming your dining space. Remember, choosing the right stain isn’t just about color; it’s about protecting your table and enhancing its natural beauty for years to come. Consider your existing décor, the wood’s grain, and the overall vibe you’re aiming for. Don’t be afraid to experiment with samples and trust your gut!
Now it’s your turn to create a dining table that’s not only functional but also a reflection of your personal style. Go forth, explore the hues, unleash your inner artisan, and create a dining table that becomes the heart of your home! The perfect stain is out there waiting for you – get staining!